Infiniti G37 Coupe. Manual - part 736
GW-12
< ON-VEHICLE REPAIR >
SIDE WINDOW GLASS
SIDE WINDOW GLASS
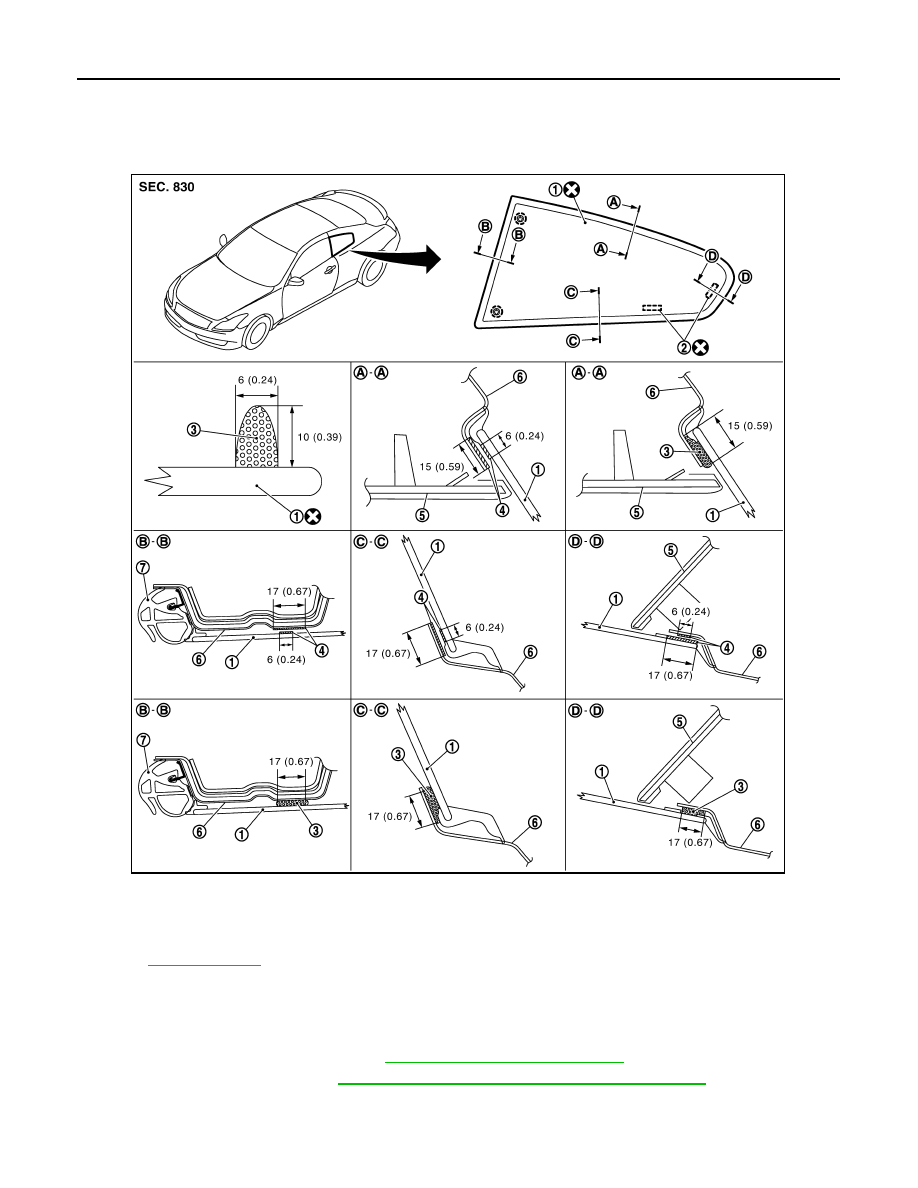
Exploded View
INFOID:0000000001741445
Removal and Installation
INFOID:0000000001741446
REMOVAL
1.
Remove the rear pillar finisher. Refer to
INT-14, "Removal and Installation"
.
2.
Remove the headlining. Refer to
INT-21, "NORMAL ROOF : Removal and Installation"
.
3.
Apply protective tape around the side window to protect the painted surface from damage.
4.
Remove the side window glass using piano wire or power cutting tool and an inflatable pump bag.
1.
Side window glass
2.
Spacer
3.
Adhesive
4.
Primer
5.
Rear pillar finisher
6.
Rear fender
7.
Weatherstrip body side
Refer to
for symbols in the figure.
JMKIA1196GB