Honda Element. Manual - part 261


  Index      Honda     Honda Element - service repair manual 2007-2008 year


Search            


Content   ..  259  260  261  262   ..


Honda Element. Manual - part 261


Courtesy of AMERICAN HONDA MOTOR CO., INC.

4. Disconnect the transmission range switch connector. 

Fig. 342: Identifying Transmission Range Switch Connector 
Courtesy of AMERICAN HONDA MOTOR CO., INC. 

5. Remove the transmission range switch.  

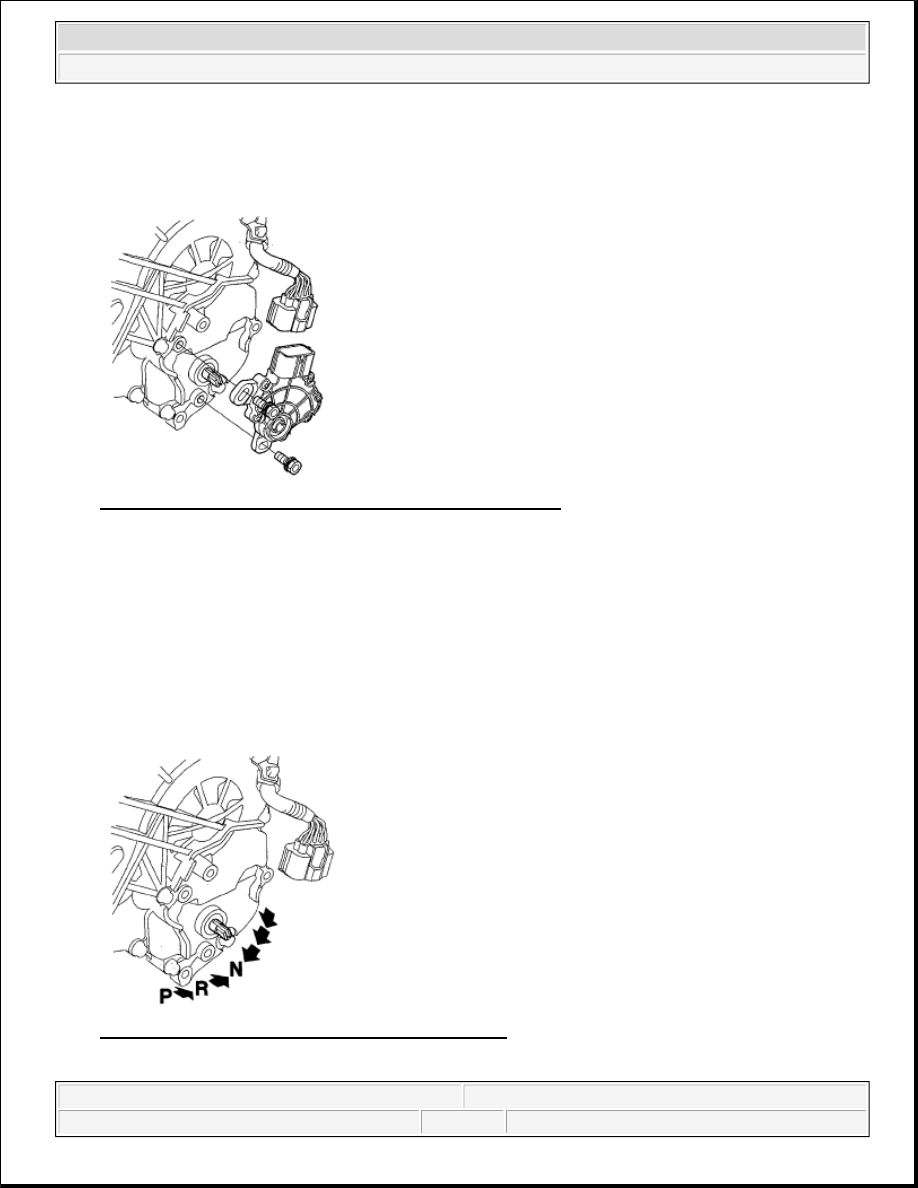
6. Make sure the selector control shaft is in the N position. If necessary, move the shift lever from the P 

position to the N position. 

Fig. 343: Identifying Selector Control Shaft Positions 
Courtesy of AMERICAN HONDA MOTOR CO., INC.

NOTE:

Do not use the selector control shaft to adjust the shift position. If the 
selector control shaft tips are squeezed together it will cause a faulty 
signal or position due to play between the selector control shaft and the 
switch.


2007 Honda Element EX 

2007-2008 TRANSMISSION Automatic Transmission - Element


7. Align the cutouts (A) on the rotary-frame with the neutral positioning cutouts (B) on the transmission 

range switch (C), then put a 2.0 mm (0.08 in.) feeler gauge blade (D) in the cutouts to hold the switch in 
the N position. 

Fig. 344: Aligning Cutouts On Rotary-Frame With Neutral Positioning Cutouts On Transmission 
Range Switch
 
Courtesy of AMERICAN HONDA MOTOR CO., INC. 

8. Install the transmission range switch (A) gently on the selector control shaft (B) with holding it in the N 

position with the 2.0 mm (0.08 in.) blade (C). 

Fig. 345: Holding Transmission Range Switch With Blade 
Courtesy of AMERICAN HONDA MOTOR CO., INC. 

9. Tighten the bolts on the transmission range switch while you continue to hold the N position. Do not 

move the transmission range switch when tightening the bolts. Remove the feeler gauge. 

NOTE:

Be sure to use a 2.0 mm (0.08 in.) blade or equivalent to hold the switch in 
the N position.


2007 Honda Element EX 

2007-2008 TRANSMISSION Automatic Transmission - Element


Fig. 346: Tightening Transmission Range Switch Bolts With Torque Specification 
Courtesy of AMERICAN HONDA MOTOR CO., INC. 

10. Connect the connector securely, then install the transmission range switch cover (A). 

Fig. 347: Identifying Transmission Range Switch Cover With Bolts With Torque Specification 
Courtesy of AMERICAN HONDA MOTOR CO., INC. 

11. Turn the ignition switch ON (II). Move the shift lever through all positions, and check the transmission 

range switch synchronization with the A/T gear position indicator.  

12. Check that the engine will start in the P and N positions, and will not start in any other shift lever 

position.  

13. Check that the back-up lights come on when the shift lever is in the R position.  

14. Allow the all four wheels (4WD) or the front wheels (2WD) to rotate freely, then start the engine, and 

check the shift lever operation.  

D3 SWITCH TEST/REPLACEMENT


2007 Honda Element EX 

2007-2008 TRANSMISSION Automatic Transmission - Element


1. Remove the center lower cover (see CENTER LOWER COVER REMOVAL/INSTALLATION ).  

2. Remove the shift lever console trim (see CENTER LOWER COVER 

REMOVAL/INSTALLATION ).  

3. Shift the shift lever into the R position.  

4. Remove the shift cable insulator (A) from the shift cable (B). 

Fig. 348: Identifying Shift Cable Insulator And Shift Cable 
Courtesy of AMERICAN HONDA MOTOR CO., INC. 

5. Slide the lock tab (A) down on the shift cable end holder (B). 

Fig. 349: Sliding Lock Tab 
Courtesy of AMERICAN HONDA MOTOR CO., INC. 

6. Grasp the shift cable lock (C) in the middle with angle-jaw needle-nose pliers (D), and remove it from the 

shift cable end and shift cable end holder. Do not pry the shift cable lock with a screwdriver, it may 
damage the shift cable end holder.  


2007 Honda Element EX 

2007-2008 TRANSMISSION Automatic Transmission - Element


Content   ..  259  260  261  262   ..