Great Wall Hover. Manual - part 72
Brake-9
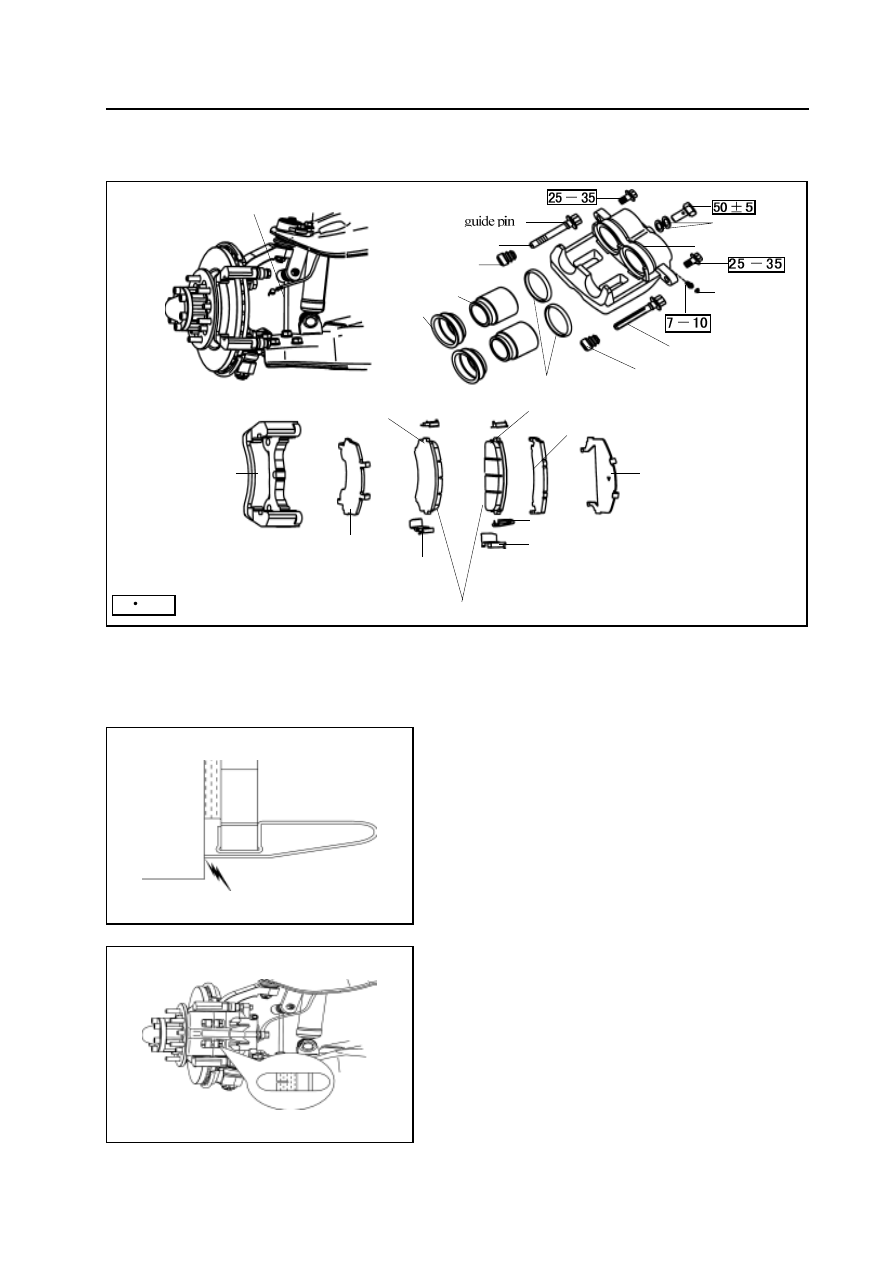
Front brake
front brake oil pipe
cliper bracket
outer silencing plate combination
lower circlip of
brake block
brake block assembly
lower circlip of brake block
wear limitation alarm plate of brake block
lnner silencing plate combination
Inner brake block
silencing plate
upper circlip of brake block (I)
upper circlip of brake block (II)
piston
dustproof cover
guide pin dustproof cover
guide pin rubber cover
cooper washer
tong
air-bleed
bolt cover
location pin
guide pin dustproof cover
square seal ring
N
m: Specified torque
Piston
Replacement of brake block
Remarks:
When brake during the travel process, if the front wheel has the
continuous screams noise, then it should check the wear limitation
alarm plate of brake block. If the alarm plate has the abrasion
mark with brake disc, then it should replace the brake block .
1. Remove the front wheel
2. Check the thickness of abrasion material of brake block.
Check the thickness of abrasion material of brake block by the watch
hole on the tong.
Replace it if is not within specified range.
Min. thickness : 2.0mm