Great Wall Hover. Manual - part 7


  Index      Great Wall     Great Wall Hover - service repair manual


Search            copyright infringement  


Content   ..  5  6  7  8   ..


Great Wall Hover. Manual - part 7


Clutch-5

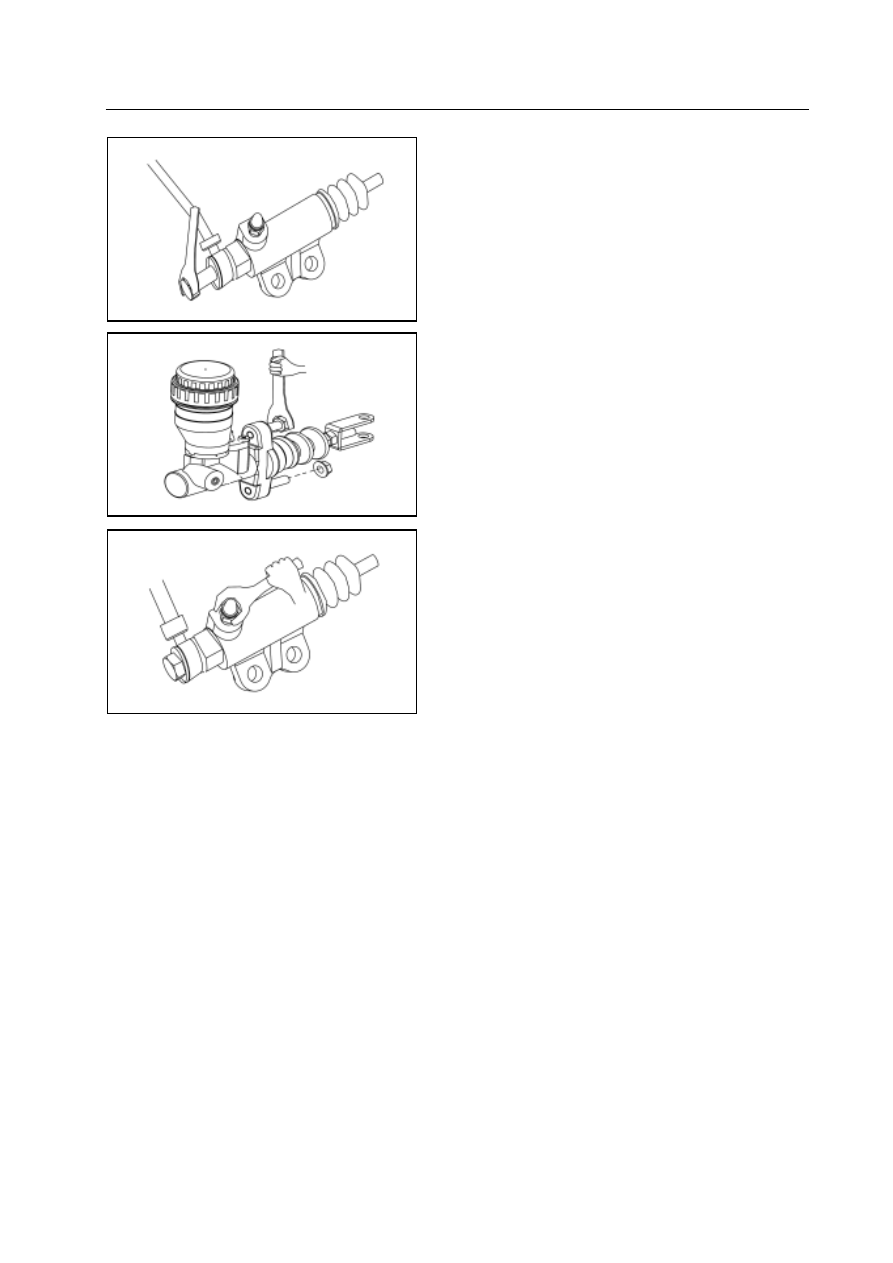
Removal of clutch master cylinder, clutch cylinder

1. Use the No. 16 open-end wrench to remove the hose connecting

bleed bolt, use the cloth to cover the oil outlet of auxiliary pump

to avoid the splash of 0brake fluid; step on the clutch pedal for

several times to drain the clutch.

Cautions for installation of clutch operation device:

1. Installation of clutch hard pipe :   Check the hard pipe for

deformation, check to see whether the curling at the port of

connection pipe is complete and without damage, if there is no

problem after confirmation, it can be installed and fixed in the

front wall clip and hard-tube clip.

2. Coat each rotary parts of peal with the lithium base grease.

3. Check the surface of clutch hoes, no surface cracking, oil leakage

and dog leg is allowed, use the split washer and spring clip to fix

the clutch hose on the support frame of car body.

4. Connect the joints of the general pump oil pipe and the general

2.  Remove the split pin and cylinder pin connected the master

pump connecting fork to the pedal; use the No. 13 socket spanner

to remove two nuts Q32008 which is used to install the master

pump. Check the clutch master cylinder, replace the complete

master pump if the internal of master pump has the abnormal

noise and damage of leakage etc.

pump and sub pump according to the required tightening torque.

5. The air in the clutch oil path needs to be exhausted after filling

oil (except the vacuum filling): step on the clutch pedal after

filling the oil tank, when feeling difficult in stepping, use the

open-end wrench with specification of 11 to loosen the air bleed

plug screw to exhaust the air, then tighten the plug screw,

repeat the operation for several times. Tighten the air bleed

plug screw of the sub  pump when there is no foam in the

flowing oil liquid. Supplement the oil of the oil tank to the

level between the Max and the Min.

Clutch-6

Clutch

4. Disassembly procedure:

a. Clutch cover assembly, clutch disc assembly

b. Profile spring, throwout bearing assembly

c. Dustproof cover, separation rocker arm assembly

d. Separation rocker arm ball support

Warning:   When maintaining the clutch assembly, it is now

allowed to use the sand mill or dry brush and compressed air for

cleaning, lest there is powder (use wet cloth). The clutch disc

has the “asbestos fiber”, if there is powder scrap during

maintaining, the asbestos fiber in the powder scrap will floats in

the air, when human inhales the air containing the asbestos

fiber, it will cause great damage to human health.

Removal of clutch assembly

1.Remove the transmission

Remarks: Do not dry the transmission oil.

2.Remove the clutch cover and clutch disc

a. Make the alignment mark on the clutch cover and flywheel

b. Remove the fixed bolt gradually, until release the tension of spring

c. Remove the fixed bolt, pull out the clutch cover and clutch disc.

3. Remove the bearing and separation fork form the transmission

a. Remove the clip and pull out the bearing .

b. Remove the separation rocker arm assembly and leather cup.

clutch disc assembly

clutch cover assembly

bolt, spring and

washer assembly

release bearing

assembly 

    profile spring

separation rocker arm assembly 

separation rocker arm ball support

leather cup 

m:   specified torque

Clutch-7

Checking the clutch components

1. Whether there is breakage of the clutch disc

The maximum of the rivet head:   0.3mm

If there is problem, the clutch disc needs to be replaced.

3. Measure the radial run-out tolerance of the flywheel

Use the dial gauge to measure the radial run-out tolerance of the

flywheel.

Maximum radial run-out tolerance:   0.2mm

If the radial run-out tolerance exceeds the maximum value, the flywheel

needs to be replaced.

4.Check the guide bearing

Rotate the bearing with hand along the direction of the axis.

If the bearing cannot be rotated or there is great resistance, the guide

bearing needs to be replaced.

The bearing is lubricated eternally, so there is no need for

cleaning and lubrication.

2. Check the radial run-out tolerance of the clutch disc

Use dial gauge to check the radial run-out tolerance of the clutch disc.

The maximum radial run-out tolerance:   0.8mm

If the radial run-out tolerance exceeds the maximum value,  the clutch

disc needs to be replaced.

5. If necessary, replace the guide bearing.

Use the special tools to remove the guide bearing.

special tools

Clutch-8

b. Use special tools to install the guide bearing

Remarks:   Install the guide bearing into the flywheel, make

     sure that the bearing can rotate well.

6. Check to see whether there is wearing of the diaphragm spring

Use caliper to check the wearing depth and width of the diaphragm

spring

Limit value:   maximum depth  0.6mm

Maximum width  5.0mm

7. Check the throwout bearing

Rotate the bearing with hand along the axis direction.

If the bearing can not rotate or the resistance is too large, it is necessary

to replace the throwout bearing.

Remarks:   The bearing is permanent lubricated, so cleaning

and lubricating is unnecessary.

special tools


Content   ..  5  6  7  8   ..