Freightliner Business Class M2. Manual - part 29
47–00 Safety Precautions
Safety Precautions in this section apply to all
procedures within this group.
DANGER
When working on the vehicle, shut down the en-
gine, set the parking brake, and chock the tires.
Before working under the vehicle, always place
jack stands under the frame rails to ensure the
vehicle can not drop. Failure to follow these steps
could result in serious personal injury or death.
47–01 Fuel Tank Band Nut
Tightening
IMPORTANT: Do not overtighten the nuts.
Rectangular Fuel Tank
Hold the retention nut on the fuel tank band with a
wrench while backing off the jam nut. Then tighten
the retention nut 13 to 17 lbf·ft (18 to 23 N·m). After
the retention nut has been tightened, hold the reten-
tion nut with a wrench while tightening the jam nut 13
to 17 lbf·ft (18 to 23 N·m).
Cylindrical Fuel Tank
Hold the retention nut on the fuel tank band with a
wrench while backing off the jam nut. Then tighten
the retention nut 30 to 35 lbf·ft (41 to 46 N·m). After
the retention nut has been tightened, hold the reten-
tion nut with a wrench while tightening the jam nut 30
to 35 lbf·ft (41 to 46 N·m).
47–02 Fuel/Water Separator
Element Replacing
Alliance
The only maintenance necessary on an Alliance
fuel/water separator is to replace the filter element.
WARNING
Diesel fuel is flammable and can ignite if exposed
to an open flame, intense heat, or other ignition
source. Do not drain fuel near, or expose fuel
vapor to open flame or intense heat. Exposure to
open flame or intense heat could start a fire, pos-
sibly resulting in personal injury or property dam-
age. When working on a fuel system, have a fire
extinguisher within easy reach.
1.
Drain off some fuel by loosening the vent plug
and opening the drain valve. See
2.
Disconnect the water sensor and heater connec-
tions if equipped.
3.
Remove the element and bowl together, by turn-
ing counterclockwise.
4.
Remove the bowl from the element and clean
the O-ring gland.
5.
Apply a coating of clean fuel or motor oil to the
new O-ring and element seal.
5
4
3
1
2
06/25/97
f470147
6
7
11
10
9
8
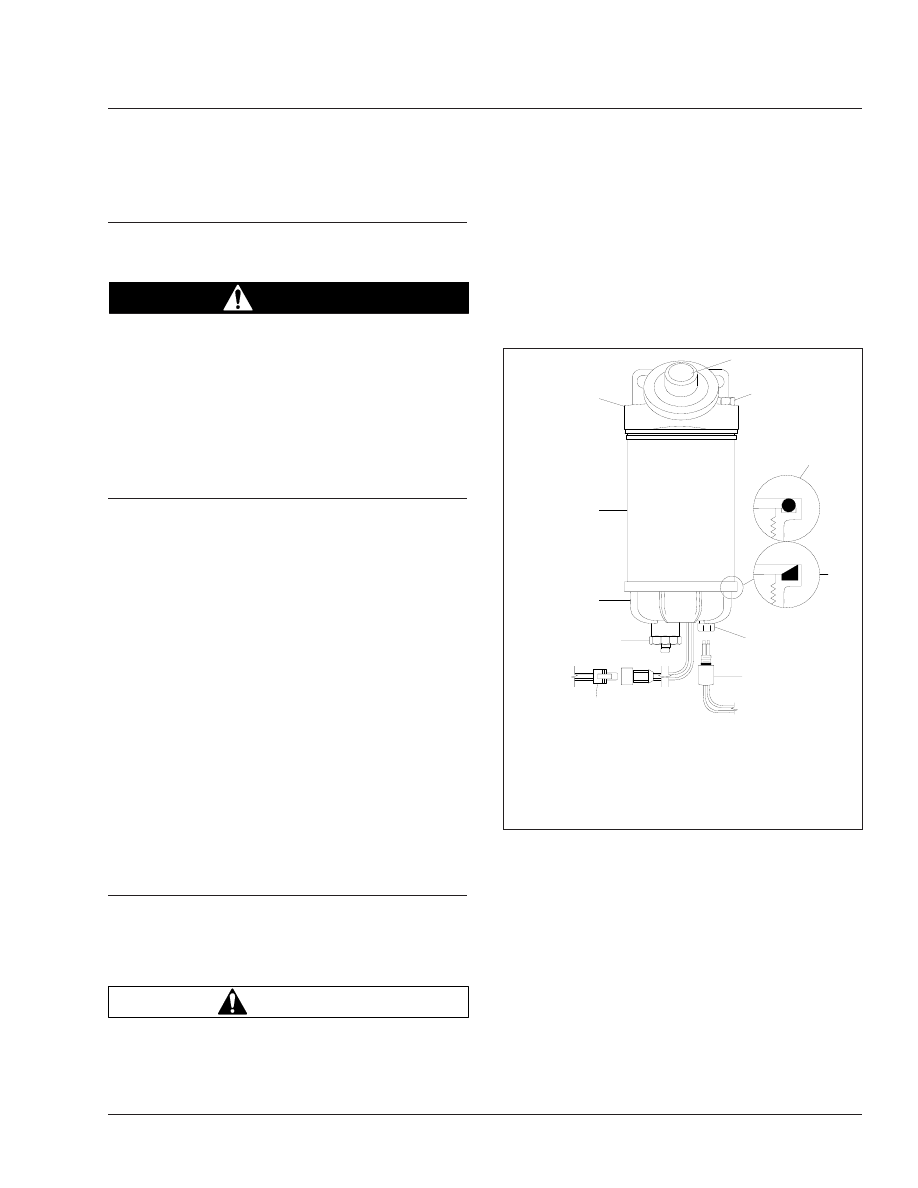
1.
Mounting Head
2.
Fuel Primer Pump
3.
Vent Plug
4.
Bowl O-Ring
5.
Bowl Gasket
6.
Bowl Probe Plug
7.
Water Sensor Probe
8.
Heater Connector
9.
Drain Plug
10. Sight Bowl
11. Filter Element
Fig. 1, Alliance Fuel/Water Separator
Fuel
47
Business Class M2 Maintenance Manual, August 2015
47/1