Dodge Durango (HB). Manual - part 851


  Index      Dodge     Dodge Durango (HB) - service repair manual 2005 year


Search            


Content   ..  849  850  851  852   ..


Dodge Durango (HB). Manual - part 851


P0330-KNOCK SENSOR 2 CIRCUIT (CONTINUED)

4.

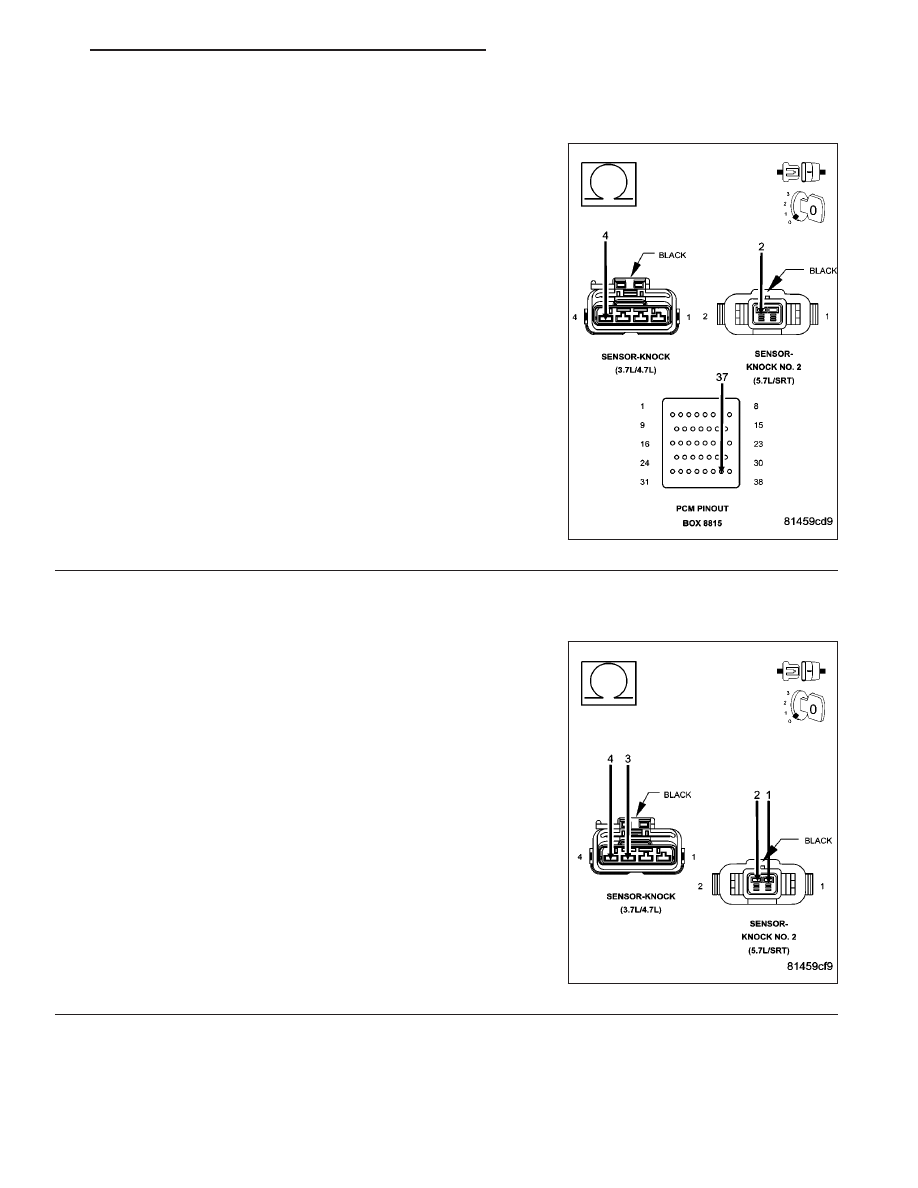
(K924) KNOCK SENSOR NO.2 RETURN CIRCUIT OPEN

Measure the resistance of the (K924) Knock Sensor No.2 Return cir-
cuit from the Knock Sensor harness connector to the appropriate ter-
minal of special tool #8815.

Is the resistance below 5.0 ohms?

Yes

>> Go To 5

No

>> Repair the open in the (K924) Knock Sensor No.2 Return

circuit.

Perform the POWERTRAIN VERIFICATION TEST. (Refer
to 9 - ENGINE - STANDARD PROCEDURE)

5.

(K242) KNOCK SENSOR NO.2 SIGNAL SHORTED TO THE (K924) KNOCK SENSOR NO.2 RETURN
CIRCUIT

Measure the resistance between the (K242) Knock Sensor No.2 Signal
circuit and the (K924) Knock Sensor No.2 Return circuit in the Knock
Sensor harness connector.

Is the resistance below 100 ohms?

Yes

>> Repair the short between the (K242) Knock Sensor No.2

Signal circuit and the (K924) Knock Sensor No.2 Return
circuit.

Perform the POWERTRAIN VERIFICATION TEST. (Refer
to 9 - ENGINE - STANDARD PROCEDURE)

No

>> Go To 6

HB

ENGINE ELECTRICAL DIAGNOSTICS

9 - 403

P0330-KNOCK SENSOR 2 CIRCUIT (CONTINUED)

6.

(K242) KNOCK SENSOR NO.2 SIGNAL SHORTED TO GROUND

Measure the resistance between ground and the (K242) Knock Sensor
No.2 Signal circuit in the Knock Sensor harness connector.

Is the resistance below 100 ohms?

Yes

>> Repair the short to ground in the (K242) Knock Sensor

No.2 Signal circuit.

Perform the POWERTRAIN VERIFICATION TEST. (Refer
to 9 - ENGINE - STANDARD PROCEDURE)

No

>> Go To 7

7.

KNOCK SENSOR

Replace the Knock Sensor.

Ignition on, engine not running.

With the scan tool, erase DTC.

Attempt to operate the vehicle using the information noted in the Freeze Frame.

With the scan tool, read DTCs.

Does the scan tool display the DTC that was previously erased?

Yes

>>

NOTE: Before continuing, check the PCM harness connector terminals for corrosion, damage, or terminal
push out. Repair as necessary. Replace and program the Powertrain Control Module per Service Informa-
tion.

Perform the POWERTRAIN VERIFICATION TEST. (Refer to 9 - ENGINE - STANDARD PROCEDURE)

No

>> Test Complete.

9 - 404

ENGINE ELECTRICAL DIAGNOSTICS

HB

P0335-CRANKSHAFT POSITION SENSOR CIRCUIT

HB

ENGINE ELECTRICAL DIAGNOSTICS

9 - 405

P0335-CRANKSHAFT POSITION SENSOR CIRCUIT (CONTINUED)

For the Engine circuit diagram (Refer to 9 - ENGINE - SCHEMATICS AND DIAGRAMS).

For a complete wiring diagram Refer to Section 8W.

When Monitored:
Engine cranking.

Set Condition:
No CKP signal is present during engine cranking, and at least 8 camshaft position sensor signals have
occurred. One Trip Fault. Three good trips to turn off the MIL.

Possible Causes

(F855) 5-VOLT SUPPLY CIRCUIT SHORTED TO BATTERY VOLTAGE

(F855) 5-VOLT SUPPLY CIRCUIT OPEN

(F855) 5-VOLT SUPPLY CIRCUIT SHORTED TO GROUND

(K24) CKP SIGNAL CIRCUIT OPEN

(K24) CKP SIGNAL CIRCUIT SHORTED TO BATTERY VOLTAGE

(K24) CKP SIGNAL CIRCUIT SHORTED GROUND

(K24) CKP SIGNAL CIRCUIT SHORTED TO THE (F855) 5-VOLT SUPPLY CIRCUIT

(K900) SENSOR GROUND CIRCUIT OPEN

CRANKSHAFT POSITION SENSOR

CAMSHAFT POSITION SENSOR

PCM

Always perform the Pre-Diagnostic Troubleshooting procedure before proceeding. (Refer to 9 - ENGINE -
DIAGNOSIS AND TESTING).

Diagnostic Test

1.

ACTIVE DTC

Crank the engine.

Ignition on, engine not running.

With a scan tool, read DTCs.

Is the DTC active at this time?

Yes

>> Go To 2

No

>> Go To 14

9 - 406

ENGINE ELECTRICAL DIAGNOSTICS

HB


Content   ..  849  850  851  852   ..