Content .. 1410 1411 1412 1413 ..
Dodge Durango (HB). Manual - part 1412
RISER-FRONT
REMOVAL
Manual Length Adjuster
1. Before proceeding with the following repair proce-
dure, review all warnings and cautions. (Refer to
23 - BODY/SEATS - WARNING)
2. Remove the seat. (Refer to 23 - BODY/SEATS/
SEAT - REMOVAL)
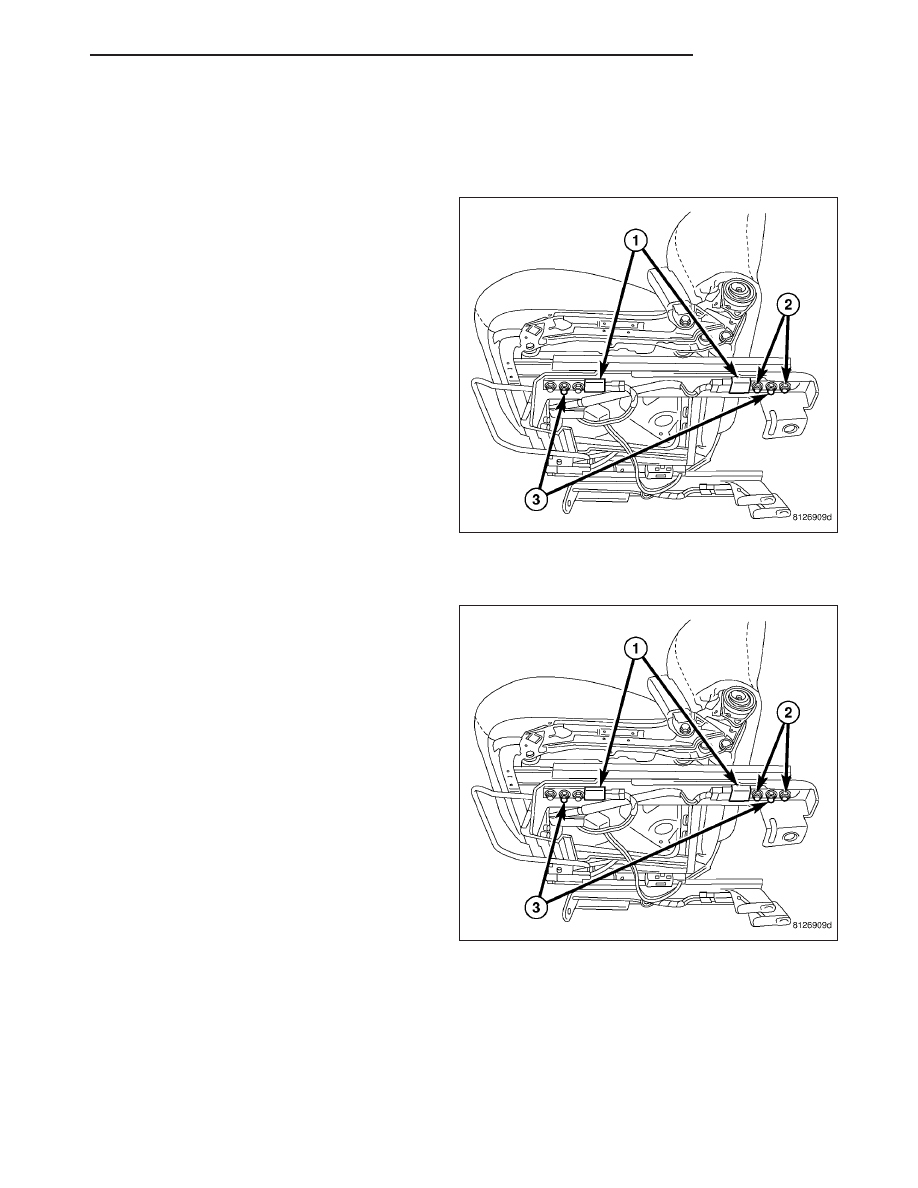
3. Move the seat to the forward position on the tracks
and remove the seat adjuster bolts/nuts (3).
4. Move the seat to the reward position on the tracks
and remove the front seat adjuster bolts/nuts (3).
NOTE: Passenger seat with strain gauges shown,
drivers side seat similar.
5.
Disconnect strain gauge electrical connectors (1),
if equipped.
6. If equipped, remove the strain gauge bolts (2) and
remove the strain gauges as necessary.
Power Length Adjuster
1. Before proceeding with the following repair proce-
dure, review all warnings and cautions. (Refer to
23 - BODY/SEATS - WARNING)
2. Unbolt the seat from the floor as necessary to gain
access to the riser bolts. (Refer to 23 - BODY/
SEATS/SEAT - REMOVAL)
3. Move the seat to the forward position on the tracks,
tip the seat backwards in vehicle and remove the
seat adjuster bolts/nuts (3).
4. Move the seat to the reward position on the tracks
and remove the front seat adjuster bolts/nuts (3).
NOTE: Manual seat length adjuster shown, power
similar.
HB
SEATS
23 - 161