Dodge Durango (HB). Manual - part 1387


  Index      Dodge     Dodge Durango (HB) - service repair manual 2005 year


Search            


Content   ..  1385  1386  1387  1388   ..


Dodge Durango (HB). Manual - part 1387


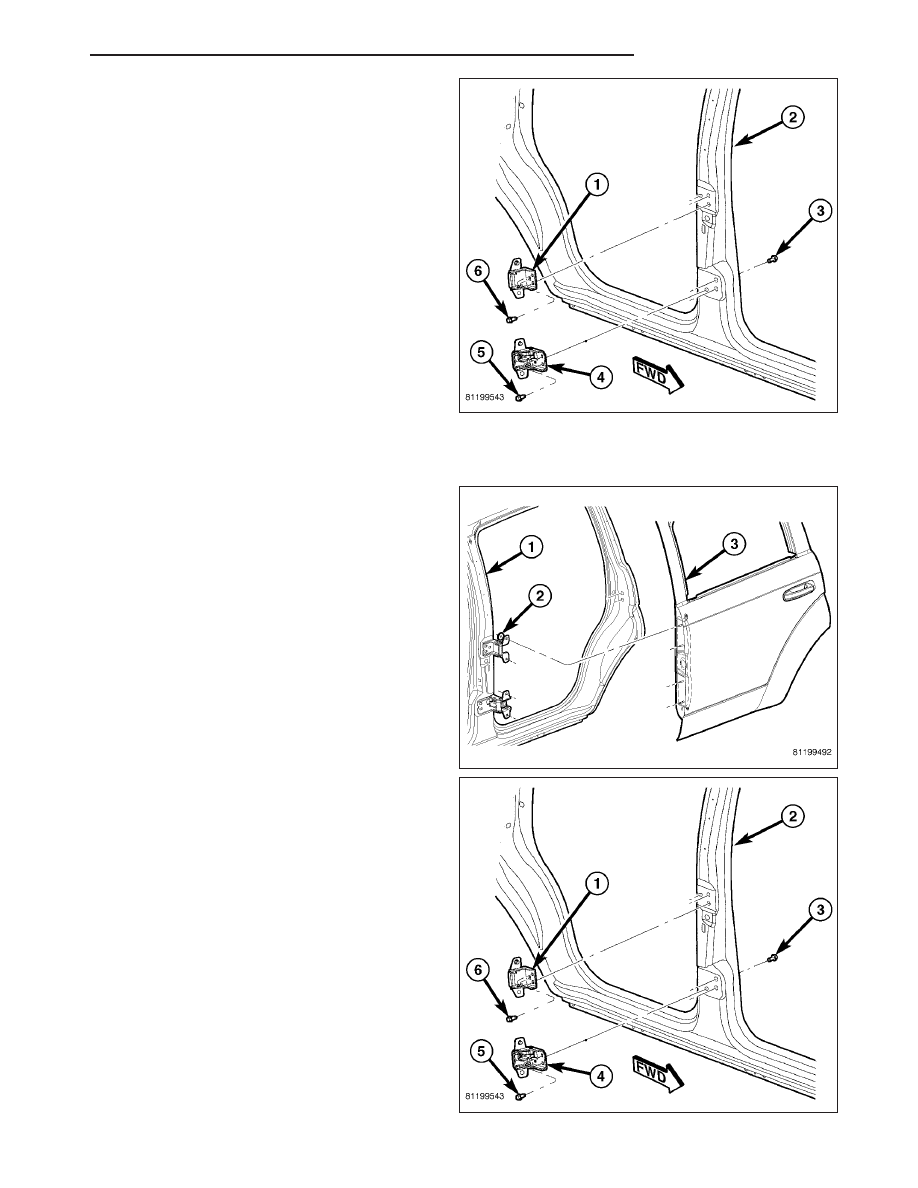
3. Remove the three bolts (6) attaching the hinge (1)

to the b-pillar (2) and remove the hinge.

LOWER HINGE

1. Using a grease pencil or equivalent, mark the posi-

tion of the hinge on the door and b-pillar.

2. Remove the lower b-pillar trim. (Refer to 23 -

BODY/INTERIOR/B-PILLAR

LOWER

TRIM

-

REMOVAL)

3. Remove the nuts (2) attaching the hinge to the

door (3).

4. Remove the two bolts (5) attaching the hinge (4) to

the b-pillar (2).

5. From the inside of the vehicle remove the remain-

ing bolt (3) attaching the hinge (4) to the b-pillar (2)
and remove the hinge.

HB

DOORS - REAR

23 - 61

INSTALLATION

UPPER HINGE

NOTE: A suitable body sealant should be used
when removing or moving the hinges.

1. Install the hinge to door washers, if there were

removed previously, and nuts (2) and tighten to 28
N·m (21 ft. lbs.).

2. Install the three hinge to b-pillar bolts (6).

3. Tighten the bolts to 28 N·m (21 ft. lbs.) using the

sequence shown.

NOTE: Right hand door shown, left hand door
opposite.

4. Adjust the door if needed. (Refer to 23 - BODY/

DOORS - REAR/DOOR - ADJUSTMENTS)

23 - 62

DOORS - REAR

HB

LOWER HINGE

NOTE: A suitable body sealant should be used
when removing or moving the hinges.

1. Install the hinge (4) and install the b-pillar bolts (5

& 3).

2. Tighten the bolts to 28 N·m (21 ft. lbs.) using the

sequence shown.

NOTE: Right hand door shown, left hand door
opposite.

3. Install the hinge to door washers, if there were

removed previously, and nuts (2) and tighten to 28
N·m (21 ft. lbs.).

4. Adjust the door if needed. (Refer to 23 - BODY/

DOORS - REAR/DOOR - ADJUSTMENTS)

5. Install the lower b-pillar trim. (Refer to 23 - BODY/

INTERIOR/B-PILLAR LOWER TRIM - INSTALLA-
TION)

HB

DOORS - REAR

23 - 63

STRIKER

REMOVAL

1. Using a grease pencil or equivalent, mark the posi-

tion of the striker (2).

2. Remove the bolts (1) and remove the striker.

INSTALLATION

1. Install the striker and install the bolts.

2. Tighten the bolts to 28 N·m (21 ft. lbs.).

3. Adjust the striker if needed. (Refer to 23 - BODY/

DOORS - REAR/LATCH STRIKER - ADJUST-
MENTS)

23 - 64

DOORS - REAR

HB


Content   ..  1385  1386  1387  1388   ..