Content .. 1356 1357 1358 1359 ..
Dodge Durango (HB). Manual - part 1358
CONDITION
POSSIBLE CAUSE
CORRECTION
Transfer case noisy while in, or
jumps out of, 4LO.
1) Transfer case not completely
engaged in 4LO position.
1) While rolling 2-3 MPH and the
transmission in NEUTRAL, or the
clutch depressed on vehicles
equipped with a manual
transmission, shift the transfer case
to the AWD or 4LOCK position, and
then back into the 4LO position.
2) Range fork damaged, inserts
worn, or fork is binding on the shift
rail.
2) Repair or replace components as
necessary.
3) Low range gear worn or
damaged.
3) Repair or replace components as
necessary.
Lubricant leaking from transfer case
seals or vent.
1) Transfer case overfilled.
1) Drain lubricant to the correct
level.
2) Transfer case vent closed or
restricted.
2) Clean or replace vent as
necessary.
3) Transfer case seals damaged or
installed incorrectly.
3) Replace suspect seal.
Transfer case will not shift through
4LOCK (Part-time) range.
1) Incomplete shift due to drivetrain
torque load.
1) Drive in a straight line and
momentarily release the accelerator
pedal to complete the shift.
2) Incorrect tire pressure.
2) Correct tire pressure as
necessary.
3) Excessive tire wear.
3) Correct tire condition as
necessary.
4) Excessive vehicle loading.
4) Correct as necessary.
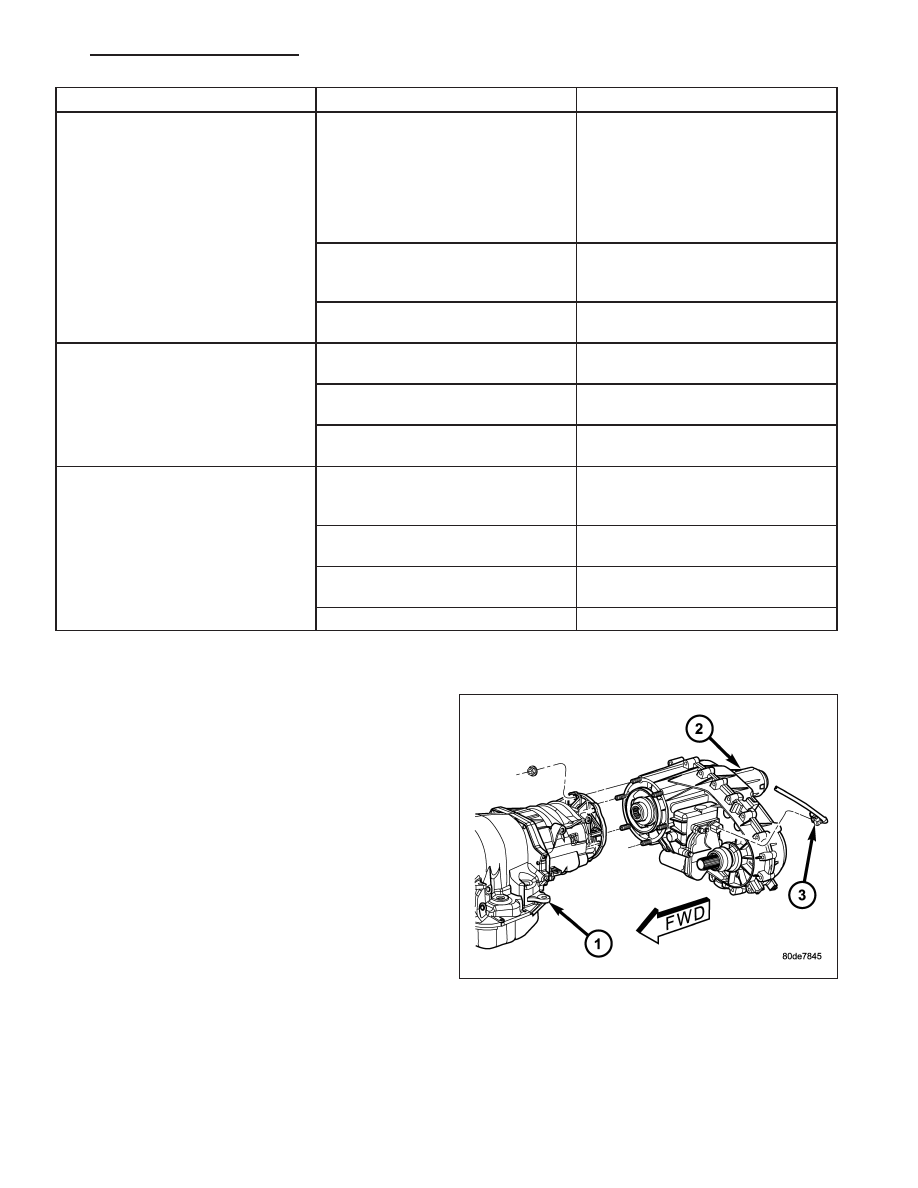
REMOVAL
1. Shift transfer case into AWD.
2. Raise vehicle.
3. Drain transfer case lubricant.
4. Mark front and rear propeller shafts for alignment
reference.
5. Support transmission (1) with jack stand.
6. Remove the transfer case skid plate, if equipped.
7. Disconnect front and rear propeller shafts at trans-
fer case.
8. Disconnect transfer case shift motor and mode
sensor wire connectors (3).
9. Disconnect transfer case vent hose.
10. Support transfer case (2) with transmission jack.
11. Secure transfer case (2) to jack with chains.
12. Remove nuts attaching transfer case to transmission.
13. Pull transfer case and jack rearward to disengage transfer case.
14. Remove transfer case (2) from under vehicle.
DISASSEMBLY
Position transfer case in a shallow drain pan. Remove drain plug and drain any remaining lubricant remaining in
case.
HB
TRANSFER CASE - NV244 GENII - SERVICE INFORMATION
21 - 837