Dodge Dakota (R1). Manual - part 658
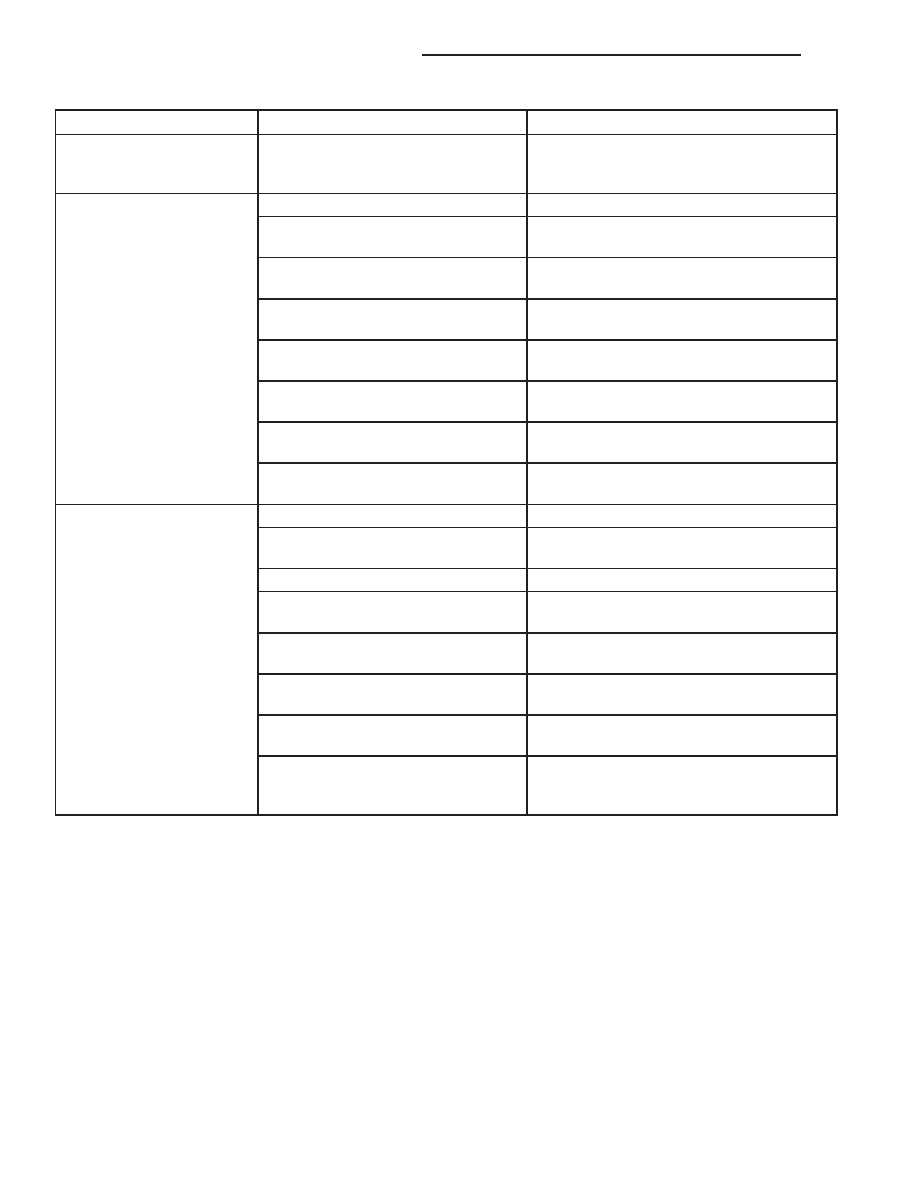
CONDITION
POSSIBLE CAUSES
CORRECTION
SLIPS IN LOW GEAR
9
D
9
ONLY, BUT NOT IN
MANUAL 1 POSITION
Overrunning Clutch Faulty.
Replace overrunning clutch.
GROWLING, GRATING OR
SCRAPING NOISES
1. Drive Plate Broken.
1. Replace.
2. Torque Converter Bolts Hitting
Dust Shield.
2. Dust shield bent. Replace or repair.
3. Planetary Gear Set Broken/
Seized.
3. Check for debris in oil pan and repair as
required.
4. Overrunning Clutch Worn/Broken.
4. Inspect and check for debris in oil pan.
Repair as required.
5. Oil Pump Components Scored/
Binding.
5. Remove, inspect and repair as required.
6. Output Shaft Bearing or Bushing
Damaged.
6. Remove, inspect and repair as required.
7. Clutch Operation Faulty.
7. Perform air pressure check and repair as
required.
8. Front and Rear Bands Mis-
adjusted.
8. Adjust bands.
DRAGS OR LOCKS UP
1. Fluid Level Low.
1. Check and adjust level.
2. Clutch Dragging/Failed
2. Air pressure check clutch operation and
repair as required.
3. Front or Rear Band Mis-adjusted.
3. Adjust bands.
4. Case Leaks Internally.
4. Check for leakage between passages in
case.
5. Servo Band or Linkage
Malfunction.
5. Air pressure check servo operation and
repair as required.
6. Overrunning Clutch Worn.
6. Remove and inspect clutch. Repair as
required.
7. Planetary Gears Broken.
7. Remove, inspect and repair as required
(look for debris in oil pan).
8. Converter Clutch Dragging.
8. Check for plugged cooler. Perform flow
check. Inspect pump for excessive side
clearance. Replace pump as required.
21 - 276
AUTOMATIC TRANSMISSION - 46RE
AN
AUTOMATIC TRANSMISSION - 46RE (Continued)