Dodge Dakota (R1). Manual - part 614
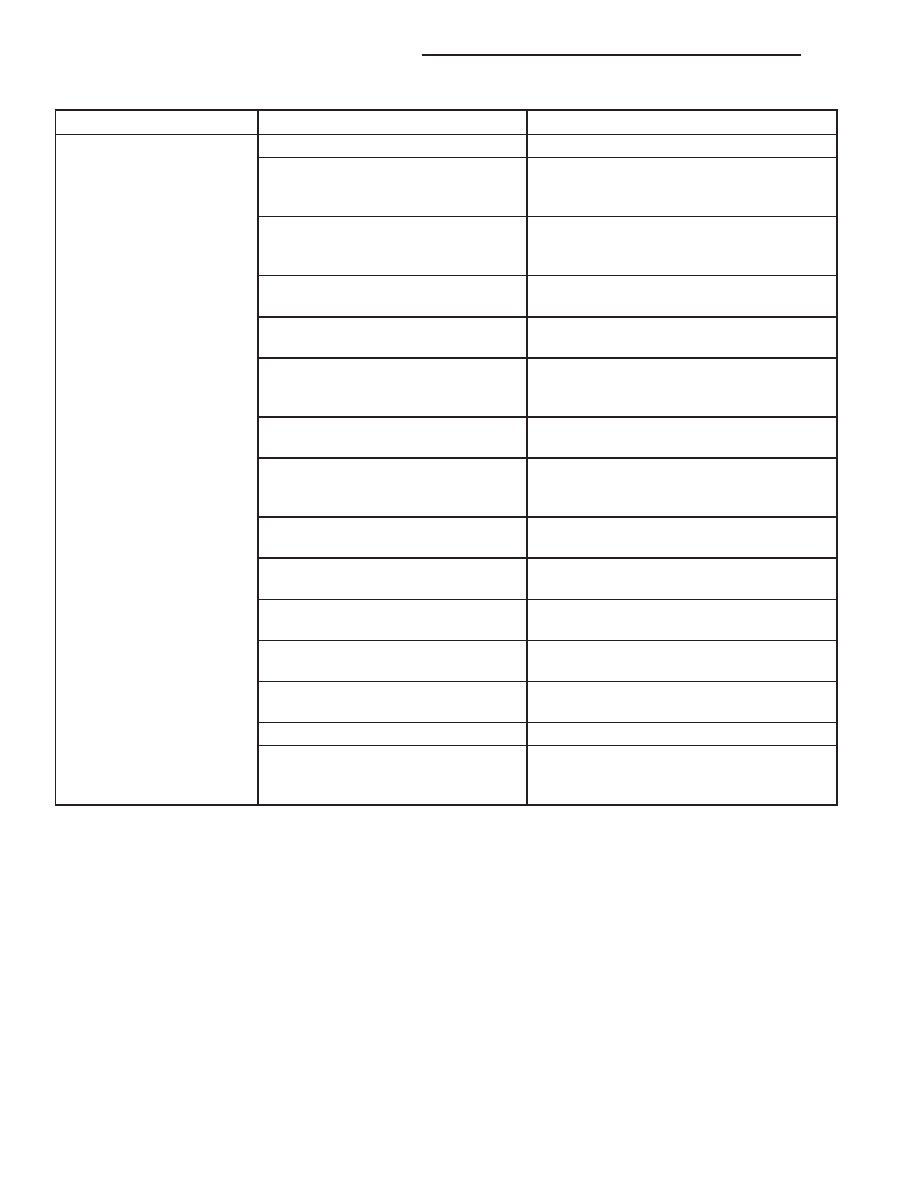
CONDITION
POSSIBLE CAUSES
CORRECTION
NO 3-4 UPSHIFT
1. O/D Switch In OFF Position.
1. Turn control switch to ON position.
2. Overdrive Circuit Fuse Blown.
2. Replace fuse. Determine why fuse failed
and repair as necessary (i.e., shorts or
grounds in circuit).
3. O/D Switch Wire Shorted/Open
Cut.
3. Check wires/connections with 12V test
lamp and voltmeter. Repair damaged or
loose wire/connection as necessary.
4. Distance or Coolant Sensor
Malfunction.
4. Check with DRB® scan tool and repair
or replace as necessary.
5. TPS Malfunction.
5. Check with DRB® scan tool and replace
if necessary.
6. Neutral Sense to PCM Wire
Shorted/Cut.
6. Test switch/sensor as described in
service section and replace if necessary.
Engine no start.
7. PCM Malfunction.
7. Check with DRB® scan tool and replace
if necessary.
8. Overdrive Solenoid Shorted/Open.
8. Replace solenoid if shorted or open and
repair loose or damaged wires (DRB® scan
tool).
9. Solenoid Feed Orifice in Valve
Body Blocked.
9. Remove, disassemble, and clean valve
body thoroughly. Check feed orifice.
10. Overdrive Clutch Failed.
10. Disassemble overdrive and repair as
needed.
11. Hydraulic Pressure Low.
11. Pressure test transmission to determine
cause.
12. Valve Body Valve Stuck.
12. Repair stuck 3-4 shift valve, 3-4 timing
valve.
13. O/D Piston Incorrect Spacer.
13. Remove unit, check end play and install
correct spacer.
14. Overdrive Piston Seal Failure.
14. Replace both seals.
15. O/D Check Valve/Orifice Failed.
15. Check for free movement and secure
assembly (in piston retainer). Check ball
bleed orifice.
21 - 100
AUTOMATIC TRANSMISSION - 42RE
AN
AUTOMATIC TRANSMISSION - 42RE (Continued)