DAF LF45, LF55 Series. Manual - part 660
©
200515
5-13
Draining and filling
EXPLANATORY NOTES ON THE MAINTENANCE ACTIVITIES
ΛΦ45/55 series
5
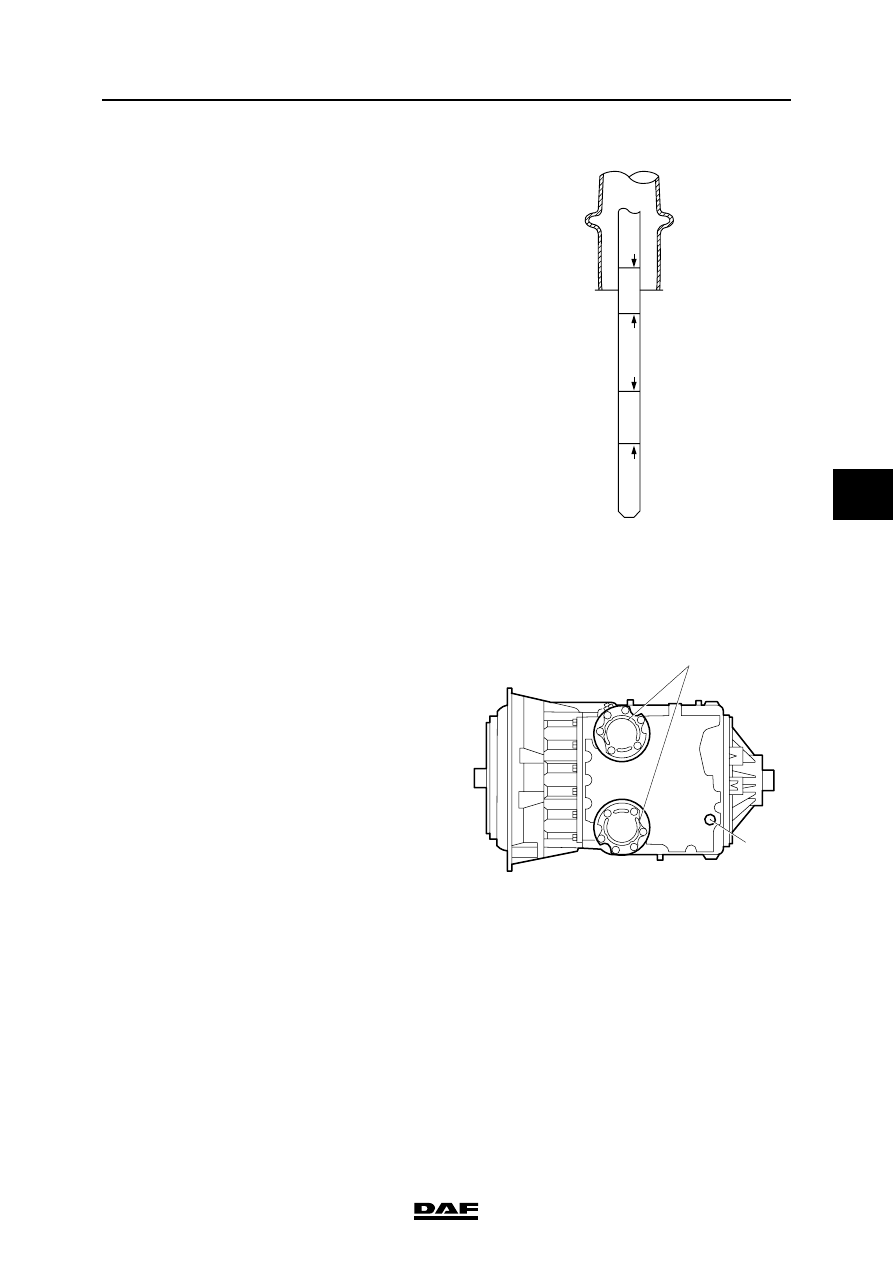
Filling the gearbox
1.
Clean the drain plugs, provide them with new
sealing rings and fit them, tightening them to
the specified torque, see "Technical data".
2.
Fill the gearbox through the dipstick holder
with the specified quantity of oil; see
"Technical data".
3.
Start the engine and run it at idling speed.
4.
Tighten the bleed screw (2) to the specified
torque, if only gearbox oil escapes. See
"Technical data".
5.
With the engine running at idling speed, top
up gearbox oil until the oil level is between
the "Cold add" and "Cold Full" marks.
6.
Check the oil level. See "Inspection and
adjustment".
Allison MD3060 automatic gearbox
To prevent skin injury, avoid
unnecessary contact with the
drained oil.
Draining the gearbox
1.
Place the vehicle on a flat and level surface.
2.
Bring the gearbox to operating temperature
(approx. 71
C - 93C) to allow the oil to drain
more quickly and more fully.
3.
Remove the drain plug (1) from the gearbox
oil sump.
4.
Remove the oil filters (2). See "Removal and
installation".
HOT
FULL
COLD
FULL
HOT
ADD
COLD
ADD
W 3 03 099
}
V300371
2
1