DAF LF45, LF55 Series. Manual - part 520


  Index      DAF     DAF LF45, LF55 Series - service repair manual


Search            


Content   ..  518  519  520  521   ..


DAF LF45, LF55 Series. Manual - part 520


7

LF45/55 series

Inspection and adjustment

FRONT AXLE, F36/F48

2-5

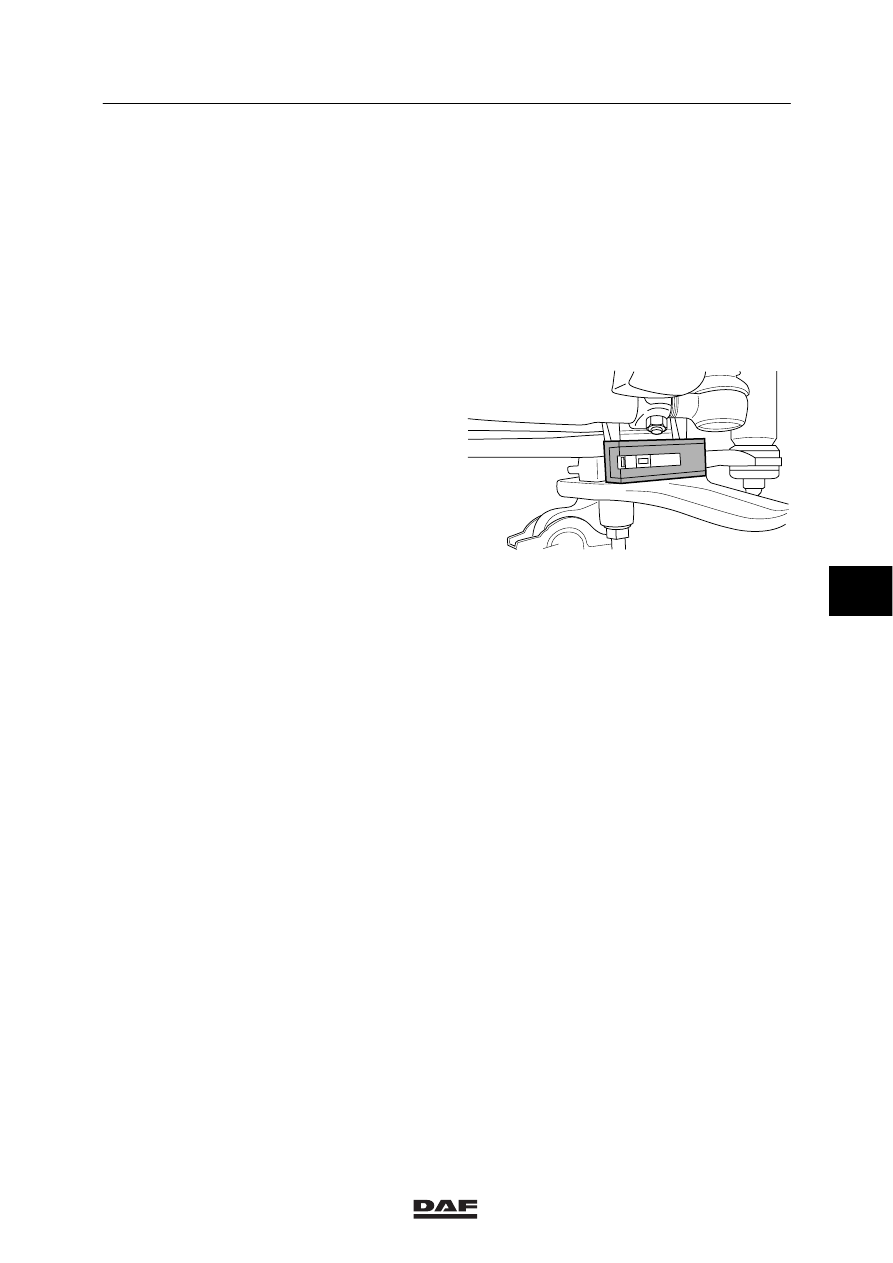
2.3 CHECKING THE CASTER

General
-

The vehicle must be on a level and
horizontal surface with the steering gear in
the “straight ahead” position.

-

The caster can be measured using an angle
gauge or wheel alignment equipment.

Checking caster using an angle gauge
1.

Clean the spot where the angle gauge is to
be placed on the spring seat.

2.

Place the angle gauge on a chassis side
member and check whether the chassis is
parallel with the floor.
If not, the caster reading should be adjusted
to the chassis position.

3.

Place the angle gauge on the spring seat
and measure the angle.
Compare the reading to the specified value,
see “Technical data”.

4.

Carry out the caster measurement at the
other end of the axle.
If different readings are obtained, check the
front axle suspension for deviations.

Checking caster using wheel alignment
equipment
1.

Use high quality wheel alignment equipment
for the inspection. The equipment must be
calibrated regularly and preferably be of the
type that can be calibrated before every
use.

2.

Follow the instructions for the wheel
alignment equipment carefully. Compare
the reading to the specified value, see
“Technical data”.

S7 00 560

6

ᓻ 200322

7

FRONT AXLE, F36/F48

Inspection and adjustment

LF45/55 series

2-6

2.4 CHECKING CAMBER ANGLE

General
-

The vehicle must be on a level and
horizontal surface with the steering gear in
the “straight ahead” position.

-

The tyre pressure must be correct.

-

The vehicle must be unladen.

-

The caster can be measured using an angle
gauge or wheel alignment equipment.

-

Carry out the measurement on both wheels.

Checking camber angle using an angle
gauge
1.

Thoroughly clean the side of the wheel hub
and place the angle gauge against the
surface. Keep the angle gauge vertical.

2.

Read off the angle. See “Technical data” for
the correct angle.

Checking camber angle using wheel
alignment equipment
1.

Use high quality wheel alignment equipment
for the inspection. The equipment must be
calibrated regularly and preferably be of a
type that can be calibrated before every
use.

2.

Follow the instructions for the wheel
alignment equipment carefully.
See “Technical data” for the correct angle.

If the angle is incorrect this may be caused by
the following:
-

excessive swivel axle bearing play

-

bent front axle.

S7 00 566

6

ᓻ 200322

7

LF45/55 series

Inspection and adjustment

FRONT AXLE, F36/F48

2-7

2.5 INSPECTION AND ADJUSTMENT OF TOE

Checking toe
1.

Use a high quality tracking gauge or high
quality wheel alignment equipment for the
inspection. The gauge/equipment must be
calibrated regularly and preferably be of the
type that can be calibrated before every
use. Follow the instructions for the wheel
alignment equipment carefully.

2.

Ensure that the steering gear is free of
tension by, if possible, driving the vehicle
straight ahead to the place where the
measurement will be taken. If this is not
possible, drive forwards and backwards at
the place where the measurement will be
taken with the steering gear in the “straight
ahead” position.

3.

Check the toe with the vehicle unladen.

4.

Measure the axle toe. Compare the reading
to the specified value, see “Technical data”.

Note:
If a large difference is measured, the cause
must be traced. The deviation could have
been caused by excessive wear or by a
collision, during which components were
bent.
If so, the other steering gear components
should be inspected carefully.

6

ᓻ 200322

7

FRONT AXLE, F36/F48

Inspection and adjustment

LF45/55 series

2-8

Adjusting toe
1.

Bend back the lips of the locking plate (3) at
both ends of the track rod.

2.

Unscrew the lock nut (2) at both ends of the
track rod.

3.

Turn the track rod (5) until the toe is correct,
see “Technical data”.

Note:
Make sure that the threaded ends of the
ball joints (1) are not pushed too far out of
the track rod (5). The hexagonal tapered
sleeve (4) must always fully engage the
screw thread of the ball joints.

4.

Tighten the lock nut (2) at both ends of the
track rod to the specified tightening torque,
see “Technical data”.

5.

Check the toe again.

6.

Secure the lock nut (2) and hexagonal
tapered sleeve (4) using the locking plate
(3). Use lips on the locking plate that have
not yet been used for this purpose.

;;

;;

S7 00 628

1

2 3 4 5

6

ᓻ 200322


Content   ..  518  519  520  521   ..