DAF LF45, LF55 Series. Manual - part 297


  Index      DAF     DAF LF45, LF55 Series - service repair manual


Search            


Content   ..  295  296  297  298   ..


DAF LF45, LF55 Series. Manual - part 297


©

 200416

5-17

Removal and installation

BE ENGINE FUEL SYSTEM

ΛΦ45/55 series

4

2

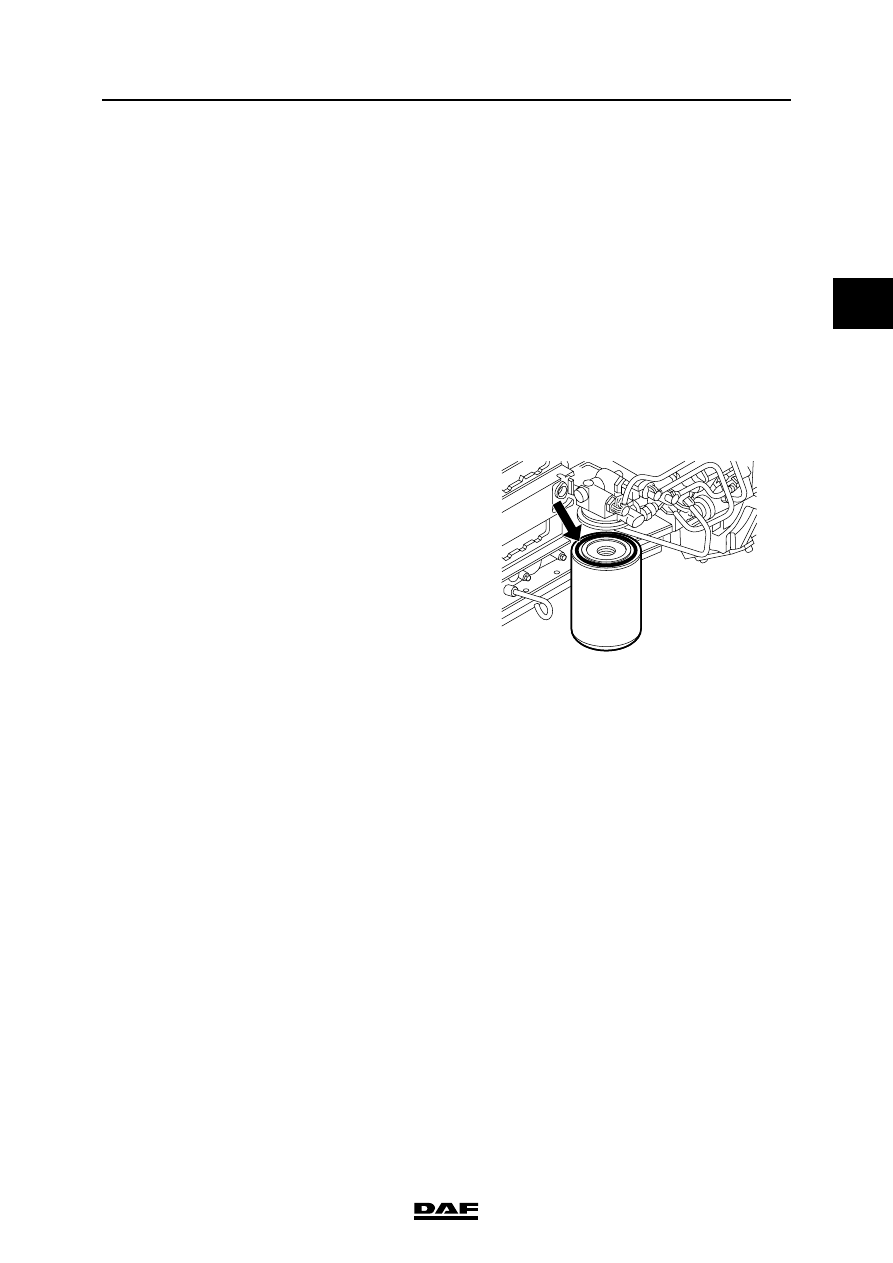
5.7 REMOVAL AND INSTALLATION, FUEL FINE FILTER

When removing the fuel fine filter, a 

quantity of fuel will escape. Collect 

the fuel and avoid the risk of fire.

Removing the fuel fine filter
1.

Place a container beneath the fuel fine filter 

and remove the filter.

Note:

The fuel fine filter is a disposable filter and 

must therefore not be cleaned and re-used.

Installing the fuel fine filter

Note:

Do not fill the fine filter with fuel until it has 

been fitted. The fine filter is filled with fuel by 

the primer pump after it has been fitted. This 

considerably reduces the risk of dirt getting 

into the fuel system.

1.

Check by hand whether the coupling piece 

for the filter attachment is securely attached.

2.

Lightly lubricate the filter sealing ring with 

clean engine oil.

3.

Fit the filter element onto the housing. 

Tighten the filter element until the sealing 

ring abuts. Tighten the filter element a further 

∂ to • turn by hand.

4.

Bleed the fuel system. See "Inspection and 

adjustment".

5.

Start the engine and check the fuel system 

for leaks. If necessary, retighten the filter by 

hand.

}

G0 00 201

BE ENGINE FUEL SYSTEM

5-18

©

 200416

Removal and installation

2

ΛΦ45/55 series

4

5.8 REMOVAL AND INSTALLATION, FUEL PREFILTER/WATER SEPARATOR

When removing the fuel prefilter/

water separator, a quantity of fuel 

will escape. Collect the fuel and 

avoid the risk of fire. 

Removing the fuel prefilter/water separator 
filter element
1.

Place a container under the filter.

2.

Remove the plug (3) from the water sensor 

(2).

3.

Remove the fuel prefilter/water separator 

filter element (1) by turning it anti-clockwise.

4.

Remove the water sensor (2) from the filter 

element (1).

Installing the fuel prefilter/water separator 
filter element
1.

Check by hand whether the coupling piece 

for the filter attachment is securely attached.

2.

Lightly lubricate the sealing ring with engine 

oil.

3.

Fit the fuel prefilter/water separator filter 

element (1) until the sealing ring abuts. 

Tighten the filter element a further 

∂ to • 

turn by hand.

4.

Turn the water sensor (2) onto the filter 

element until it abuts. Tighten the water 

sensor by about a further 

 -  turn.

Note:

Over-tightening the water sensor (2) may 

damage the sensor and/or cause leakage.

5.

Fit the plug (3) on the water sensor (2).

6.

Bleed the fuel system. See "Inspection and 

adjustment".

7.

Start the engine and check for leaks. If 

necessary, retighten the fuel prefilter/water 

separator filter element (1) by hand.

}

G0 00 220

1

2

3

©

 200416

5-19

Removal and installation

BE ENGINE FUEL SYSTEM

ΛΦ45/55 series

4

2

5.9 REMOVAL AND INSTALLATION, FUEL LEVEL ELEMENT

When removing the fuel prefilter/

water separator, a quantity of fuel 

will escape. Collect the fuel and 

avoid the risk of fire.

Dirt in the fuel system can lead to 

significant damage to parts of the 

system. All open connections must 

therefore be sealed.

Removing fuel level element
1.

Disconnect the earth lead from the battery 

terminal.

Note:

To prevent dirt from entering, first clean the 

outside of the fuel tank.

2.

Drain the fuel tank until it is less than 1/3 full.

3.

Remove the connector from the fuel level 

element.

4.

Remove the attachment bolts of the fuel level 

element and carefully remove the fuel level 

element from the fuel tank.

5.

Remove the gasket.

Installing fuel level element
1.

Clean the contact surface of the fuel tank and 

the fuel level element.

2.

Fit a new gasket to the fuel level element and 

fit the fuel level element.

3.

Fit the attachment bolts of the fuel level 

element.

4.

Fit the connector of the fuel level element.

5.

Fill the fuel tank with fuel to a level above the 

lip of the fuel level element and check the 

tank for leaks.

}

}

BE ENGINE FUEL SYSTEM

5-20

©

 200416

Removal and installation

2

ΛΦ45/55 series

4

5.10 REMOVAL AND INSTALLATION, FUEL TANK

When the fuel tank is removed, a 

quantity of fuel will escape. Collect 

the fuel and avoid the risk of fire. 

Dirt in the fuel system can lead to 

significant damage to parts of the 

system. Prevent this by cleaning the 

parts before disassembly and then 

sealing all open connections.

Removing fuel tank
1.

To prevent dirt from entering, first clean the 

outside of the fuel tank.

2.

Drain the fuel tank until it is almost empty.

3.

Remove the connector from the fuel level 

element.

4.

Remove the fuel connections from the fuel 

tank.

5.

Loosen the fuel pre-filter/water separator 

from the fuel tank and put it to the rear.

6.

Loosen the tank straps.

7.

Remove the fuel tank.

Installing the fuel tank
1.

Check the fuel tank for damage.

2.

Fit the fuel tank with the straps.

3.

Fit the fuel pre-filter/water separator on the 

fuel tank.

4.

Fit the fuel connections on the fuel tank.

5.

Fit the connector of the fuel level element.

6.

Fill the fuel tank with fuel.

7.

Bleed the fuel system. See "Inspection and 

adjustment".

8.

Check the tank and the fuel pipes for leaks.

}

}


Content   ..  295  296  297  298   ..