DAF LF45, LF55 Series. Manual - part 198
©
200505
4-23
Removing and installing
CE ENGINE
ΛΦ45/55 series
2
5
4.16 REMOVAL AND INSTALLATION, FLYWHEEL HOUSING SEAL
Removing the flywheel housing seal
1.
Remove the gearbox.
2.
Remove the clutch release assembly and the
clutch plate.
3.
Remove the flywheel.
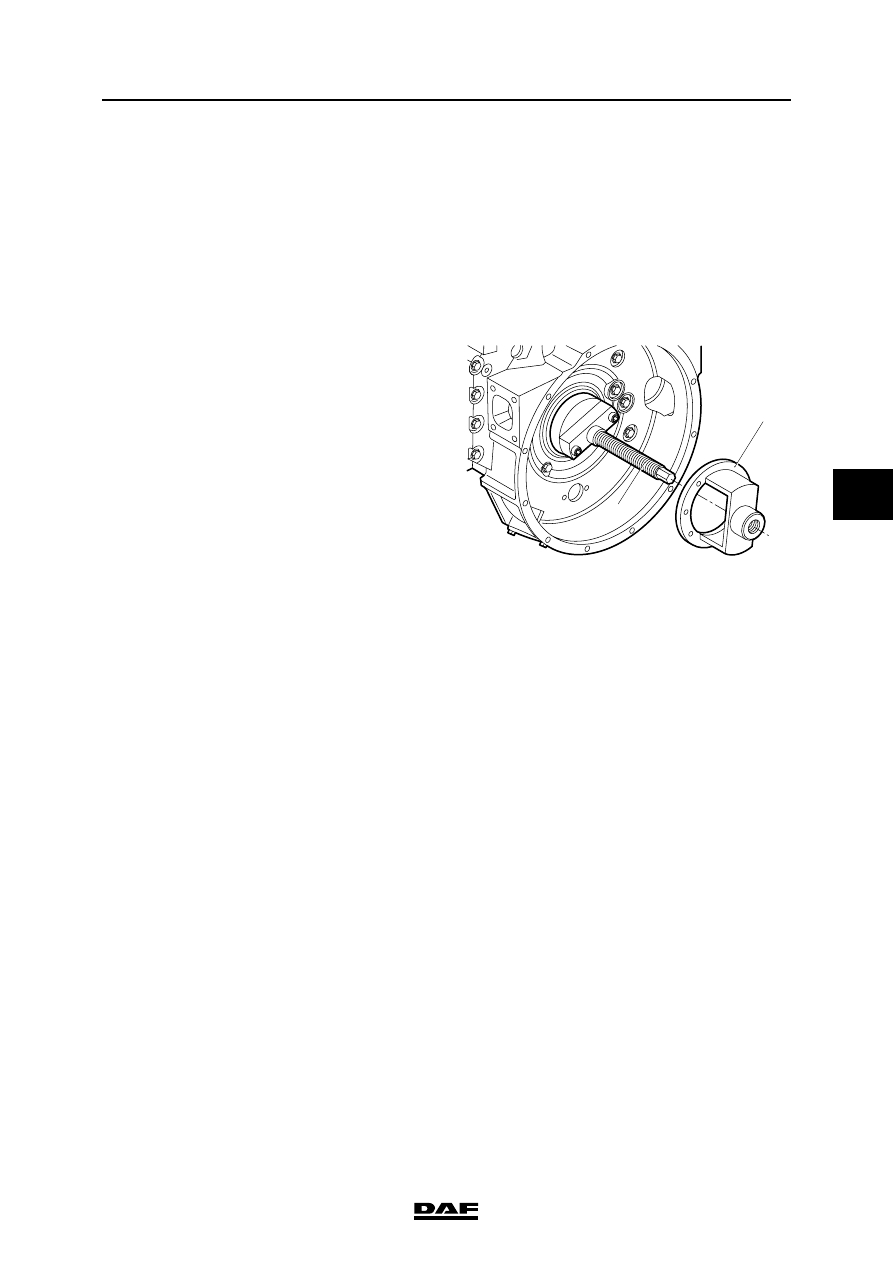
4.
Fit the threaded spindle (2) of the special tool
(DAF no. 1329475) on the crankshaft flange.
5.
Screw the push/pull piece (1) onto the
spindle up to the flywheel housing.
Note:
Mark the drill at a length of 22 mm using a
piece of tape.
6.
Drill a hole through the base plate to the tape
marking and fit a screw in the seal to keep
the base plate in its place.
7.
Drill the other five holes and fit screws.
8.
Turn the threaded spindle (2) clockwise until
the seal has been removed.
M201068
2
1