BMW 3 (E46). Manual - part 285


  Index      BMW     BMW 3 (E46) - service repair manual 2006 year


Search            


Content   ..  283  284  285  286   ..


BMW 3 (E46). Manual - part 285


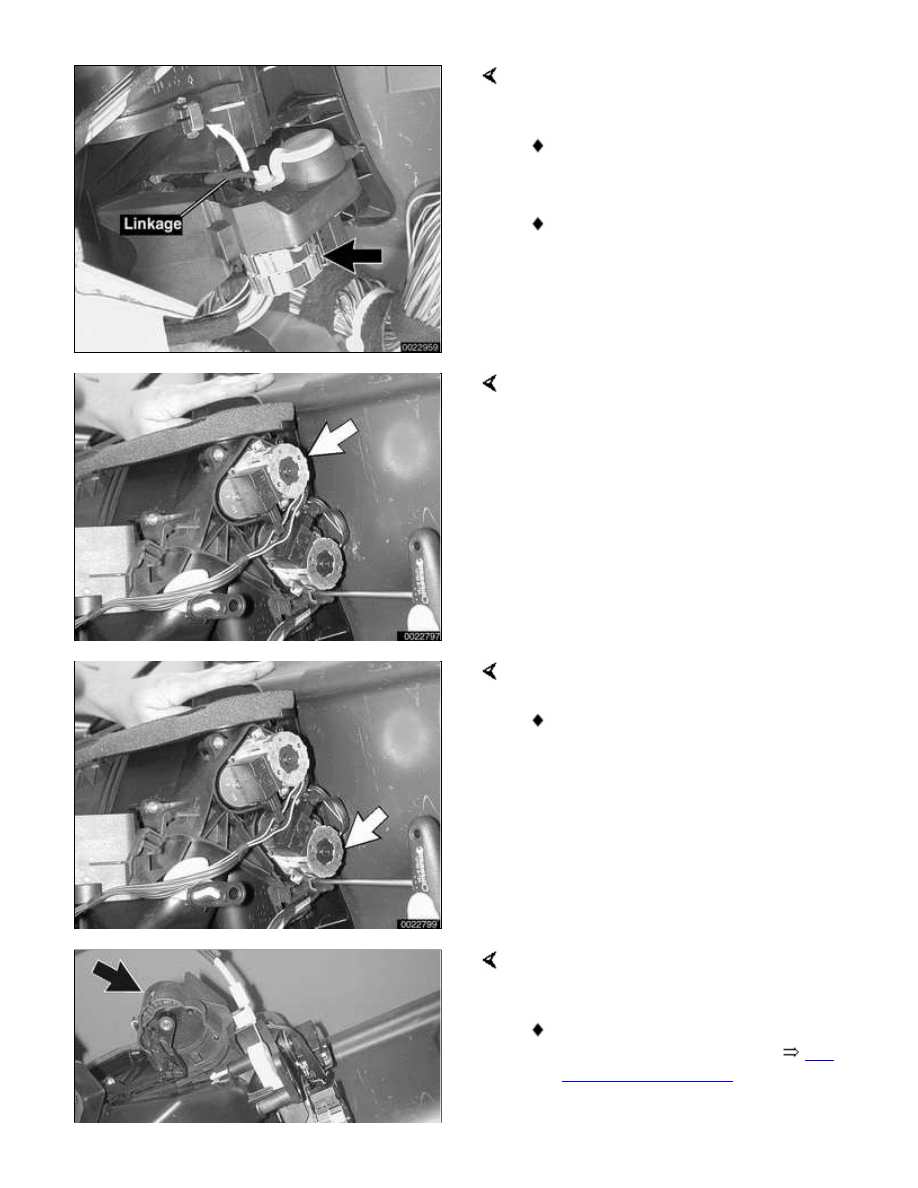
Right side fresh air/recirculation motor
(arrow):

For access, remove right footwell
duct as described below.

Unhook linkage, then remove
motor.

Defroster air distribution motor (arrow)

Ventilation distribution motor (arrow)

For access, remove defroster air
distribution motor.

Right footwell vent air distribution motor
(arrow):

For access, remove passenger
side airbag as described in 


721

Airbag System (SRS)

.

Unhook linkage, then remove
motor.


Left side air distribution motor,
accessing

The fresh air distribution motor is under
the left side of the dashboard. Remove
the left footwell (pedal cluster) trim
panel for access.

CAUTION!

Disassemble interior trim carefully to
avoid damage.

 -

Move steering column to maximum
extended position.

Working at trim panel, remove
fasteners.

Note locking clips (A) which must
be rotated 90° to remove.

Remove mounting screws (B).

Unhook retaining clip from
steering column lower trim.

Detach electrical harness
connectors from footwell light and
speaker (if equipped).

Release OBD II socket from panel
and pull out.

Reach up above accelerator pedal to
gain access to fresh air distribution
motor (arrow).


Right footwell duct, removing
and installing

 -

Remove glove compartment as
described in 

513 Interior Trim

.

 -

Remove IHKA control panel or
GPS On-Board Monitor, as
applicable (described below).

Reach through control panel opening
to detach air duct locking clip (arrow)
from heater/evaporator housing.

 -

Separate bottom of air duct from
rear compartment duct.

 -

Pull forward and down to remove.

 -

Installation is reverse of removal.


Dashboard vent, removing and
installing

Pry gently at dashboard trim to remove.

CAUTION!

To avoid marring interior trim, work
with a plastic prying tool.

Remove air vent mounting screws
(arrows).

 -

Lift vent slightly and withdraw from
dashboard.

 -

Installation is reverse of removal.

Note:

Removal of right or center
dashboard vent is similar.

To fully remove the center
dashboard vent, use pliers to
detach control cable housing and
remove from control lever.

Remove trim on right side prior to
removing center trim.


Content   ..  283  284  285  286   ..