BMW 3 (E46). Manual - part 210
513-3
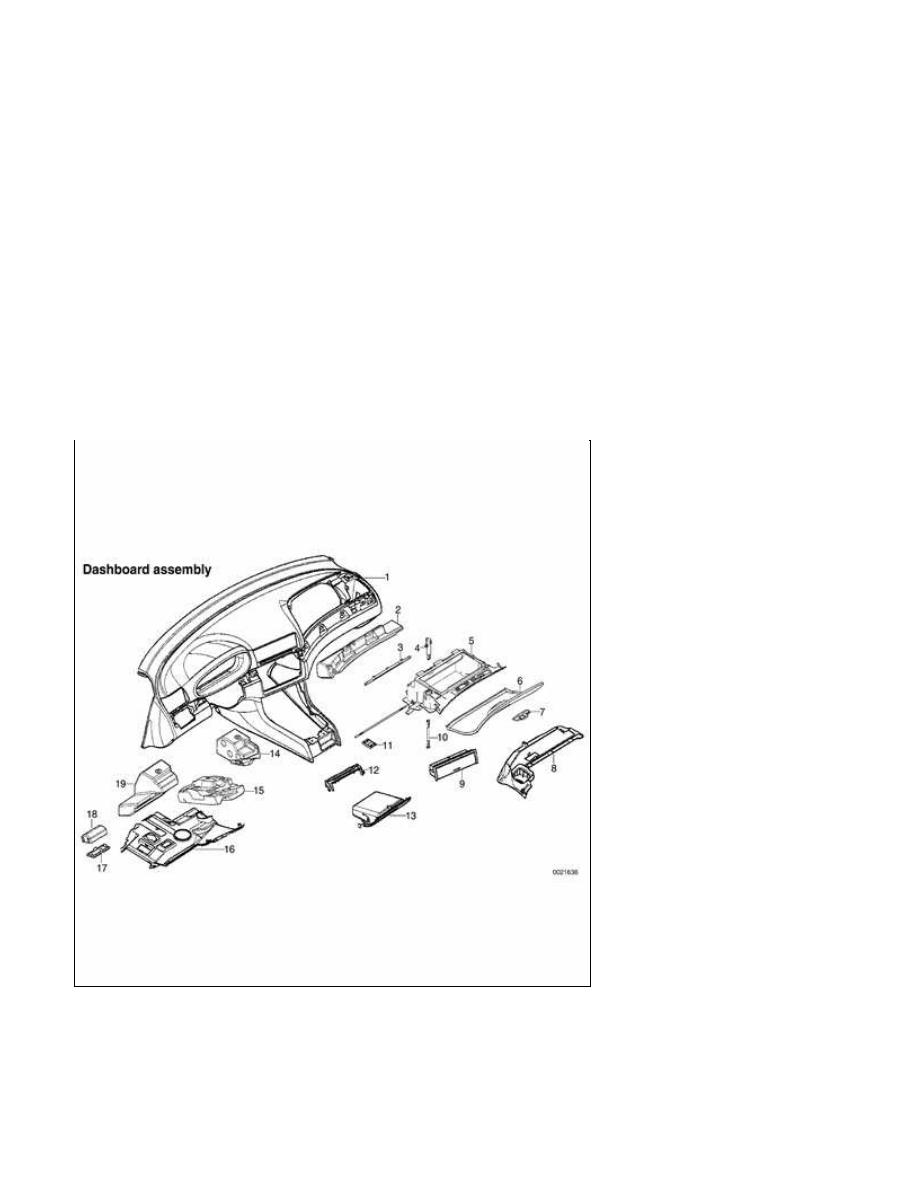
Dashboard
The E46 dashboard assembly includes
the instrument cluster, passenger side
airbag, glove compartment, fuse and
relay panel, radio, IHKA control panel
or on-board monitor (if equipped with
GPS), front ashtray, shifter assembly,
and window control switches.
Dashboard removal is a complex
operation. Read the procedures
through before starting work.
Dashboard
assembly
1
-
Dashboard
2
-
Passenger knee
protector
3
-
Reinforcement
4
-
Damper piston
5
-
Glove
compartment
6
-
Glove
compartment
door
7
-
Latch
8
-
Right top
footwell trim
panel
9
-
Storage
compartment
10
-
Glove
compartment
door strap