BMW 3 (E46). Manual - part 193


  Index      BMW     BMW 3 (E46) - service repair manual 2006 year


Search            


Content   ..  191  192  193  194   ..


BMW 3 (E46). Manual - part 193


screw and protective cap.

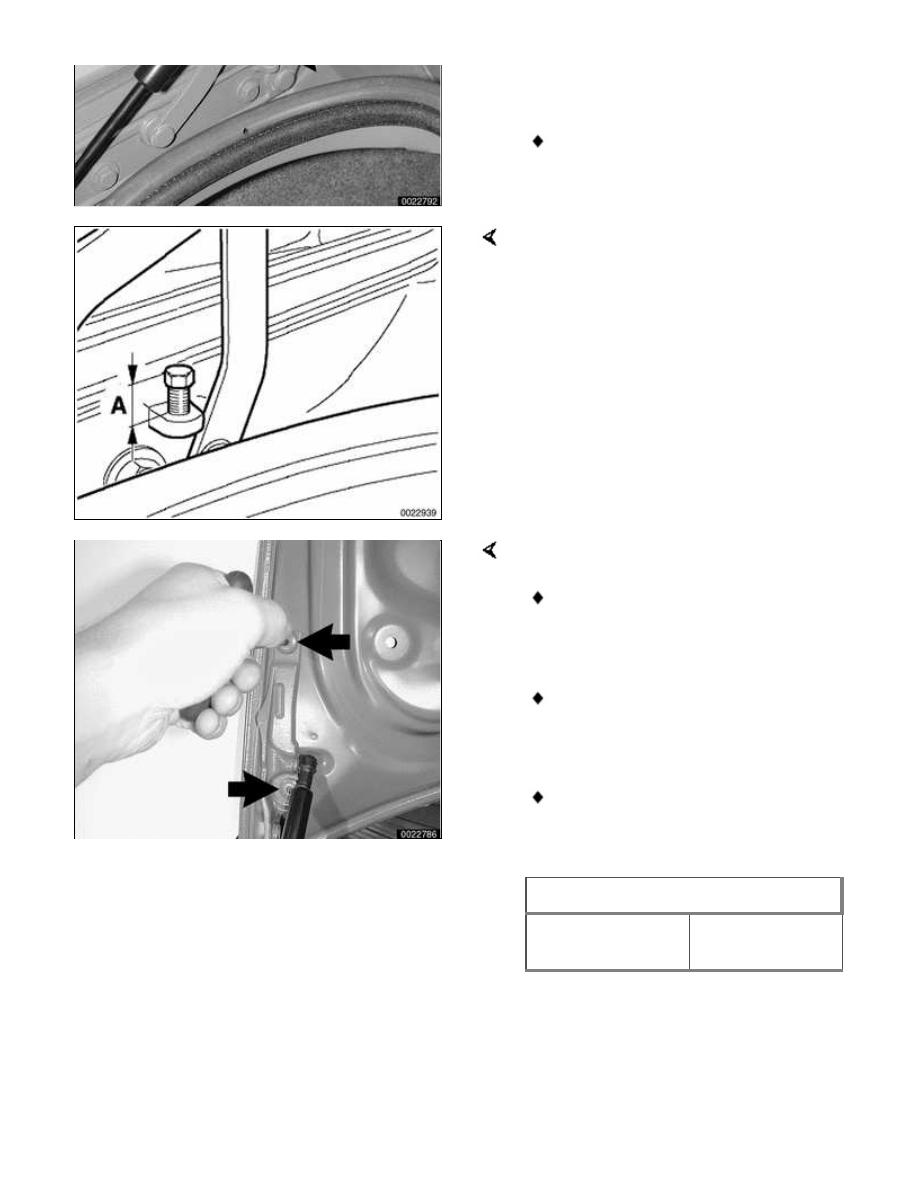
If stop screw has removable
protective cap (arrow) remove
protective cap from stop screw.

Adjust stop screw so that head is set to
(A) 10 mm (0.40 in.) above bore height.

To adjust trunk lid gap at rear fender:

Loosen bolts retaining trunk hinge
to trunk lid (arrows) until trunk lid
is just able to move.

If range of adjustment is
insufficient, loosen lower bolts on
trunk hinge

Once trunk lid gap is within
specification, tighten trunk hinge
to lid bolts.

Trunk lid gap specification

Trunk lid gap at
rear fender

4.25 ± 0.75 mm

(0.17 ± 0.03 in.)

CAUTION!

Before closing truck lid, be sure that
trunk lid and body are not damaged.

To adjust trunk lid at lock:

Remove protective caps from trim
panel and loosen screws retaining
latch assembly until it can just be
moved.

Inspect pads (arrows) on each
side of latch assembly for damage
or wear and replace if necessary.

Insert key in trunk lock, and hold
key in unlock position to prevent
lock from closing. Close trunk lid
to center latch assembly.

Open trunk lid and tighten screws
retaining latch. Replace protective
caps on trim panel.

Check adjustment of trunk lid and
lock, repeat adjustment process if
necessary.

 -

Screw in trunk lid detent buffers
until left and right sides of lid rest
on buffers with trunk lid closed.

CAUTION!

Top surface of trunk lid must not
protrude above top lip of fenders or
height adjustment can be distorted.

 -

Gently twist detent buffer ejector
clockwise with screwdriver to
unlock buffer and release ejector.

 -

To adjust stop screw at trunk lid
hinge:

Working at trunk lid hinge, set
stop screw to a height of 10 mm
(0.40 in.). Place a strip of paper on

top of stop screw, and gently
close trunk lid.

Adjust height of stop screw until
paper strip can be removed with
slight resistance. Once stop screw
height has been adjusted, lower
adjusted height of stop screw 2.5
mm (0.1 in.) to accommodate for
stop screw protective cap.

Fit protective cap on stop screw.
Check that trunk lid is in correct
position, adjust if necessary.

CAUTION!

Excessive force should not be
needed to close trunk lid.

Set gap measurements as listed below.

Trunk position gap adjustment

Trunk lid / trunk
panel (A)

5 ± 1.5 mm

(0.2 ± 0.06 in.)

Trunk lid / rear
fender (B)

4.25 ± 0.75 mm

(0.17 ± 0.03 in.)


Trunk lid support strut,
removing and installing

WARNING!

Make sure to support trunk lid before
removing strut.

Open trunk lid and support in open
position. Remove spring clips (arrows)
from support strut ends.

 -

Remove strut from trunk lid.

 -

Installation is reverse of removal.
Replace retaining clips damaged
during removal.


Content   ..  191  192  193  194   ..