BMW 3 (E46). Manual - part 188


  Index      BMW     BMW 3 (E46) - service repair manual 2006 year


Search            


Content   ..  186  187  188  189   ..


BMW 3 (E46). Manual - part 188


minimal clearance. Turn stop disk to
move hood front stop further out.

 -

Height at front of hood is set using
spring pins and rubber stop
buffers.


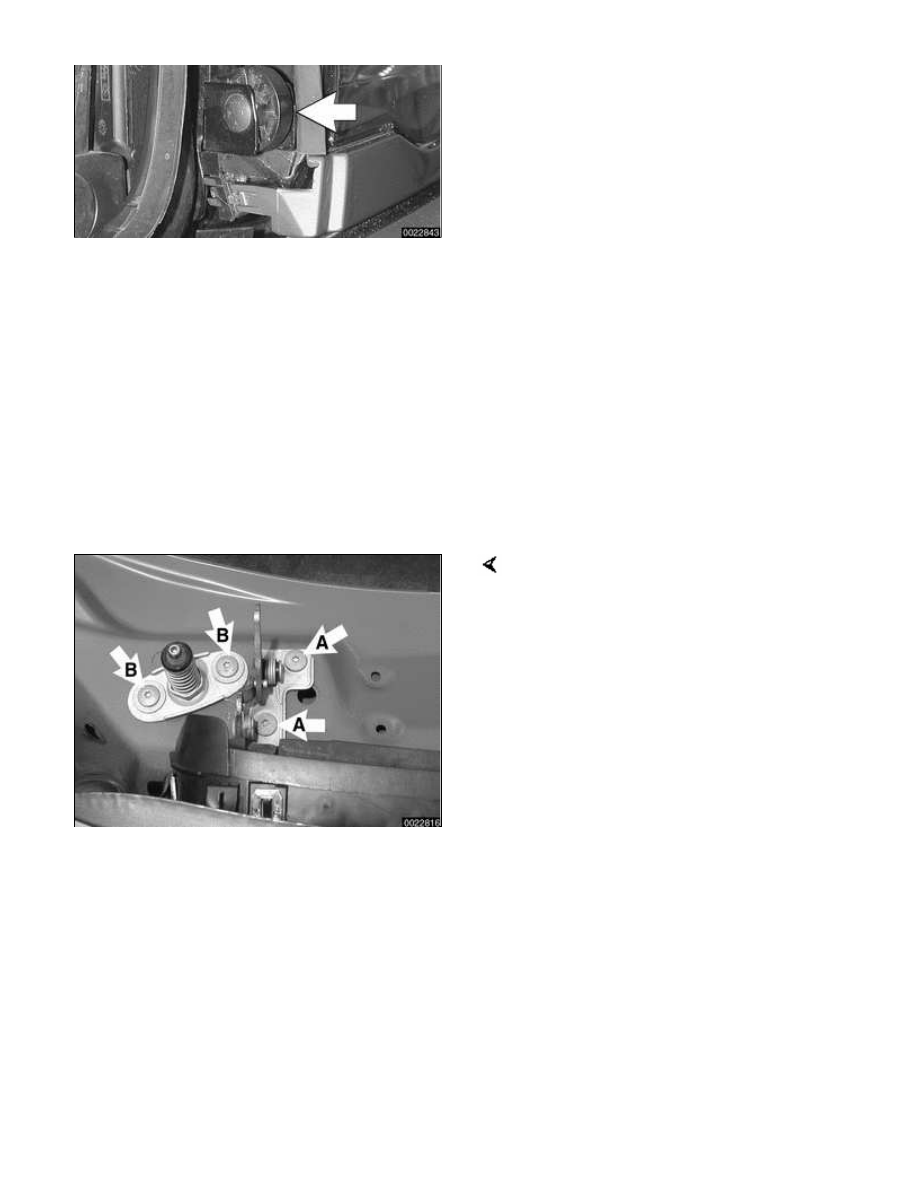
Hood release cable and spring
pins, adjusting

Before adjusting hood pins, be sure
the hood is aligned evenly to fenders
and front panel.

 -

Make sure bowden cable, which
connects both hood locks
together, is seated in lock guide
on both left and right locks.

Loosen hood spring pin bolts (A) and
retaining hook bolts (B) at hood on left
and right sides only enough to allow
movement.

 -

Turn rubber stop buffers over
headlights inwards to provide
clearance.

 -

Lower (but do not fully latch) hood
several times so pins on hood
center themselves in lower locks.

CAUTION!

Do not let hood lock with latch bolts
loose.

 -

Tighten hood spring pin bolts and
latch bolts when alignment is
correct.

 -

Remove one screw from each
side, clean and coat with

Loctite®270 or equivalent, and
reinstall.

 -

Unscrew rubber stop buffers
above headlight assemblies until
they support hood when closed
without movement.

 -

Test hood for correct closure and
opening. If hood does not spring
open, lengthen spring pins.

To lengthen spring pin, loosen locknut
(arrow) with wrench inserted through
spring, then turn pin counterclockwise.


Hood latch
components, assembly

1

-

Hood hinge

2

-

Hood release
lever

3

-

Torx bolt

4

-

Bowden cable,
main

5

-

Hex bolt

6

-

Gas pressurized
strut

7

-

Ball pin

8

-

Stop buffer

9

-

Spring pin

10

-

Lower hood
lock

11

-

Saucer head
screw

12

-

Eccentric wheel

13

-

Hex nut with
plate

14

-

Hood catch

15

-

Bowden cable,
center


BMW > 328 > 2000 > 2.5L L6 (M52)

Logout


Content   ..  186  187  188  189   ..