BMW 3 (E46). Manual - part 65


  Index      BMW     BMW 3 (E46) - service repair manual 2006 year


Search            


Content   ..  63  64  65  66   ..


BMW 3 (E46). Manual - part 65


negative (-) battery cable.

CAUTION!

Prior to disconnecting the
battery, read the battery
disconnection cautions given at
the front of this manual on page
viii.

Disconnecting the battery may
erase fault code(s) stored in
control module memory. Check
for fault codes using special BMW
diagnostic equipment.

 -

Remove complete air filter housing,
cylinder head cover, intake
camshaft plastic cover and spark
plugs, as described earlier in 

Camshaft Timing Chains,
Removing

.

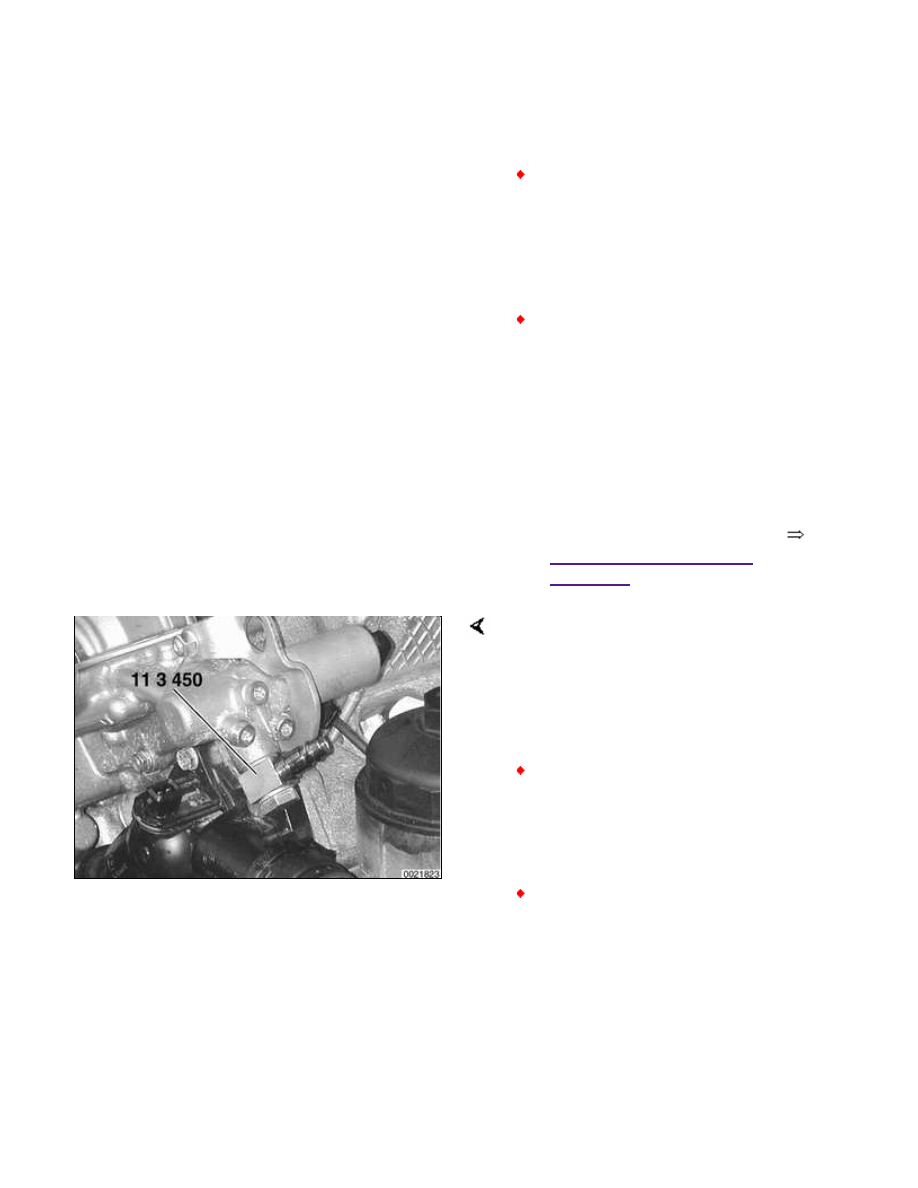
Remove banjo bolt from VANOS unit oil
pressure line. Use banjo bolt to attach
BMW special tool 11 3 450 (compressed
air fitting) to VANOS unit.

CAUTION!

Oil will drain from pressure line.
Have a container and rags ready.
Do not allow oil to run onto drive
belts.

Cover top of VANOS unit with
lint-free shop cloth. Compressed
air will force oil to spray out of oil
bore on top of unit.

 -

Connect compressed air line (with
line pressure set to 2 - 8 bar or 30 -
110 psi) to air fitting.

With compressed air line connected,
turn engine at least twice in direction of
rotation until cylinder 1 intake and
exhaust camshaft lobes (arrows) face
each other.

Remove sealing plug from bore on lower
left side of engine block (flywheel end).
Secure crankshaft in TDC position with
BMW special tool 11 2 300 (arrow).

 -

Unscrew and remove cylinder head
cover studs at rear of cylinder head.

Secure camshafts in TDC position using
BMW special tools 11 3 240 ans 11 3
244.

 -

Detach compressed air line, leaving
compressed air fitting attached to
VANOS unit.

Note:

Oil will drain from fittings when air line is
removed. Have a container and rags
ready. Do not allow oil to run onto drive
belts.

Unscrew sealing plugs (arrows) from
VANOS unit.

Note:

Oil will drain from plugs when removed.
Have a container and rags ready. Do not
allow oil to run onto drive belts.

Remove sealing caps from inside
VANOS unit with BMW special tool 11 6
170, or with short flat nose pliers.

Note:

Additional oil may drain from VANOS
unit.

Remove set screws (left hand thread) on
ends of intake and exhaust camshaft
hydraulic pistons.

CAUTION!

Set screws have left-hand threads.
Remove with a clockwise motion.

Disconnect electrical harness connectors
from camshaft position sensors and
solenoid valves on both exhaust and
intake sides of VANOS unit.

Remove VANOS unit:

Remove fasteners from engine
support eye.

Remove VANOS mounting nuts
(arrows) from cylinder head. Slide
VANOS unit and metal gasket off.

CAUTION!

Do not crank or turn over engine with
VANOS unit removed. Piston/valve
interference is possible.


VANOS control unit, installing

Clean contact edges of cylinder head
face and VANOS unit and apply a thin
coat of sealing compound (3-Bond®1209
or equivalent) to surfaces.

CAUTION!

Make sure all gasket material is
removed from face of cylinder
head. Clean sealing face and
keep free of oil. If any foreign
material is present on the sealing
surface, the camshaft timing will
be incorrect.

Check locating dowel (A) and
dowel sleeve (B) at top of cylinder
head for damage or incorrect
installation.

Note:

If the Double VANOS control unit is
being replaced, be sure to check
and adjust camshaft timing as
described later in this group.

If work being carried out has no
effect on camshaft timing, it is not
necessary to recheck the timing. It
is recommended however that the
VANOS operation be checked using
a compatible scan tool.

 -

Using new gasket, install VANOS
unit to cylinder head.


Content   ..  63  64  65  66   ..