Acura RL (1996-2004 year). Manual - part 575
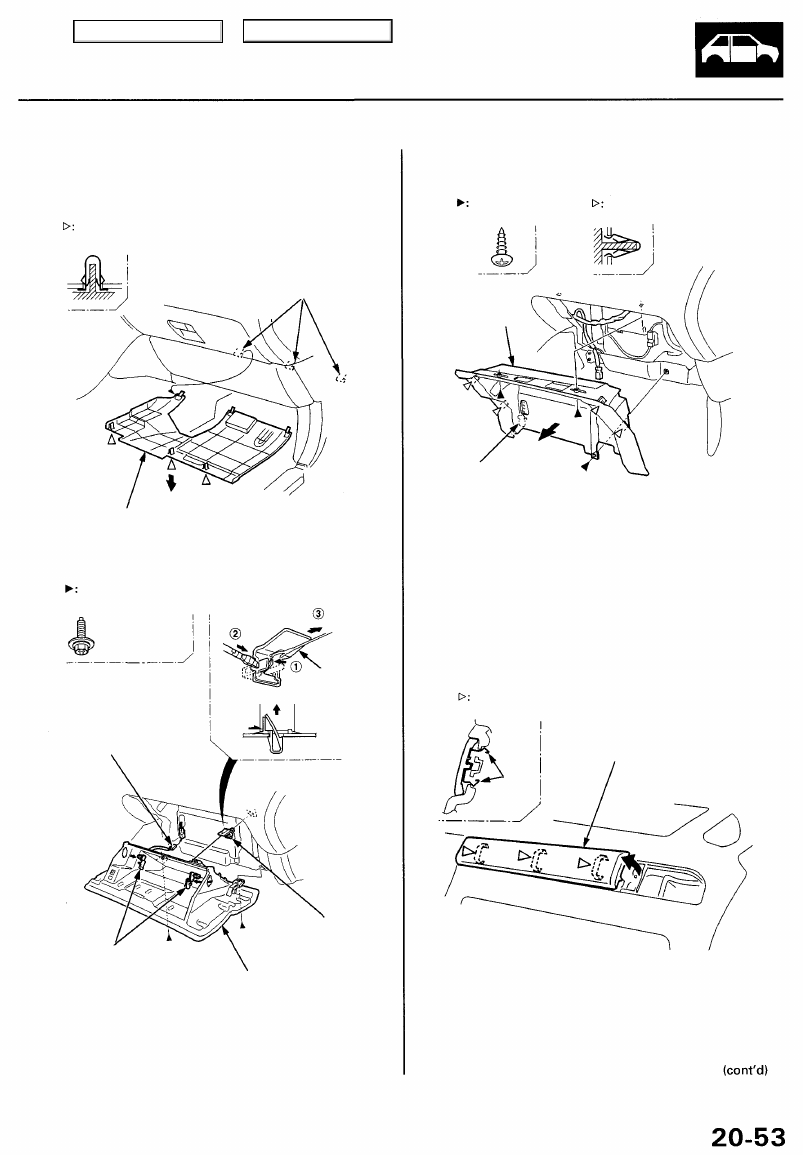
Glove box:
1. Remove the dashboard lower cover.
HOOKS
DASHBOARD LOWER
COVER
2. Remove the glove box stop from each side.
Bolt locations, 2
5 x 0.8 mm
9 N-m (0.9 kgf-m,
7 Ibf-ft)
TRUNK LID
OPENER MAIN
SWITCH
CONNECTOR
DAMPER
CLIP
DAMPER
CLIP
GLOVE BOX
STOPS
GLOVE BOX
3. Detach the damper clip while holding the glove box,
and disconnect the connector.
4. Remove the bolts, then remove the glove box.
5. Remove the glove box back cover.
Clip locations, 4
GLOVE BOX
BACK COVER
6. Installation is the reverse of the removal procedure.
Passenger's dashboard panel:
1. Remove the side air vent.
2. Carefully detach the clips, then pull out the passen-
ger's dashboard panel.
PASSENGER'S
DASHBOARD PANEL
3. Installation is the reverse of the removal procedure.
CLIPS
Clip locations, 3
Detach the
connector.
Screw locations, 3
Clip locations, 3
Main Menu
Table of Contents