Acura RL (1996-2004 year). Manual - part 573
Headliner
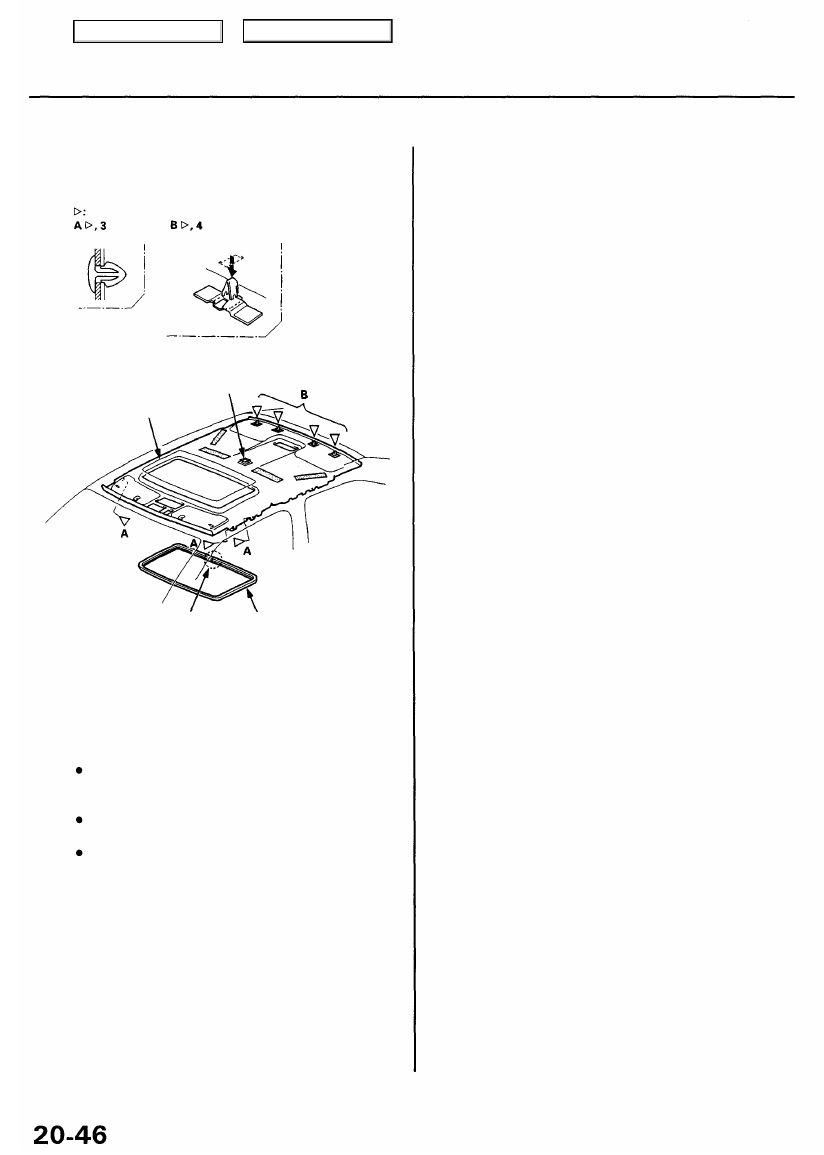
Removal (cont'd)
5. Remove the clips and roof trim, detach the rear
clips, then remove the headliner.
Clip locations
FASTENER
HEADLINER
JOINT
ROOF
TRIM
6. Remove the headliner through the passenger's door
opening.
7. Installation is the reverse of the removal procedure.
NOTE:
When inserting the headliner through the door
opening, be careful not to fold or bend it. Also,
be careful not to scratch the body.
Check that both sides of the headliner are
securely attached to the trim.
When installing the roof trim, install the joint
toward the rear.
Main Menu
Table of Contents