Acura CSX. Manual - part 637


  Index      Acura     Acura CSX - P/NO. 61SNR03 - service repair manual 2006-2009 year


Search            


Content   ..  635  636  637  638   ..


Acura CSX. Manual - part 637


01

SNR9AGTJ10311157191KDAT02

01

SNR9A0DJ10370327201KBAT80

Type S model

Front Door Speaker

23-259

23-259

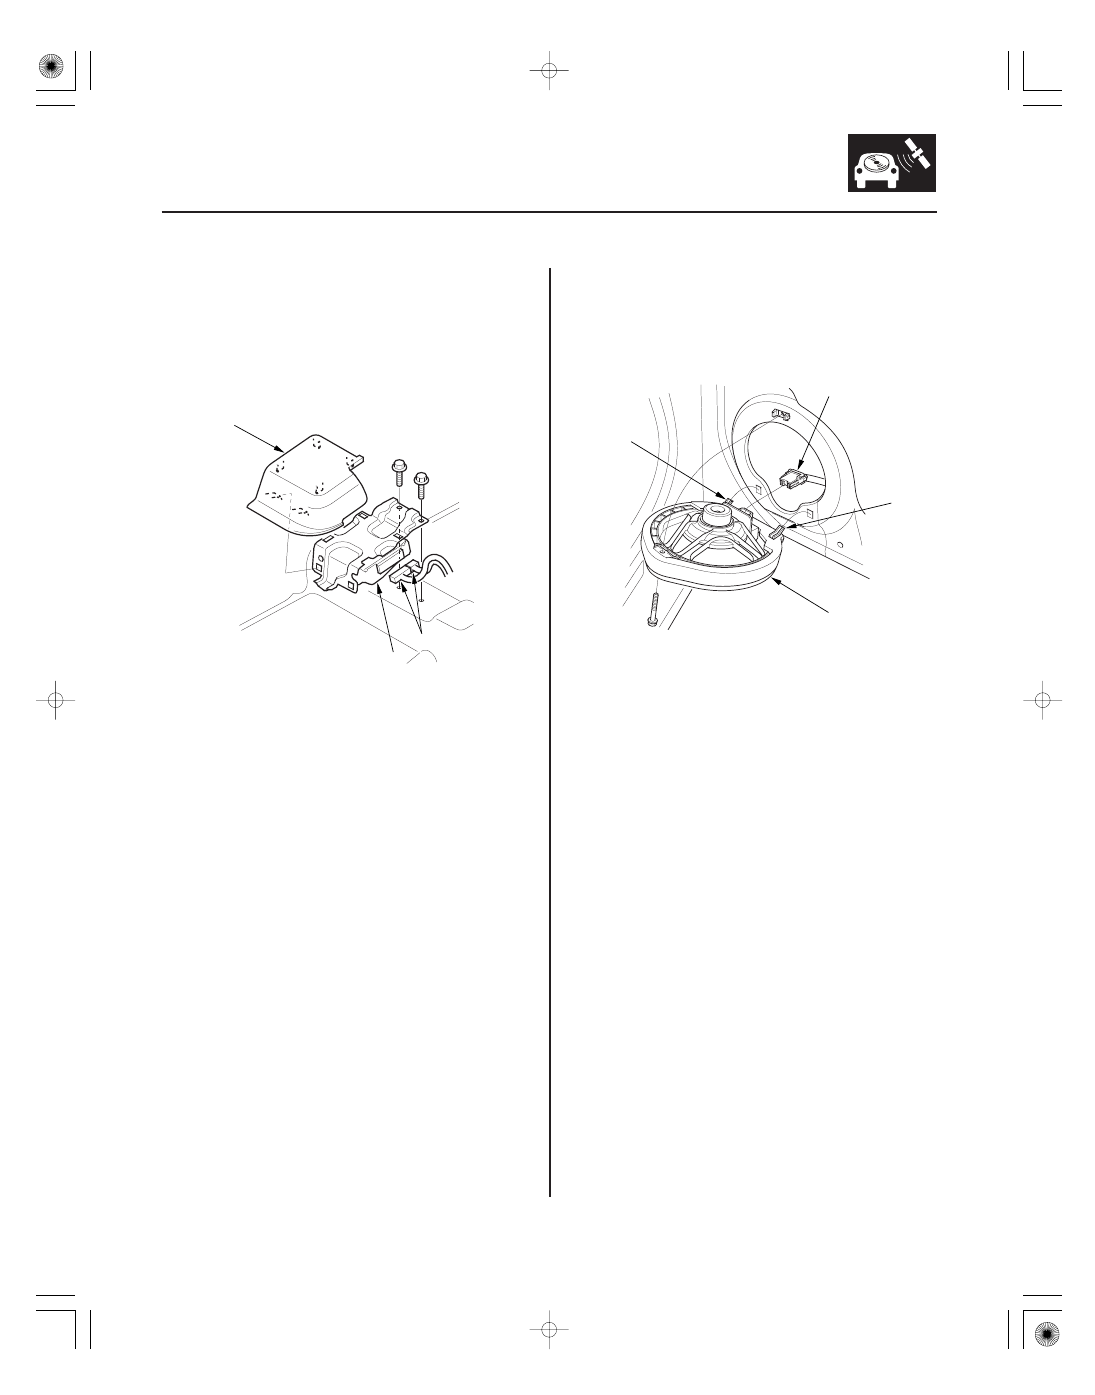
Stereo Amplifier Removal/
Installation

Speaker Replacement

A

C

B

A

B

C

B

1. Slide the driver’s front seat forward fully.

2. Remove the amp cover (A), then disconnect the

connectors (B).

3. Remove the mounting bolts, then remove the

stereo amplifier (C).

4. Install the stereo amplifier in the reverse order of

removal.

1. Remove the front door panel (see page 20-7).

2. Remove the screw. Then lift the speaker (A) straight

up to release the lower clips (B).

3. Disconnect the 2P connector (C), and remove the

speaker.

4. Install the speaker in the reverse order of removal.

08/08/21 14:14:17 61SNR030_230_0262

02

*01

04

05

Tweeter

Rear Speaker

23-260

Audio System

A

B

A

A

A

C

B

1. Carefully pry the tweeter grille (A) out of the

dashboard. Be careful not to damage the tweeter
grille and the dashboard.

2. Disconnect the 2P connector (B) from the tweeter.

3. Remove the tweeter (A) from the speaker grille.

4. Install the tweeter in the reverse order of removal.

1. Remove the rear speaker grille (A).

2. Remove the screw. Then lift the speaker (A) straight

up to release the clips (B).

3. Disconnect the 2P connector (C), and remove the

speaker.

4. Install the speaker in the reverse order of removal.

08/08/21 14:14:18 61SNR030_230_0263

01

*01

SNR9A0DJ10300013431KBAT00

Subwoofer (Type S model)

23-261

23-261

Auxiliary Jack Assembly
Replacement

A

B

A

B

1. Remove the rear tray (see page 20-78).

2. Remove the four mounting bolts from the

subwoofer (A).

3. Disconnect the 2P connector (B), and remove the

subwoofer.

4. Install the subwoofer in the reverse order of

removal.

1. With navigation: Remove the navigation unit

(see page 23-355).
Without navigation: Remove the audio unit
(see page 23-256).

2. Carefully pull out the auxiliary jack assembly (A),

then disconnect the 5P connector (B).

3. Install the auxiliary jack assembly in the reverse

order of removal.

08/08/21 14:14:18 61SNR030_230_0264

*01

SNR9A0DJ10300062333KBAT02


01

SNR9A0DJ10311113145FEAT00

Position

Resistance

23-262

23-262

Audio System

USB Adapter Replacement

Audio Remote Switch Test

B

C

D

A

A

B

1. Remove the center console (see page 20-92).

2. Detach the USB adapter cable (A) from the clip.

Remove the cover (B) and disconnect the USB
adapter cable connector (C).

3. Carefully pull out the USB adapter holder (D) from

the center console box.

4. Install the USB adapter in the reverse order of

removal.

SRS components are located in this area. Review the
SRS component location (see page 24-11).
Also review the precautions and procedures (see page
24-13) in the SRS section before doing repairs or
service.

1. Remove the driver’s airbag assembly (see page

24-188).

2. Remove the 20P connector (A) from the cable reel

(B).

3. Measure the resistance between terminals No. 9

and No. 10 in each switch position according to the
table.

No button

pressed

About 10 k

MODE

About 3.7 k

CH (

)

About 1.7 k

CH (

)

About 775

(VOL.UP)

About 357

(VOL.DOWN)

About 100

4. If the resistance is not as specified, replace the

audio remote switch (see page 23-263).

08/08/21 14:14:18 61SNR030_230_0265


Content   ..  635  636  637  638   ..