Acura CSX. Manual - part 215


  Index      Acura     Acura CSX - P/NO. 61SNR03 - service repair manual 2006-2009 year


Search            


Content   ..  213  214  215  216   ..


Acura CSX. Manual - part 215


15

16

*06

18

13-88

Manual Transmission

A

B

C

A

B

A

B

A

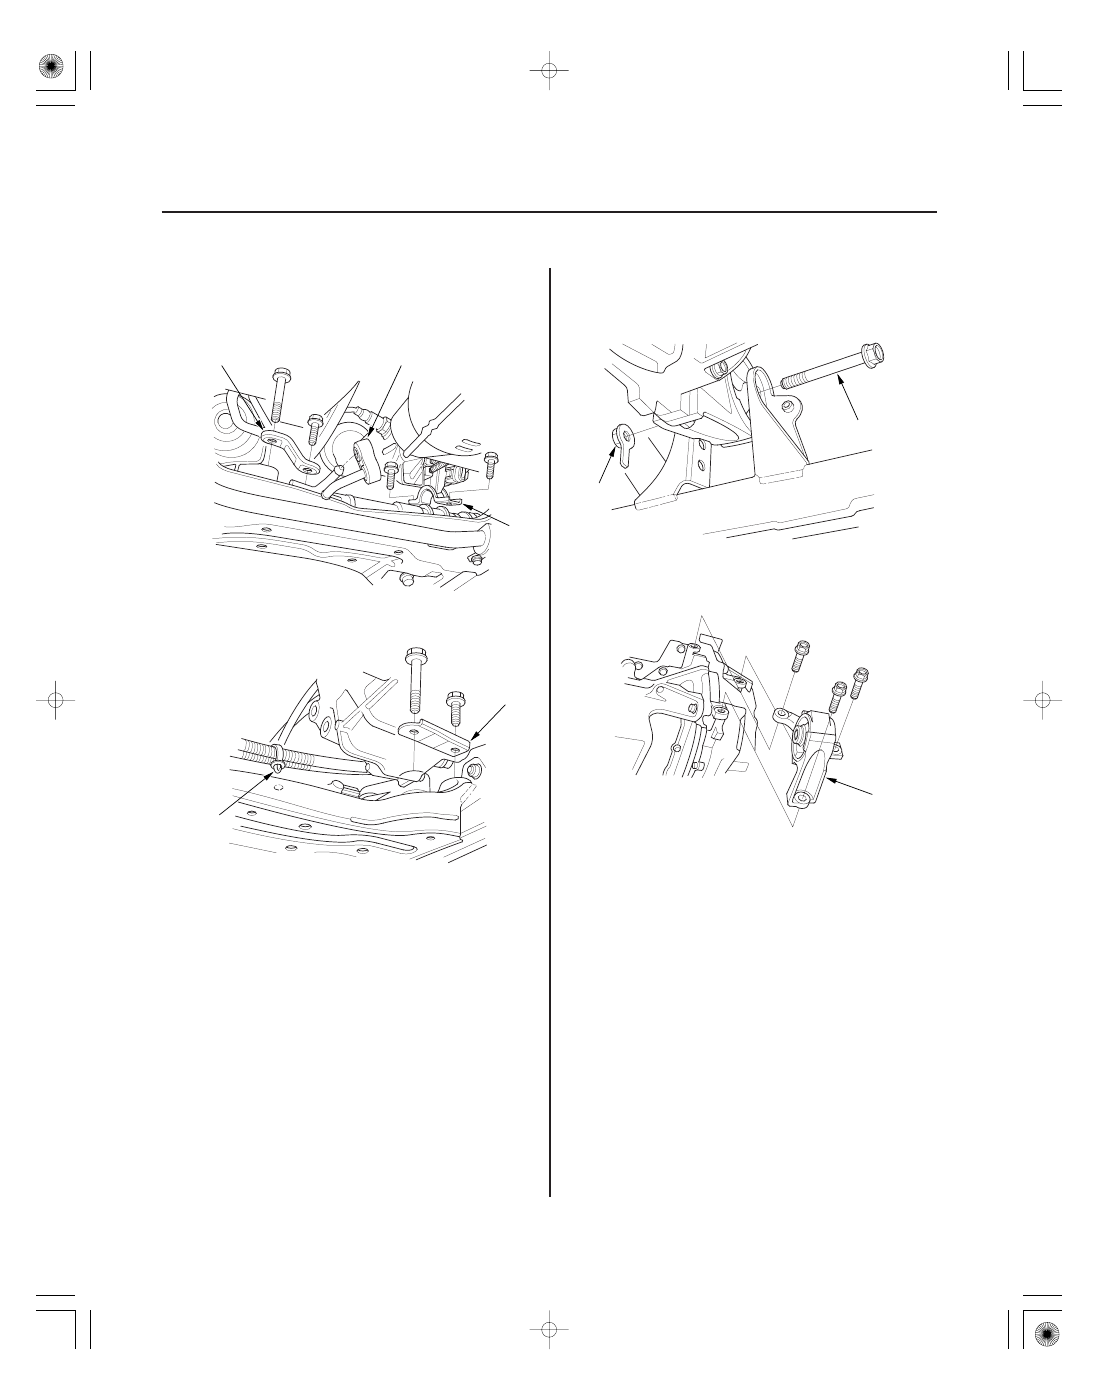
21. Remove the stiffener plate (A) from the left side of

the steering gearbox, and the mounting bracket (B)
from the right side of the steering gearbox.
Disconnect the exhaust mounting rubber (C).

22. Remove the stiffener plate (A) and the harness clip

(B).

23. Remove the front engine mount mounting bolt (A)

and nut (B), then remove the lower radiator hose
from the front engine mount bracket.

24. Remove the front engine mount (A) from the

transmission and the engine.

08/08/21 14:47:22 61SNR030_130_0090

19

20

21

*03

*04

13-89

A

A

B

B

A

B

C

VSB02C000016

A

A

B

A

A

25. Remove the lower torque rod mounting bolt.

26. Remove the middle subframe mounting bolts (A).

27. Note the reference marks (A) on both sides of the

front subframe that lines up with the body (B).

28. Attach the front subframe adapter (VSB02C000016)

to the front subframe, and hang the belt (A) of the
subframe attachment over the front subframe, then
secure the belt with the stop (B).

29. Raise the jack, and line up the slots in the arms with

the bolt holes on the corner of the jack base (C),
then attach them securely.

30. Remove the front subframe mounting bolts (A) and

the front subframe (B).

NOTE: Suspend the steering gearbox with an
appropriate size wire.

08/08/21 14:47:24 61SNR030_130_0091

*05

26

25

Front side

Rear side

13-90

Manual Transmission

31. Pry out the driveshafts inboard joint (see step 8 on

page 16-5).

32. Remove the intermediate shaft (see page 16-23).

33. Remove the clutch cover.

34. Support the transmission with a transmission jack.

35. Remove the transmission mounting bolts.

36. Pull the transmission away from the engine until

the transmission mainshaft clears the clutch
pressure plate.

37. Slowly lower the transmission about 150 mm (6 in.).

Check once again that all hoses and harnesses are
disconnected and free from the transmission, then
lower it completely.

08/08/21 14:47:24 61SNR030_130_0092

01

*01

04

*05

SNR9AA9E34150100000KCAT00

Special Tools Required

Front side

Rear side

13-91

Transmission Installation

A

A

A

12 x 1.25 mm
64 N·m
(6.5 kgf·m,
47 lbf·ft)

12 x 1.25 mm
64 N·m
(6.5 kgf·m, 47 lbf·ft)

• Engine hanger adapter VSB02C000015
• 2006 Civic engine hanger VSB02C000025
• Engine support hanger, A and Reds AAR-T1256
• Front subframe adapter VSB02C000016
These special tools are available through the Acura
Canada Technical Tools Department; FAX
866-398-8665/e-mail: ch_technicaltools

ch.honda.com

NOTE: Use fender covers to avoid damaging painted
surfaces.

1. Loosen the upper torque rod mounting bolt (A).

2. Make sure the two dowel pins (A) are installed in

the clutch housing.

3. Check the release fork and the release bearing, and

reinstall them with appropriate grease (see page
12-24).

4. Place the transmission on the transmission jack,

and raise it to engine level.

5. Install the transmission mounting bolts.

08/08/21 14:47:25 61SNR030_130_0093


Content   ..  213  214  215  216   ..