Snowmobile Polaris Widetrak LX (2014 year). Manual - part 7
29
FEATURES AND CONTROLS
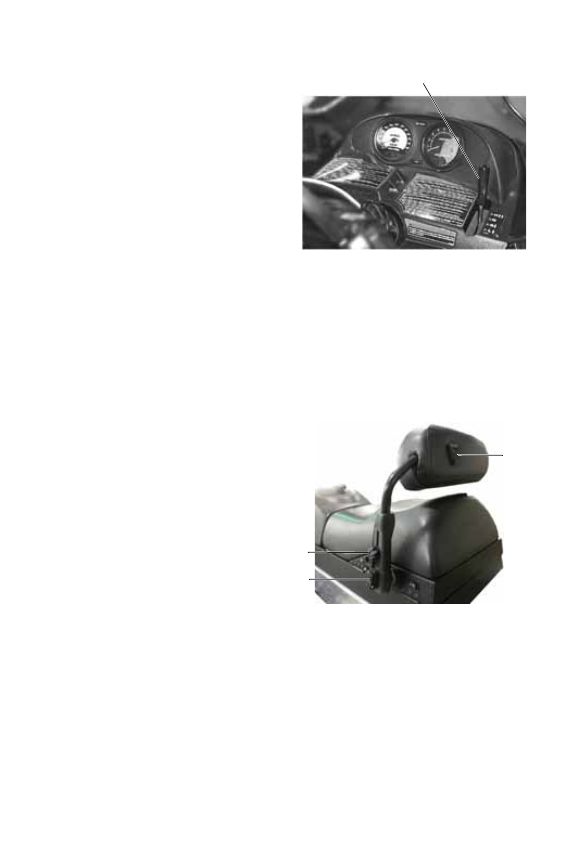
Shifter
For normal operation, place the
transmission in high gear.
Whenever towing or operating
with a heavy load, place the
transmission in low gear. See
page 59.
NOTICE: When operating in low
gear, never exceed 25
MPH (40 km/h). Serious
engine damage may occur.
Backrest
The backrest can be adjusted for rider comfort. Whenever making
adjustments, always make sure all lock levers are securely locked before
operating.
Tip: If an adjustment is difficult after releasing lock levers, rotate the levers to
relieve tension, then make the adjustment.
Height Adjustment
1. Lift the upper lock levers (1)
on both backrest supports to
release the locks.
2. Raise or lower the backrest to
the desired position.
3. Push the lock levers inward to
secure the locks.
Angle Adjustment
1. Lift the lock lever at the
center of the backrest (3).
2. Tilt the backrest forward or
rearward to the desired position.
3. Push the lock lever inward to secure the lock.
Operator/Passenger Conversion
1. Lift the lower lock levers (2) on both backrest supports to release
the locks.
2. Move the backrest forward for operator use or rearward for
passenger use.
3. Push the lock levers inward to secure the locks.
Shifter
1
2
3