Volvo S90 (2019 year). Instruction - part 14


  Index      Volvo     Volvo S90 - instruction 2019 year in english


Search            


Content   ..  12  13  14  15   ..


Volvo S90 (2019 year). Instruction - part 14


KEY, LOCKS AND ALARM

* Option/accessory.

241

Settings for remote and inside door

unlock

Several different sequences are available for
remote unlocking.

1. Tap 

Settings

 in the center display's Top

view.

2. Tap 

My Car

Locking

Remote and

Interior Unlock

.

3. Select alternative:

All Doors

- unlocks all doors at the same time.

Single Door

- unlocks the driver's door. Press the remote
key unlock button twice to unlock all doors.

The settings made here also affect central lock-
ing using the inside door handle.

Related information

Locking and unlocking using the remote key
(p. 240)

Locking and unlocking from inside the vehi-
cle (p. 256)

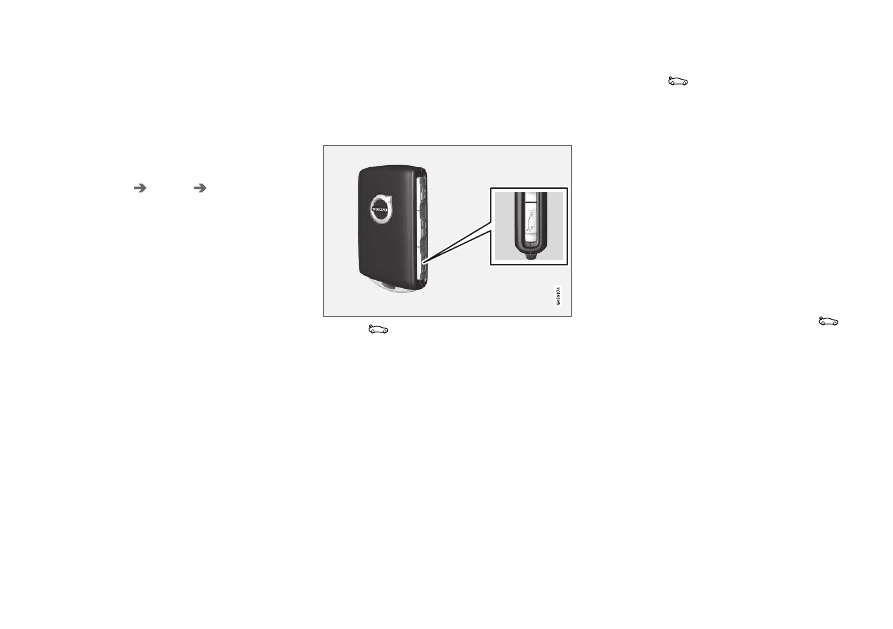
Unlocking the trunk lid using the

remote key

The remote key can be used to unlock only the
trunk lid.

Press the 

 button on the remote key to disarm and

unlock the trunk lid.

1. Press the 

 button on the remote key.

> The lock and alarm indicator on the dash-

board will go out to indicate that the vehi-
cle is no longer fully armed.

The trunk lid will be unlocked but remain
closed. However, the side doors will
remain locked and armed.

Press lightly on the rubberized pressure
plate under the trunk lid handle to open
the trunk lid.

If the trunk lid is not opened within
2 minutes, it will be relocked and the
alarm armed.

2. With the optional power trunk lid* -

Hold and press (about 1.5 seconds) the 
button on the remote key.
> The trunk lid will unlock and open. How-

ever, the side doors will remain locked and
armed.

Related information

Locking and unlocking using the remote key
(p. 240)

KEY, LOCKS AND ALARM

* Option/accessory.

242

Remote key range

In order to function correctly, the remote key
must be within a certain distance from the vehi-
cle.

Manual use

The remote key's functions for e.g. locking and
unlocking, which are activated by pressing 

 or

, have a range of approx. 20 meters (65 feet)

from the vehicle.

If the vehicle's locks do not react, move closer
and try again.

Keyless use

8

The shaded areas around the vehicle illustrate the range
of the system's antennas.

For keyless use, a remote key or the Key Tag
must be within the shaded areas shown in the
illustration, i.e. a semicircle with a radius of
approx. 1.5 meter (5 feet) along the sides of the
vehicle or approx. 1 meter (3 feet) from the trunk
lid.

NOTE

The functions of the remote control key can
be disrupted by ambient radio waves, build-
ings, topographical conditions, etc. The vehi-
cle can always be locked/unlocked using the
key blade.

If the remote key is removed from the
vehicle

If the remote key is removed from the
vehicle while the engine is running, the
warning message 

Vehicle key not

found


Removed from vehicle

 will be

displayed in the instrument panel and an audible
signal will sound when the last door is closed.

The message will disappear when the key is
returned to the vehicle and the O button on the
right-side steering wheel keypad is pressed or
when the last door is closed again.

Related information

Remote key (p. 237)

Antenna locations for the start and lock sys-
tem (p. 255)

Keyless and touch-sensitive surfaces*
(p. 252)

8

Models equipped with keyless locking/unlocking (Passive Entry*) only.

KEY, LOCKS AND ALARM

}}

* Option/accessory.

243

Replacing the remote key's battery

The battery in the remote key must be replaced
when it is discharged.

NOTE

All batteries have a limited service life and
must eventually be replaced (does not apply
for Key Tag). The battery's service life varies
depending on how often the vehicle/key is
used.

The remote key battery should be replaced if:

the information symbol illuminates and
the message 

Vehicle key bat. low

See Owner's manual

 is displayed in

the instrument panel

and/or

the locks do not react after several attempts
to lock or unlock the vehicle using the
remote key within approx. 20 meter (65 feet)
from the vehicle.

NOTE

Move closer to the vehicle and try to unlock it
again.

The battery in the smaller key without buttons

9

(the Key Tag) cannot be replaced. A new key can
be ordered from an authorized Volvo workshop.

CAUTION

An end-of-life Key Tag must be turned in to
an authorized Volvo workshop. The key must
be deleted from the vehicle because it can
still be used to start the vehicle via backup
start.

Opening the key and replacing the
battery

 Hold the remote key with the front side

(with the Volvo logo) facing up and move the
button on the key ring section to the right.
Slide the front cover slightly upward.

 The cover will loosen and can be

removed from the key.

9

This key is provided with vehicles equipped with keyless locking/unlocking (Passive Entry*).

||

KEY, LOCKS AND ALARM

244

 Turn the key over, move the button to the

side and slide the rear cover slightly upward.

 The cover will loosen and can be

removed from the key.

Use a screwdriver or similar object to turn
the battery cover counterclockwise so the
markers point to OPEN.

Remove the cover carefully by pressing e.g. a
fingernail into the indentation.

Pry the cover up.

The battery's positive side (+) faces upward.
Carefully pry out the battery as shown in the
illustration.

CAUTION

Avoid touching new batteries and their con-
tact surfaces with your fingers as this will
impair their function.

Insert a new battery with the positive side (+)
facing upward. Do not touch the contact sur-
faces of the remote key battery.

 Place the edge of the battery downward

into the holder. Slide the battery forward until
it locks into place under the two plastic
catches.

 Press the battery downward until it locks

into place under the upper black plastic
catch.

NOTE

Use batteries with the designation CR2032,
3 V.

KEY, LOCKS AND ALARM

245

NOTE

Volvo recommends that batteries used in the
remote control key satisfy UN Manual of Test
and Criteria, Part III, sub-section 38.3. The
factory installed batteries and batteries
replaced by an authorized Volvo workshop
satisfy the above criterion.

Replace the battery cover and turn it clock-
wise until it points to CLOSE.

 Put the rear cover back into position and

press it down until it clicks into place.

 Slide the cover back.

> A second click indicates that the cover is

correctly positioned and locked into place.

 Turn the remote key over and press the

front cover down until it clicks into place.

 Slide the cover back.

> An additional click indicates that the cover

is correctly in place.

CAUTION

Be sure to dispose of end-of-life batteries in
a way that protects the environment.

WARNING

California Proposition 65

Operating, servicing and maintaining a pas-

senger vehicle can expose you to chemicals

including engine exhaust, carbon monoxide,

phthalates, and lead, which are known to the

State of California to cause cancer and birth

defects or other reproductive harm. To mini-

mize exposure, avoid breathing exhaust, do

not idle the engine except as necessary, serv-

ice your vehicle in a well ventilated area and

wear gloves or wash your hands frequently

when servicing your vehicle. For more infor-

mation go to www.P65Warnings.ca.gov/

passenger-vehicle.

Related information

Remote key (p. 237)

KEY, LOCKS AND ALARM

* Option/accessory.

246

Ordering additional remote keys

Two remote keys are provided with the vehicle.
One Key Tag is also included if the vehicle is
equipped with keyless locking/unlocking*. Addi-
tional keys can be ordered.

A total of 12 keys can be programmed and used
for the same vehicle. An additional driver profile
will be added for each new remote key. This also
applies to the key tag.

Loss of a remote key

If you lose your remote key, you can order a
replacement from a workshop - an authorized
Volvo workshop is recommended. Bring the other
remaining remote keys to the workshop. As an
anti-theft measure, the code of the lost remote
key must be erased from the system.

The current number of keys registered for the
vehicle can be checked via driver profiles in the
center display's Top view. Select 

Settings

System

Driver Profiles

.

NOTE

Volvo recommends that you order a new or
duplicate remote control key from an author-
ized Volvo workshop.

You can also obtain additional or duplicate
remote control keys from certain independent
repair facilities and locksmiths that are quali-
fied to make remote control keys. Each key
must be programmed to work with your vehi-
cle.

A list of independent repair facilities and/or
locksmiths known to Volvo that can cut and
code replacement keys can be found:

on Volvo's website www.volvocars.com/us

by calling Volvo Customer Care
1-800-458-1552.

Related information

Remote key (p. 237)

Red Key - restricted remote key*

A Red Key makes it possible for the vehicle
owner to set limitations for certain vehicle prop-
erties. The limitations are intended to promote
safe use of the vehicle, e.g. when it is loaned
out.

For a Red Key, it is possible to define the vehi-
cle's maximum speed, set speed reminders and
limit the audio system's volume. Several of the
driver support systems will also always be active.
Otherwise, the Red Key functions in the same
way as a standard remote key.

One or more Red Key can be ordered from a
Volvo retailer. A total of twelve keys can be pro-
grammed and used for the same vehicle. Up to
ten may be restricted keys, but at least two must
be standard remote keys.

These restrictions are intended to help reduce
the risk of accidents and help the driver feel more

KEY, LOCKS AND ALARM

* Option/accessory.

247

secure when handing over the vehicle to e.g. a
young driver, parking attendant or workshop. The
settings for a Red Key cannot be changed by its
user; a regular remote key is needed to change
settings.

Related information

Red Key* settings (p. 247)

Remote key (p. 237)

Red Key* settings

The holder of a regular remote key can adjust
settings for a Red Key. Certain driver support
functions are always active.

1. Tap 

Settings

 in the center display's Top

view.

2. Tap 

System

Driver Profiles

Red Key

.

> The following settings can be made:

Set Time Gap For Adaptive Cruise
Control

Reduced Maximum Volume

Max Speed Limit

Speed Limit Warning

Adaptive Cruise Control*:

Default setting: Longest interval

Reduced maximum volume (On/Off):

Default setting: On

Speed Limiter (On/Off):

Setting interval: 50-250 km/h (30-160 mph)

The default setting is 120 km/h (75 mph)

Increments: 1 km/h (1 mph)

The following symbol and message will
be shown in the instrument panel

Red key


Speed limitation cannot

be exceeded

.

Speed reminder (On/Off):

Setting interval: 0-250 km/h (0-160 mph)

Default setting: 50, 70 and 90 km/h (30, 45
and 55 mph)

Increments: 1 km/h (1 mph)

Maximum number of simultaneous remind-
ers: 6

Driver support functions

The following driver support functions will always
be active for a Red Key user:

Blind Spot Information (BLIS)*

Lane Keeping Aid (LKA)*

Distance Alert*

City Safety

Driver Alert Control (DAC)*

Road Sign Information*

Related information

Red Key - restricted remote key* (p. 246)

KEY, LOCKS AND ALARM

* Option/accessory.

248

Detachable key blade

The remote key contains a detachable metal key
blade that can be used to activate a number of
functions and preform certain actions.

A Volvo workshop can provide you with the key
blade's unique code, which is recommended in
case you need to order a new key blade.

Using the detachable key blade

The detachable key blade can be used to:

manually open the left-side front door if cen-
tral locking cannot be activated with the
remote key.

emergency lock all doors.

activate/deactivate the rear door mechanical
child safety locks.

The button-less Key Tag

10

 does not have a

detachable key blade. If needed, use the standard
remote key's detachable key blade.

Detaching the key blade

 Hold the remote key with the front side

(with the Volvo logo) facing up and move the
button on the key ring section to the right.
Slide the front cover slightly upward.

 The cover will loosen and can be

removed from the key.

 Remove the key blade by pulling it up.

Put the key blade back into its designated
spot in the remote key after use.

 Replace the cover by pressing it down

until it clicks into place.

 Slide the cover back.

> An additional click indicates that the cover

is correctly in place.

Related information

Locking and unlocking with detachable key
blade (p. 249)

Remote key (p. 237)

10

Supplied with vehicles equipped with keyless locking/unlocking (Passive Entry*).

KEY, LOCKS AND ALARM

}}

249

Locking and unlocking with

detachable key blade

The detachable key blade can be used to unlock
the vehicle from the outside, e.g. if the battery in
the remote key is discharged.

Unlocking

Pull the front left-hand door handle to its end
position to access the lock cylinder.

Put the key in the lock cylinder.

Turn the key clockwise 45 degrees so that
the key blade is pointing straight rearward.

Turn the key blade back 45 degrees to its
original position. Remove the key from the
lock cylinder and release the handle so that it
returns to its original position against the
vehicle.

5. Pull the door handle.

> The door will open.

Lock the door in the same way, but turn the key
45 degrees counterclockwise in step (3).

Turning off the alarm

NOTE

When the door is unlocked using the detach-
able key blade and then opened, the alarm
will be triggered.

Location of the backup key reader in the cup holder.

Turn off the alarm by:

1. Place the remote control key on the key sym-

bol in the backup reader in the bottom of the
cup holder in the tunnel console.

2. Turn the start knob clockwise and release it.

> The start knob will automatically return to

its original position - the alarm signal will
stop and the alarm will be turned off.

Locking

The vehicle can also be locked using the remote
key's detachable key blade, e.g. if either the vehi-
cle's or remote key's batteries are discharged.

The left-hand front door can be locked by insert-
ing the detachable key into the door's lock cylin-
der.

This is the only door with a lock cylinder. The
other doors have lock mechanisms in the side of
the door that must be pushed in using the key
blade. The door will then be locked mechanically
and cannot be opened from the outside.

The doors can still be opened from inside.

Manual door lock. This is not the child lock.

||

KEY, LOCKS AND ALARM

250

Remove the detachable key blade from the
remote key. Insert the key blade into the
opening for the lock mechanism and push
the key in as far as possible, about 12 mm
(0.5 in).

The door can be opened from both the out-
side and the inside.
The door cannot be opened from the outside.
To return to position A, open the door using
the inside door handle.

The doors can also be unlocked by pressing the
unlock button on the remote key or the central
lock button in the driver's door.

NOTE

The door's lock controls only lock that
specific door, not all doors simultane-
ously.

A manually locked rear door with an acti-
vated manual or electric child safety lock
cannot be opened from either the outside
or inside of the vehicle. A rear door
locked in this way can only be unlocked
using the remote key or the central
unlocking button.

Related information

Detachable key blade (p. 248)

Arming and disarming the alarm (p. 267)

Replacing the remote key's battery (p. 243)

Remote key (p. 237)

Electronic immobilizer

The electronic immobilizer is a start inhibitor that
helps prevent the vehicle from being started by
an unauthorized person.

The vehicle can only be started with the right
remote key.

The following instrument panel error messages
are related to the electronic immobilizer:

Symbol

Message

Meaning

Vehicle key
not found

See
Owner's
manual

Remote key not
recognized during
start. Place the
remote key on the
key symbol in the
cup holder and try
to start the vehicle
again.

KEY, LOCKS AND ALARM

}}

* Option/accessory.

251

Remote immobilizer with tracking
system

11

The vehicle is equipped with a system that makes
it possible to track and locate the vehicle and to
remotely activate the immobilizer to prevent the
vehicle from being started. Contact your nearest
Volvo retailer for more information and assistance
activating the system.

The following instrument panel error messages
are related to the remote immobilizer with track-
ing system:

Symbol

Message

Meaning

Remotely
immobilised

Vehicle not
possible to
start

The remote
immobilizer with
tracking system is
activated. The
vehicle cannot be
started. Contact
Volvo On Call
Service Center.

Related information

Remote key (p. 237)

Ordering additional remote keys (p. 246)

Start and lock system type

designations

The following information contains type designa-
tions for the start and lock system.

Alarm system

USA FCC ID: MAYDA 5823(3)

This device complies with part 15 of the FCC
rules. Operation is subject to the following condi-
tions: (1) This device may not cause harmful
interference, and (2) this device must accept any
interference received, including interference that
may cause undesired operation.

Canada IC: 4405A-DA 5823(3)

This device is subject to the following conditions:
(1) this device may not cause interference, and
(2) this device must accept any interference,
including interference that may cause undesired
operation of the device.

Remote keys (Passive entry/Passive
start*)

USA

Volvo Standard Key FCC ID: YGOHUF8423

Volvo Tag ID FCC ID: YGOHUF8432

This device complies with part 15 of the FCC
rules. Operation is subject to the following two
conditions:

(1) This device may not cause harmful interfer-
ence, and

(2) this device must accept any interference
received, including interference that may cause
undesired operation.

Any changes or modification not expressly
approved by the party responsible for compliance
could void the user's authority to operate this
equipment.

Canada

Volvo Standard Key IC: 4008C-HUF8423

Volvo Tag ID IC: 4008C-HUF8432

This device complies with Industry Canada
license-exempt RSS standards. Operation is sub-
ject to the following two conditions:

(1) This device may not cause harmful interfer-
ence, and (2) this device must accept any inter-
ference received, including interference that may
cause undesired operation.

Immobilizer and Passive entry/Passive
start* systems

USA-FCC ID: LTQVO3134

This device complies with part 15 of the FCC
rules. Operation is subject to the following two
conditions:

11

Only certain markets and in combination with Volvo On Call*.

||

KEY, LOCKS AND ALARM

* Option/accessory.

252

(1) This device may not cause harmful interfer-
ence, and

(2) this device must accept any interference
received, including interference that may cause
undesired operation.

Any changes or modification not expressly
approved by the party responsible for compliance
could void the user's authority to operate this
equipment.

Canada-IC:3659A-VO3134

This device complies with Industry Canada
license-exempt RSS standards. Operation is sub-
ject to the following two conditions:

(1) This device may not cause harmful interfer-
ence, and (2) this device must accept any inter-
ference received, including interference that may
cause undesired operation.

Related information

Remote key (p. 237)

Keyless and touch-sensitive

surfaces*

If the vehicle is equipped with keyless locking
and unlocking, it is only necessary to have the
remote key within range, e.g. in a pocket or bag,
which makes it easier to open the vehicle if your
hands are full.

Pressure-sensitive surfaces

Door handle

There are indentations on the outside of the
outer door handles for locking, and pressure-sen-
sitive surfaces on the inside of the handles for
unlocking.

Pressure-sensitive indentation for locking

Pressure-sensitive surface for unlocking

NOTE

It is important that only one pressure-sensi-
tive surface is activated at a time. If the han-
dle is grasped at the same time as the lock
area is pressed, there is a risk that double
commands may be sent. This may cause the
requested action (locking/unlocking) to be
delayed or not performed at all.

Trunk lid

The trunk lid handle has a rubberized pressure
plate that can only be used for unlocking.

NOTE

Please be aware that the system could be
activated in a car wash if the remote key is
within range.

KEY, LOCKS AND ALARM

}}

* Option/accessory.

253

Related information

Keyless locking and unlocking* (p. 253)

Keyless trunk lid unlock* (p. 255)

Keyless locking and unlocking*

The vehicle can be locked or unlocked from out-
side using the door or trunk lid handles if the
vehicle is equipped with keyless locking/unlock-
ing (Passive Entry)*.

NOTE

One of the vehicle's remote keys must be
within range for locking and unlocking to be
possible.

Pressure-sensitive indentation for locking

Pressure-sensitive surface for unlocking

Rubberized pressure plate on the trunk lid used only for
unlocking.

NOTE

Please be aware that the system could be
activated in a car wash if the remote key is
within range.

||

KEY, LOCKS AND ALARM

* Option/accessory.

254

Keyless locking

All of the doors have to be closed before the
vehicle can be locked. However, the trunk lid can
be open when a door handle is used for locking.

To lock, touch the marked area on the out-
side of one of the door handles after the
door is closed or press the button on the
lower edge of the trunk lid

12

 before it is

closed.
> The lock indicator light in the windshield

will flash to confirm that the vehicle is
locked.

To close all door windows at the same time -
place your finger on the pressure-sensitive
indentation on the outside of the door handle and
hold it there until the side windows have closed.

Locking when the trunk lid is open

NOTE

If the vehicle is locked and the trunk lid is still
open, make sure that the remote key is not
left in the trunk when the trunk lid is closed
and the entire vehicle is locked.

If the key is detected in the vehicle, the trunk
lid will not lock when it is closed.

Keyless unlocking

To unlock, grasp a door handle or press the
rubberized pressure plate on the underside
of the trunk lid handle.
> The lock indicator light in the windshield

will go out to confirm that the vehicle is
unlocked. Open the doors or trunk lid as
usual.

Automatic relocking

If none of the doors or trunk lid are opened within
two minutes after being unlocked, they will auto-
matically relock. This function reduces the risk of
inadvertently leaving the vehicle unlocked.

Related information

Keyless unlock settings* (p. 254)

Keyless trunk lid unlock* (p. 255)

Keyless and touch-sensitive surfaces*
(p. 252)

Keyless unlock settings*

Several different sequences are available for
keyless unlocking.

1. Tap 

Settings

 in the center display's Top

view.

2. Tap 

My Car

Locking

Keyless Unlock

3. Select alternative:

All Doors

- unlocks all doors at the same time.

Single Door

- unlocks the selected door.

Related information

Keyless locking and unlocking* (p. 253)

Keyless and touch-sensitive surfaces*
(p. 252)

12

Applies to vehicles with power trunk lid.

KEY, LOCKS AND ALARM

}}

* Option/accessory.

255

Keyless trunk lid unlock*

The trunk lid can be opened using the remote
key. The key only needs to be within range, e.g.
in a pocket or bag.

The trunk lid is held closed by an electronic lock-
ing mechanism.

To open the tailgate:

1. Lightly press the rubberized pressure plate

on the underside of the trunk lid handle.
> The lock will disengage.

NOTE

One of the vehicle's remote keys must be
within range behind the vehicle for unlocking
to be possible.

2. Lift the outer handle to fully open the trunk

lid.

CAUTION

Only light pressure on the rubberized pres-
sure plate is necessary to release the
trunk lid's locking mechanism.

Use the handle to lift the trunk lid and do
not apply force to the rubberized pressure
plate. Too much force can damage the
pressure plate's electrical connections.

Hands-free opening of the trunk lid is also possi-
ble using a foot movement under the rear
bumper; see the separate section.

WARNING

Do not drive with the trunk lid open. Toxic

exhaust fumes can be sucked into the vehicle

through the trunk.

Related information

Opening and closing the trunk lid with foot
movement* (p. 263)

Keyless and touch-sensitive surfaces*
(p. 252)

Remote key range (p. 242)

Antenna locations for the start and

lock system

The vehicle is equipped with a keyless start and
lock system

13

 that uses a number of integrated

antennas positioned throughout the vehicle.

Location of the antennas.

Under the cup holder in the front section of
the tunnel console
In the upper front section of the left-side rear
door

14

In the upper front section of the right-side
rear door

14

In the trunk

14

||

KEY, LOCKS AND ALARM

* Option/accessory.

256

WARNING

Individuals with an implanted pacemaker

should not allow the pacemaker to come

closer than 22 cm (9 in.) to the Keyless sys-

tem antennas. The aim of this is to prevent

disturbances between the pacemaker and the

Keyless system.

Related information

Keyless and touch-sensitive surfaces*
(p. 252)

Remote key range (p. 242)

Locking and unlocking from inside

the vehicle

The doors and trunk lid can be locked and
unlocked from inside the vehicle using the cen-
tral lock buttons in the front doors. The lock but-
tons in the rear doors* can be used to lock/
unlock that particular door.

Central locking

Button with indicator light for locking and unlocking in
front door.

Unlocking using the front door buttons

Press the 

 button to unlock all side doors

and the trunk lid.

Alternative unlocking method

Alternative unlocking method using side door opening
handle

15

.

Pull either of the side door inside opening
handles and release.
> Depending on the remote key settings,

either all doors will be unlocked or just the
selected door will be unlocked and
opened.

To change this setting, tap 

Settings

My Car

Locking

Remote and

Interior Unlock

 in the Top view of the

center display.

13

The keyless lock system only applies to vehicles equipped with keyless locking and unlocking (Passive Entry*).

14

Only in vehicles equipped with keyless locking and unlocking (Passive Entry*).

15

The illustration is generic - details may vary according to vehicle model.


Content   ..  12  13  14  15   ..