Volkswagen Golf / Golf GTI / Golf Variant. Manual - part 852
9 - Bolt
❑ Replace after removal
6.2
Shock Absorber, Removing and Instal‐
ling
⇒ “6.2.1 Shock Absorber, Removing and Installing, Torsion Beam
Axle”, page 193
⇒ “6.2.2 Shock Absorber, Removing and Installing, Multi-Link
Suspension, Left Shock Absorber”, page 195
⇒ “6.2.3 Shock Absorber, Removing and Installing, Multi-Link
Suspension, Right Shock Absorber”, page 197
6.2.1
Shock Absorber, Removing and Instal‐
ling, Torsion Beam Axle
Special tools and workshop equipment required
♦ Torque Wrench 1332 40-200Nm - VAG1332-
♦ Torque Wrench 1410 - VAG1410-
♦ Spring Compressor Kit - Spring Tensioner - VAG1752/1-
♦ Spring Compressor Kit - Spring Retainer with Inserts -
VAG1752/3A-
Caution
This procedure contains mandatory replaceable parts. Refer
to component overview prior to starting procedure.
Mandatory Replacement Parts
♦ Bolts - Shock Absorber to Body
♦ Bolts - Shock Absorber to Axle Beam
Removing
– Loosen the wheel bolts.
– Raise the vehicle.
– Remove the wheel.
– Remove the rear wheel housing liner. Refer to ⇒ Body Exte‐
rior; Rep. Gr. 66 ; Wheel Housing Liner; Rear Wheel Housing
Liner, Removing and Installing .
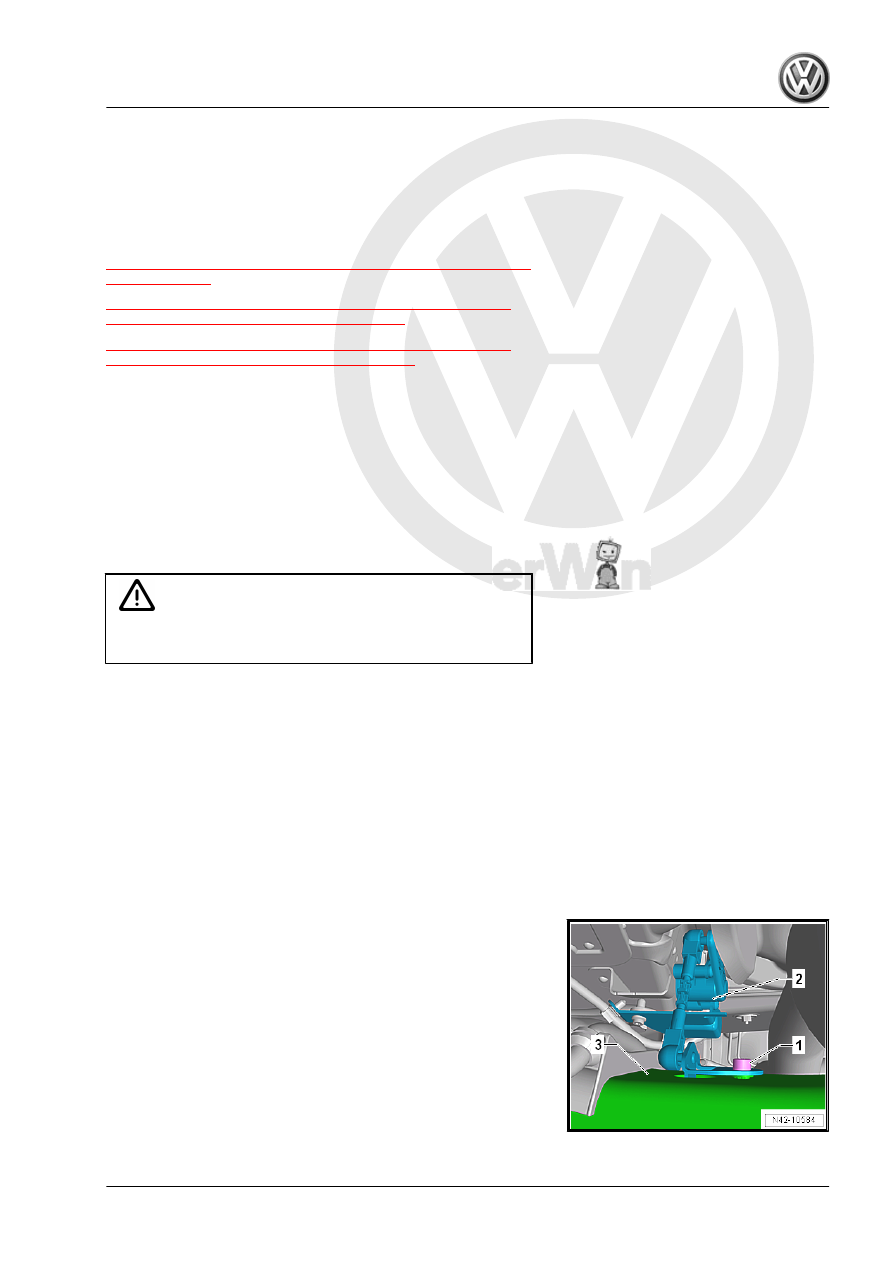
Vehicles with a Vehicle Level Sensor
– Remove the bolt -1-.
– Remove the lever of the Left Rear Level Control System Sen‐
sor - G76- -2- from the axle beam -3-