Volkswagen Golf / Golf GTI / Golf Variant. Manual - part 442


  Index      Volkswagen     Volkswagen Golf / Golf GTI / Golf Variant - service repair manual 2013 year


Search            copyright infringement  


Content   ..  440  441  442  443   ..


Volkswagen Golf / Golf GTI / Golf Variant. Manual - part 442


– Separate the backrest cover and backrest cushion. Refer to

⇒ “1.7 Backrest Cover and Cushion, Separating”, page 410

 .

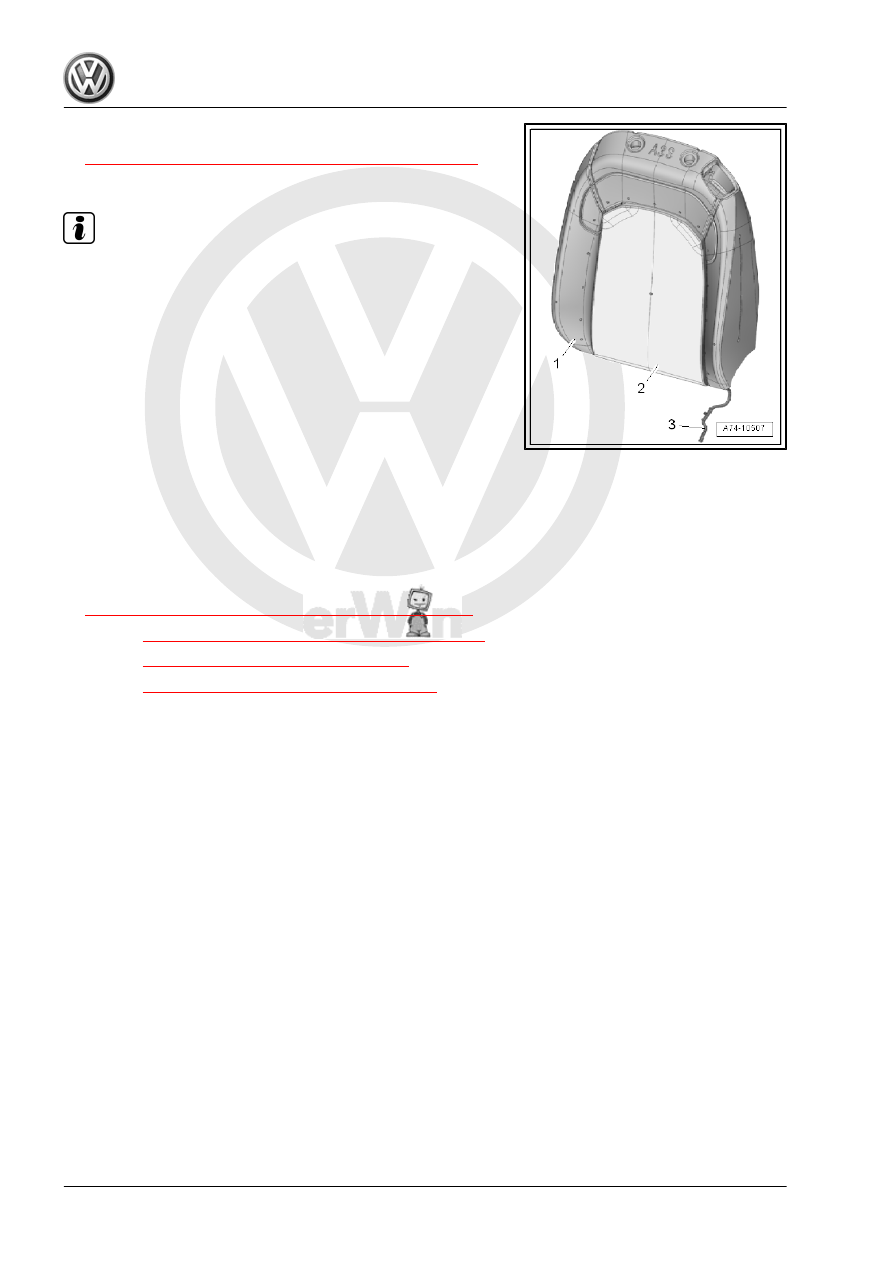
– Cut the wire -3- directly from the old heating element -2-.

Note

The old heating elements remain on the backrest cushion -1- and

will be covered over by the new heating elements.

Installing
Install in reverse order of removal while paying attention to the

following:
– Guide the wire -3- through the wiring guide.
– Align the new heating elements on the backrest cushion while

not pulling off the protective film.

– Remove protective films from the heating elements in succes‐

sion, taking care not to damage the heating elements.

– Glue the heating elements so that they align with the old heat‐

ing elements and are free of wrinkles.

– Route the connections to the individual heating elements in

the base of the gaps.

Tightening Specifications
♦ Refer to

⇒ “1.2 Overview - Backrest Cover and Cushion”, page 403

♦ Refer to 

⇒ “1.3 Overview - Seat Heating Element”, page 404

♦ Refer to 

⇒ “2.2 Overview - Front Seat”, page 318

♦ Refer to 

⇒ “2.4 Overview - Front Backrest”, page 323

2

Rear Seat Covers and Cushions

⇒ “2.1 Overview - Bench Seat Cover and Cushion”, page 417
⇒ “2.2 Overview - Rear Seat Backrest Cover and Cushion”, page

418
⇒ “2.3 Bench Seat Cover and Padding, Removing and Installing”,

page 419
⇒ “2.4 Rear Seat Backrest Cover and Cushion, Removing and

Installing”, page 419
⇒ “2.5 Center Cushion, Removing and Installing, Backrest with

Pass-Through”, page 422
⇒ “2.6 Bench Seat Cover and Cushion, Separating”, page 422
⇒ “2.7 Rear Seat Backrest Cover and Cushion, Separating”, page

423

2.1

Overview - Bench Seat Cover and Cushion

1 - Seat Frame
2 - Seat Cushion

❑ Allocation. Refer to the

Parts Catalog.

❑ Seat cover and cushion,

removing and installing.

Refer to

⇒ “2.3 Bench Seat Cov‐

er and Padding, Remov‐

ing and Installing”, page

419

 .

❑ Separate the seat cover

from the seat cushion.

Refer to

⇒ “2.6 Bench Seat Cov‐

er and Cushion, Sepa‐

rating”, page 422

 .

3 - Upholstery Clip

❑ For attachment of the

seat cover to the seat

cushion

❑ Replace after removing
❑ Install at the same loca‐

tion with Upholstery Clip

Pliers - VAG1634- .

4 - Seat Cover

❑ Different equipment lev‐

els

❑ Allocation. Refer to the

Parts Catalog.

❑ Seat cover and cushion,

removing and installing.

Refer to

⇒ “2.3 Bench Seat Cov‐

er and Padding, Remov‐

ing and Installing”, page

419

 .

❑ Separate the seat cover from the seat cushion. Refer to

⇒ “2.6 Bench Seat Cover and Cushion, Separating”, page 422

 .

❑ Make sure there are no folds after installing

5 - Molding

❑ Sewn into seat cover
❑ For engaging the seat cover in the seat frame

2.2

Overview - Rear Seat Backrest Cover and Cushion

1 - Backrest Cover

❑ Different equipment lev‐

els

❑ Allocation. Refer to the

Parts Catalog.

❑ Backrest cover and

cushion, removing and

installing. Refer to

⇒ “2.4 Rear Seat Back‐

rest Cover and Cushion,

Removing and Instal‐

ling”, page 419

 .

❑ Backrest cover and

backrest cushion, sepa‐

rating. Refer to

⇒ “2.7 Rear Seat Back‐

rest Cover and Cushion,

Separating”, page 423

 .

❑ Make sure there are no

folds after installing

2 - Upholstery Clip

❑ For attachment of back‐

rest cover to backrest

cushion

❑ Replace after removing
❑ Install at the same loca‐

tion with Upholstery Clip

Pliers - VAG1634- .

3 - Backrest Cushion

❑ Allocation. Refer to the

Parts Catalog.

❑ Backrest cover and

cushion, removing and

installing. Refer to

⇒ “2.4 Rear Seat Back‐

rest Cover and Cushion,

Removing and Installing”, page 419

 .

❑ Backrest cover and backrest cushion, separating. Refer to

⇒ “2.7 Rear Seat Backrest Cover and Cushion, Separating”, page 423

 .

4 - Backrest Frame
5 - Clamping Strip

❑ Sewn into backrest cover
❑ For attaching the backrest cover on the backrest frame

2.3

Bench Seat Cover and Padding, Re‐

moving and Installing

Removing
– Remove the rear bench seat. Refer to

⇒ “3.7 Bench Seat/Single Seat, Removing and Installing”,

page 382

 .

– Disengage the seat cover molding -3- around the seat frame.
– Disengage the seat cover molding -1- at the seat belt latch

openings.

– Remove the seat cover -2- with the seat cushion from the seat

frame.

Caution

Do not damage the seat cover.

♦ Do not pull on the seat cover. The seat cover can rip.

Installing
Install in reverse order of removal while paying attention to the

following:
– After installing, make sure the seat cover is free of folds.

2.4

Rear Seat Backrest Cover and Cushion,

Removing and Installing

Special tools and workshop equipment required
♦ Trim Removal Wedge - 3409-
♦ Wedge Set - T10383-
Removing
– Remove the rear seat backrest. Refer to

⇒ “3.8 Rear Seat Backrest, Removing and Installing”,

page 384

 .

– Remove the rear headrest. Refer to

⇒ “3.14 Headrest, Removing and Installing”, page 390

 .

– Remove the locking mechanism trim. Refer to

⇒ “3.9 Locking Mechanism Trim, Removing and Installing”,

page 386

 .

– Loosen the clips -2- from the backrest cover -1- near the inner

mounting pins.


Content   ..  440  441  442  443   ..