Volkswagen Golf / Golf GTI / Golf Variant. Manual - part 303


  Index      Volkswagen     Volkswagen Golf / Golf GTI / Golf Variant - service repair manual 2013 year


Search            copyright infringement  


Content   ..  301  302  303  304   ..


Volkswagen Golf / Golf GTI / Golf Variant. Manual - part 303


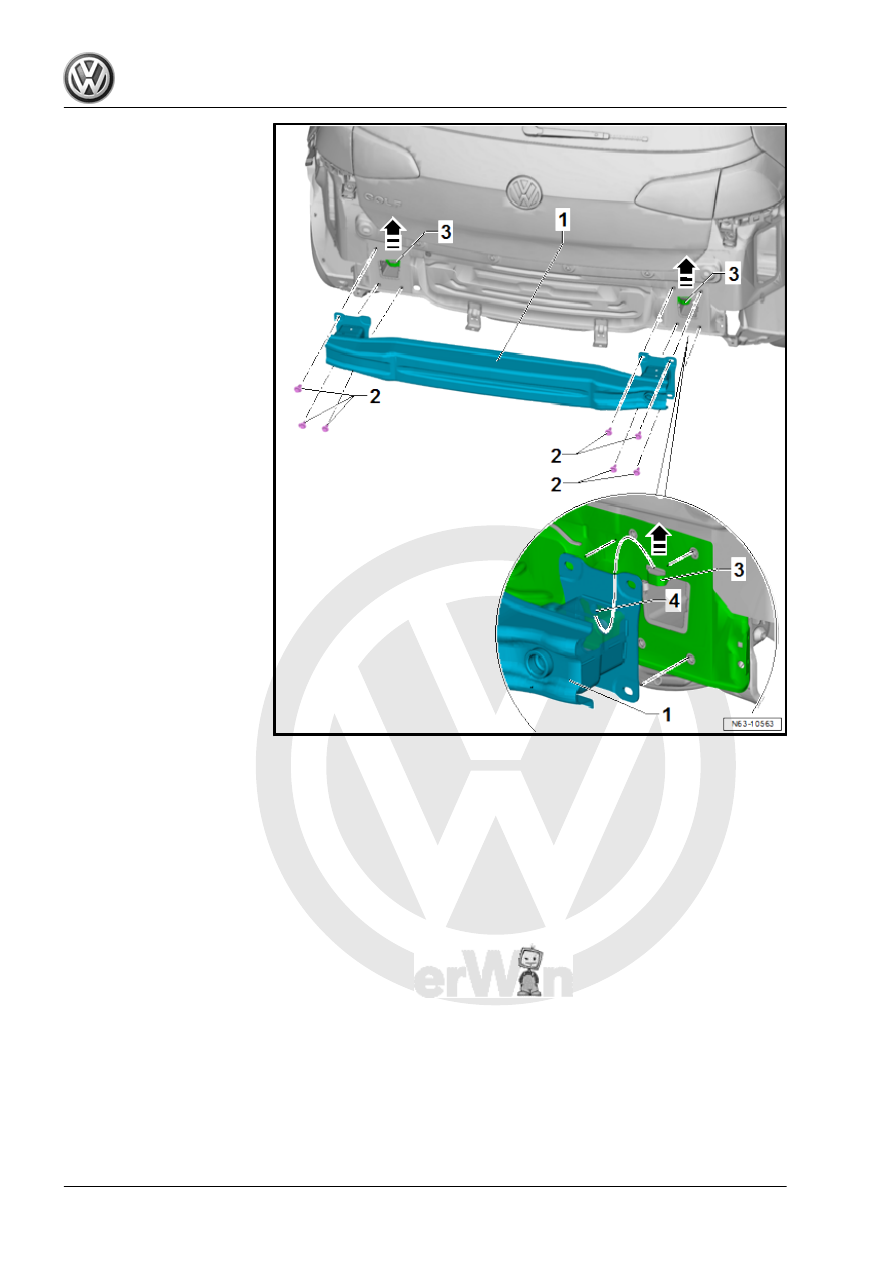
– Remove the bolts -2-.
– Lift the impact member -1- upward in direction of -arrows- from

the tabs -3- in the cross panel.

Installing

– Guide the impact member -1- with the guides -4- from above

downward in direction of -arrows- into the tabs -3- in the cross

panel.

– Tighten the screws -2-.
Tightening Specifications

2.7

Bumper Cover, Servicing

Note

If the bumper cover is damaged, first determine if it is possible to

repair the plastic before installing a new cover.

Refer to ⇒ General Information; Body Repairs, Body Collision

Repair ; Plastic Repair Methods for the description.

2.8

Parking Aid Bracket, Installing

Special tools and workshop equipment required
♦ PDC Holder Tool Set - VAS6614B-
♦ Hand Cartridge Gun - VAS5155-

Materials

Note

For material part numbers. Refer to the Parts Catalog.

♦ 2K plastic adhesive 

1)


2)

♦ Plastic adhesive 

1)

♦ Cleaning Solution 

1)

♦ Primer applicator 

1)

1)

 Follow the manufacturer's instructions provided in the packag‐

ing.

2)

 Note the minimum curing time. Refer to 

⇒ page 349

 .

Bracket, Installing

Note

After the bumper cover is painted, install the brackets.

The four markings for the bracket -1- are found on the inside of

the bumper cover.
– Determine the central point -2-, if not already present.
– Drill the holes from the inside outward with the drill -3- supplied

in the tool kit.

– Position the hole stamper with the bolt head -1-, washer -2-

and counterholder -3- on the inside of the bumper cover -5-.

– Position the iron punch -4- almost up to the bumper cover.
– Push the iron punch -4- onto the bumper cover.
– Tighten the hole stamper -1-.

Note

The iron punch -4- must not rotate on the bumper cover paint.

– By turning at the bolt head -1-, the iron punch -4- is pulled

through the bumper cover material -5- in direction of

-arrows-.

– Remove the hole stamper and stamp the next holes.


Content   ..  301  302  303  304   ..