Content .. 1011 1012 1013 1014 ..
Volkswagen Golf / Golf GTI / Golf Variant. Manual - part 1013
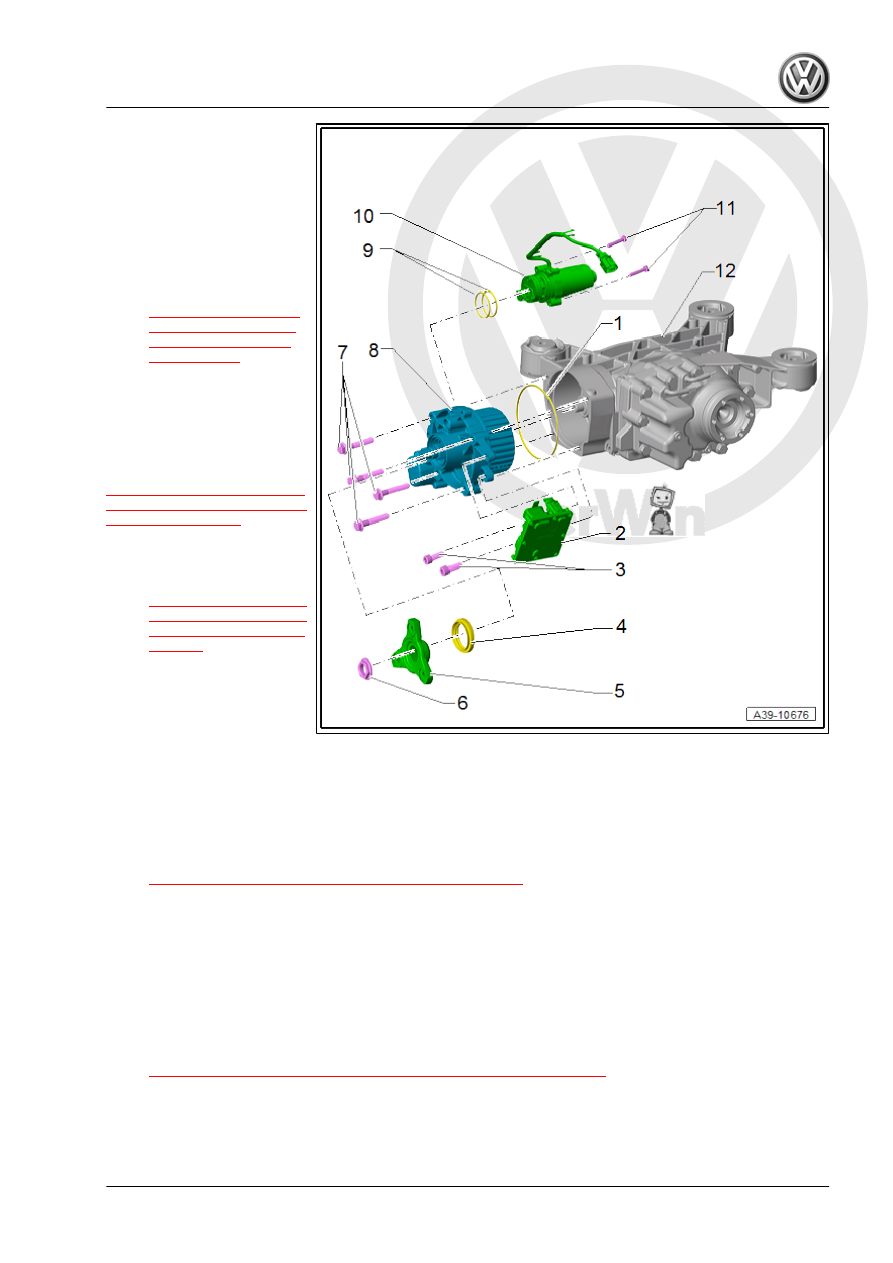
1 - O-Ring
❑ Coat with High Perform‐
ance Haldex Clutch Oil
and insert
❑ After removing replace
the Haldex Clutch
2 - All Wheel Drive Control
Module - J492-
❑ Removing and instal‐
ling, refer to
3 - Bolts
❑ 9.5 ± 0.5 Nm
❑ Quantity: 2
4 - Flange/Driveshaft Seal
Replacing, refer to
Axle Seal on Rear Final Drive,
5 - Flange/Driveshaft
❑ Removing and instal‐
ling, refer to
6 - Nut
❑ 210 Nm
❑ Replace after removing
❑ Secure using Locking
Compound - D 000 600- .
7 - Bolts
❑ 50 Nm
❑ Quantity: 4
8 - Haldex Clutch Housing
❑ Haldex clutch, removing and installing, refer to
⇒ “8.4 Haldex Clutch, Removing and Installing”, page 48
9 - O-Ring
❑ Quantity: 2
❑ Diameter 43.5 mm
❑ For Haldex Clutch Pump - V181-
❑ Coat with High Performance Haldex Clutch Oil and insert
❑ Always replace.
10 - Haldex Clutch Pump - V181-
❑ Removing and installing, refer to
⇒ “8.3 Haldex Clutch Pump V181 Removing and Installing”, page 46
11 - Bolt
❑ 9.5 ± 0.5 Nm
❑ Quantity: 2
Golf 2015 ➤
Rear Final Drive - Edition 09.2013
8. Haldex Clutch
45