Content .. 1000 1001 1002 1003 ..
Volkswagen Golf / Golf GTI / Golf Variant. Manual - part 1002
00 – General, Technical Data
1
Identification
(Edition 09.2013)
⇒ “1.1 Final Drive Identification”, page 1
1.1
Final Drive Identification
⇒ “1.1.1 Final Drive Identification 0CQ”, page 1
1.1.1
Final Drive Identification 0CQ
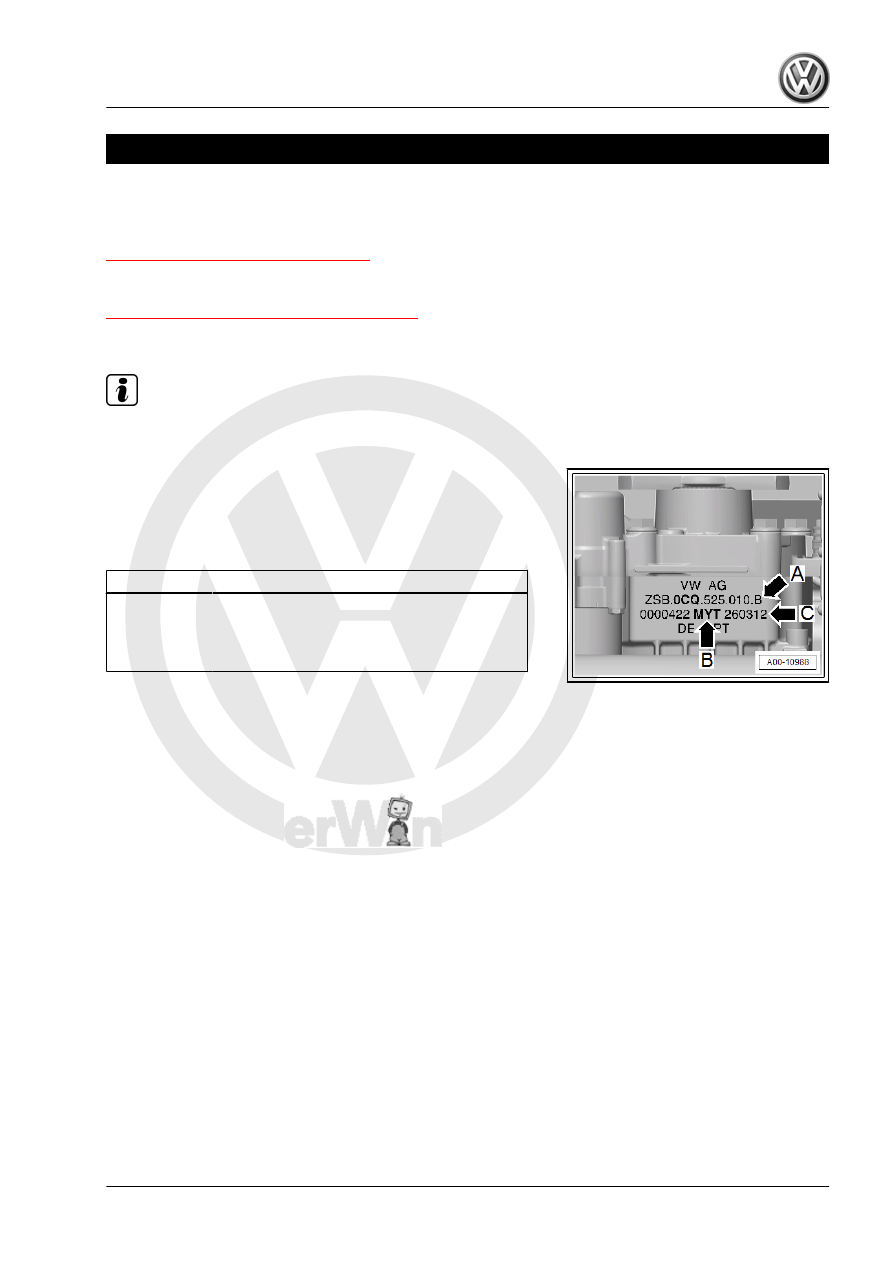
Note
The ID on the “bottom side” of the final drive identifies which final
drive is installed.
Example of the Identification:
-Arrow A- Final drive part number
-Arrow B- Final drive code letters
-Arrow C- Final drive build date
MYT
26
03
12
I
I
I
I
I
I
I
I
Code letters
Day
Month
Production year
-2012-
Golf 2015 ➤
Rear Final Drive - Edition 09.2013
1. Identification
1