Volkswagen Golf / Golf GTI / Golf Variant. Manual - part 39
4.5.2
Tail Lamp, Removing and Installing,
Wagon
The removal and installation is described for the left side. Re‐
moving and installing on the right side is identical.
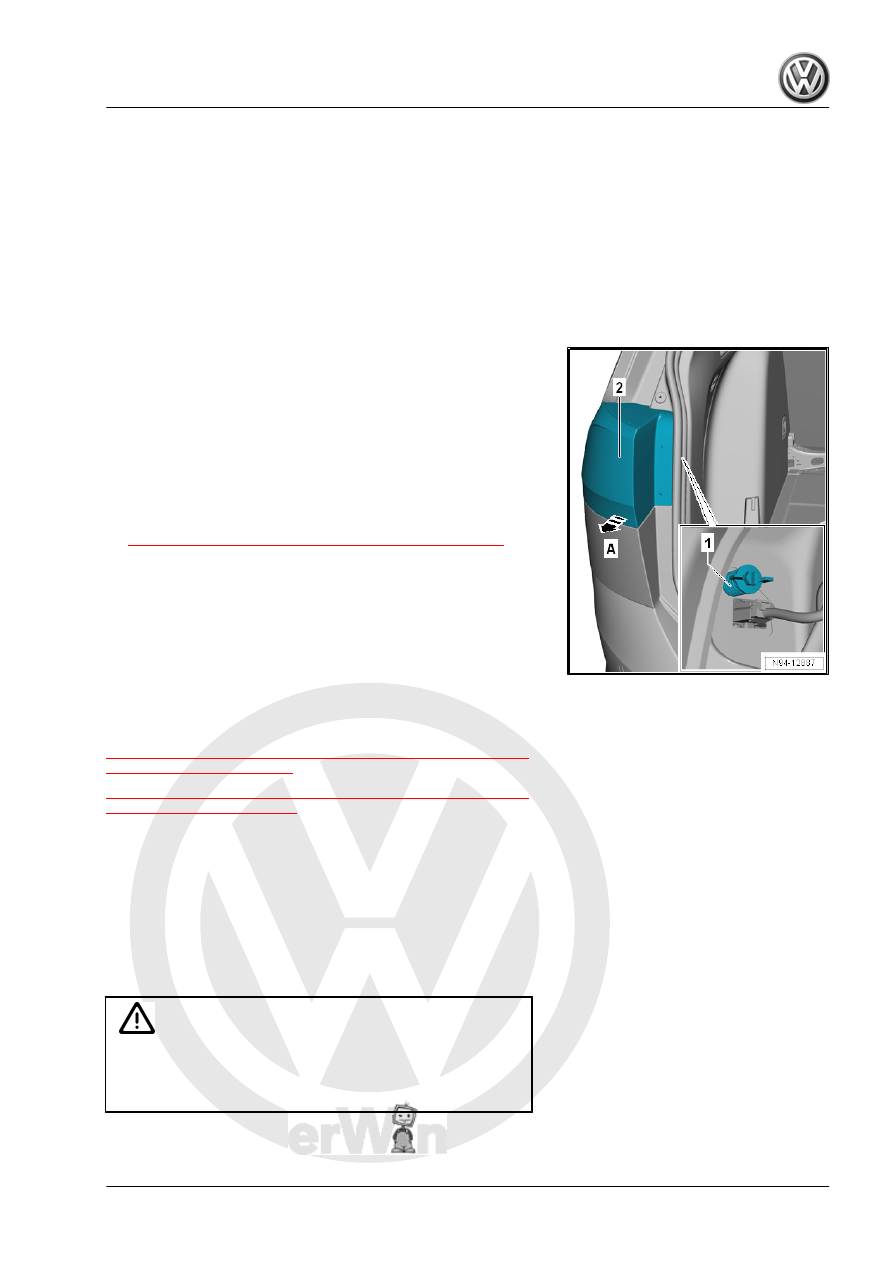
Removing
– Turn off the ignition and all electrical equipment.
– Remove the ignition key, if equipped.
– Open the cover in the luggage compartment side trim panel.
– Disconnect the connector.
– Remove the fastening element -1-.
– Remove the tail lamp -2- in the direction of the -arrow A-.
Installing
Install in the reverse order of removal while paying attention to
the following:
– Perform a function test.
Tightening Specifications
♦ Refer to
⇒ “4.1.3 Overview - Body Tail Lamps, Wagon”, page 136
4.6
Right and Left Tail Lamp Bulb - M2- / -
M4- , Removing and Installing
⇒ “4.6.1 Right and Left Tail Lamp Bulb M2 / M4 , Removing and
Installing, Sedan”, page 145
⇒ “4.6.2 Right and Left Tail Lamp Bulb M2 / M4 , Removing and
4.6.1
Right and Left Tail Lamp Bulb - M2- / -
M4- , Removing and Installing, Sedan
The removal and installation is described for the left side. Re‐
moving and installing on the right side is identical.
Removing
– Turn off the ignition and all electrical equipment.
– Remove the ignition key, if equipped.
Caution
Risk of damaging the component surfaces.
♦ When positioning a prying tool, put commercially available
adhesive tape over the component in the visible area.
– If necessity insert a narrow screwdriver in the opening on the
side.