Volkswagen Golf / Golf GTI / Jetta. Manual - part 717


  Index      Volkswagen     Volkswagen Golf / Golf GTI / Jetta - service repair manual 1999-2005 year


Search            copyright infringement  


Content   ..  715  716  717  718   ..


Volkswagen Golf / Golf GTI / Jetta. Manual - part 717


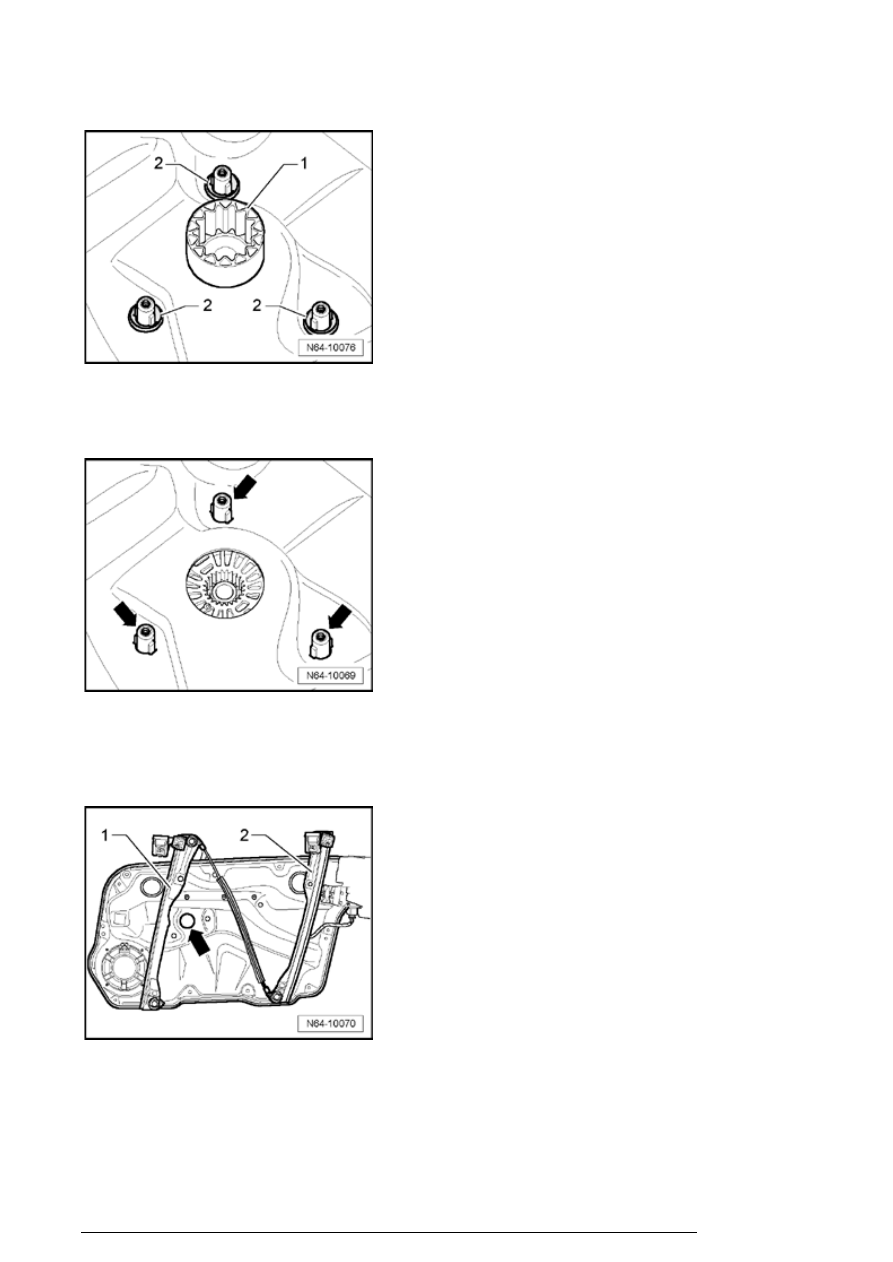
- Remove transfer element for cable reel - 1 - 


Continued for all vehicles

- Press together retaining clamps of threaded sleeves  
arrows - 

- Remove cable reel from carrier assembly. 

- Clean guide rails - 1 - and - 2 - as well as insertion 
opening - arrow - of grease and dirt. 

Installing


Door windows

13/2/2005


- Insert threaded sleeves - arrows - of new cable reel 
through openings in carrier assembly. 

- Cut and remove both cable ties on cable reel.  

- Press cable reel - 1 - into carrier assembly using light 
pressure. 

Note: 

Do not remove securing plate - 2 - from cable reel.  
 

- Route Bowden cable with long sheathing - 3 - under 
diagonal Bowden cable - 4 - 

- Guide sheathing of Bowden cables into cable reel  - 1 - - 
arrows - 

- Guide Bowden cable with short sheathing into Bowden 
cable mount of front guide rail. 


Do not thread Bowden cable onto relay pulley yet.

- Guide Bowden cable with long sheathing into Bowden 
cable mount of rear guide rail. 


Do not insert Bowden cable onto relay pulley yet.

Note: 

Door windows

13/2/2005


Ends of Bowden cable must be located in vicinity of upper 
side of window regulator because clamping brackets can 
only be installed on guide rails in topmost position. If 
necessary, pull Bowden cable slightly out of cable reel.   


Installation of coupling plate with clamping brackets

- Connect coupling plate with clamping brackets sideways 
onto guide rail. Clamping brackets must face toward upper 
side of window regulator. 

- Insert crimped Bowden cable ends into coupling plate  - 3 - 

- First insert Bowden cable - 1 - coming from below into 
upper, deep groove. 

- Next, insert Bowden cable - 2 - coming from above into 
lower, shallow groove. 

Note: 

Bowden cables must not cross.  
 

- Fold up coupling plate with clamping brackets - 1 - in 
direction of - arrow - toward guide rail - 2 - 

- Install second coupling plate with clamping brackets - 1 - 

Door windows

13/2/2005


as described. 


Thread in Bowden cable onto relay pulley

- Check 4 ends of Bowden cable sheathings for correct 
seating in mounts - arrow - 

- Route Bowden cable - 1 - onto eccentric washer of relay 
pulleys - 2 - as depicted in illustration. 

- All eccentric washers must be rotate to lowest height, 
otherwise it is very difficult to install Bowden cable onto last 
relay pulley. 

- Remove securing plate - 2 - from cable reel - 1 - 

- Pull both coupling plates with clamping brackets up to 
lower end of guide rails. When doing this, Bowden cable 
slide automatically into relay pulley grooves. 

- Check position of Bowden cable. 


Bowden cable must be located correctly in groove at all 4 
relay pulleys.

- Slide coupling plates with clamping brackets back and 
forth several times on guide rails to check them for proper 
function. 


Vehicles with electrical window regulators

Door windows

13/2/2005


Content   ..  715  716  717  718   ..