Volkswagen Golf / Golf GTI / Jetta. Manual - part 516
- Remove bolts - Arrows - .
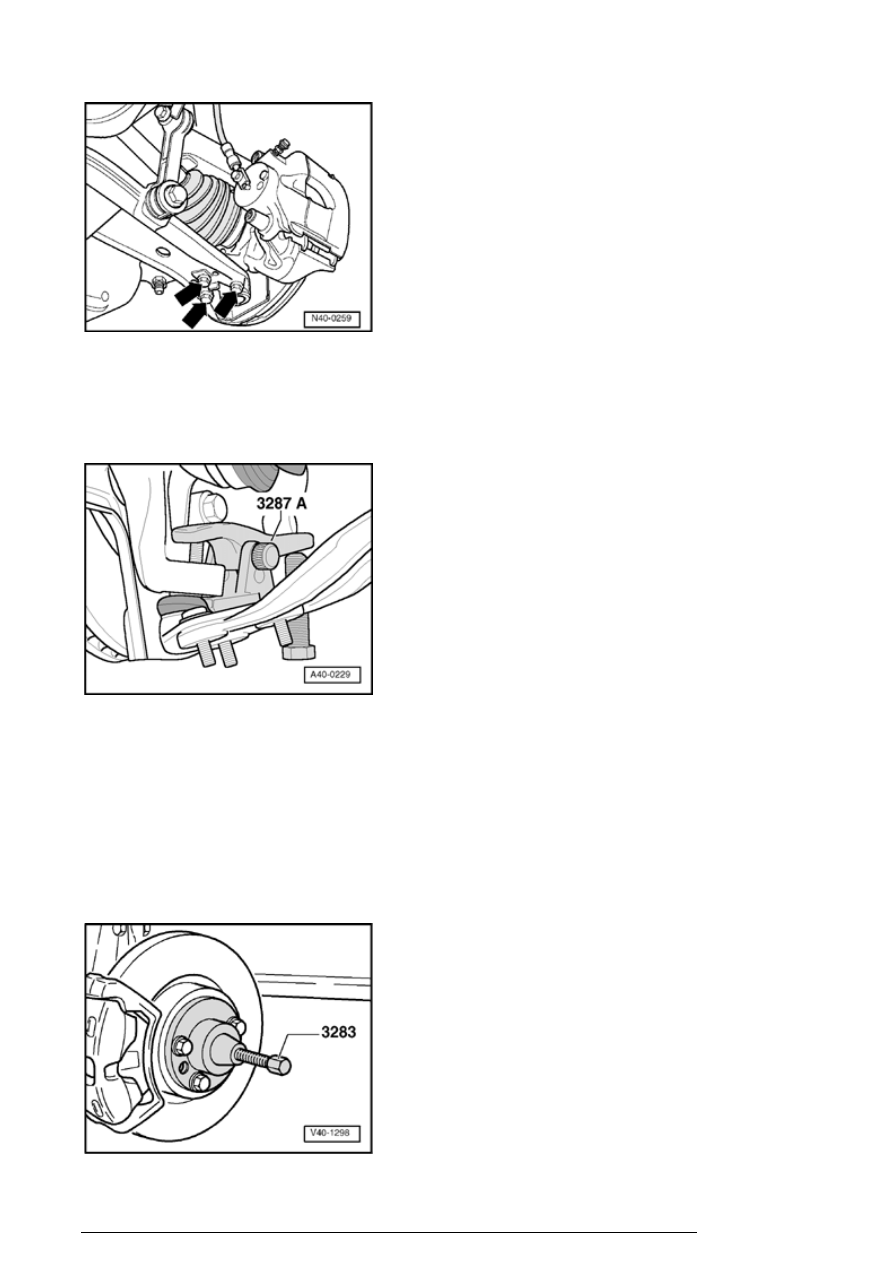
Vehicles with hex. bolt
- Loosen nut from ball joint.
- Install ball joint puller 3287 A as shown in illustration and
press out ball joint.
Note:
n
To protect ball joint threads and for safety reasons
leave nut on a few turns.
Continued for all vehicles
Front drive axle, servicing