Toyota Sienna Hybrid (2021 year). Manual in english - part 1
14
Pictorial index
Pictorial index
■
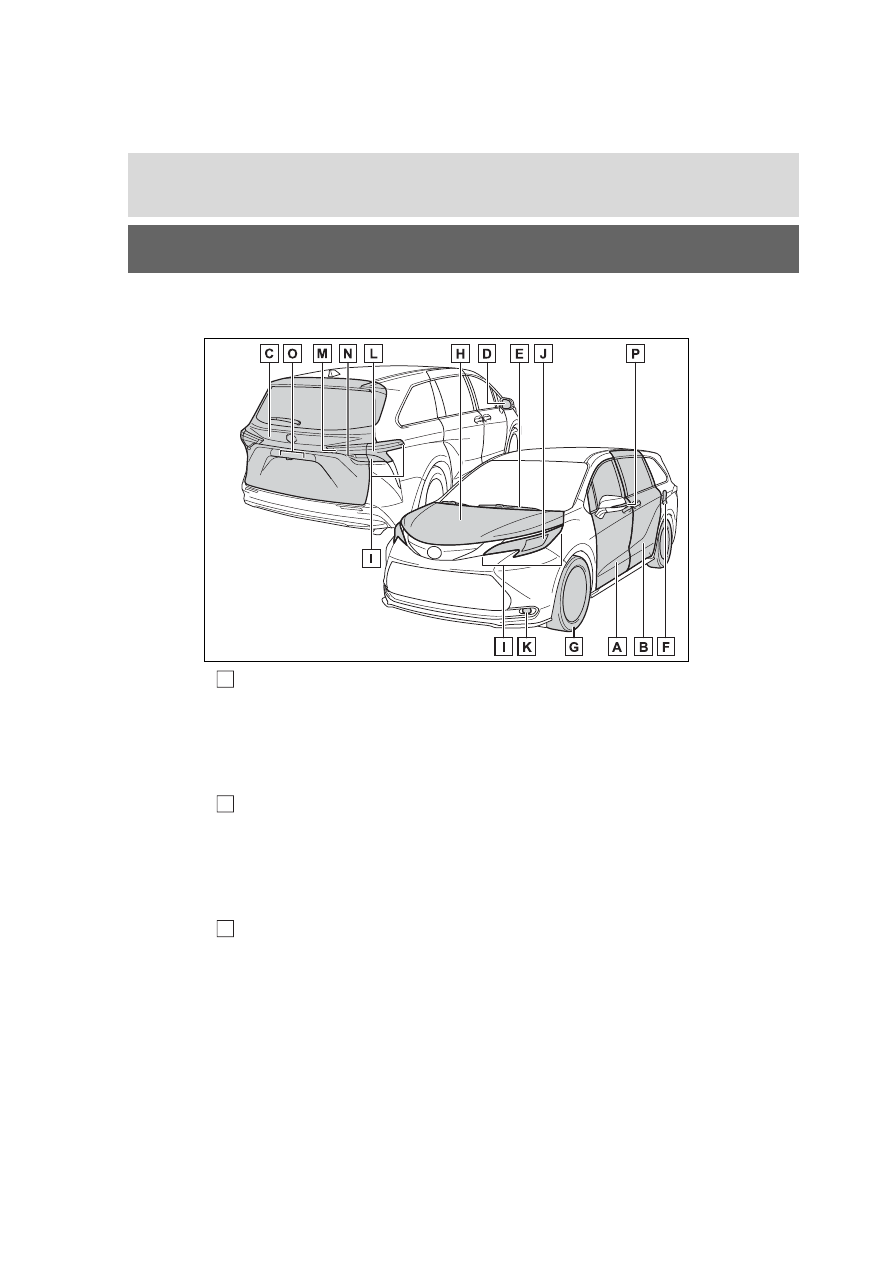
Exterior
Type A
Front doors.........................................................................P.132
Locking/unlocking ................................................................P.132
Opening/closing the front side windows...............................P.201
Locking/unlocking by using the mechanical key ..........P.133, 504
Warning messages ..............................................................P.477
Sliding doors ......................................................................P.137
Locking/unlocking ................................................................P.138
Opening/closing the sliding door..........................................P.139
Opening/closing the rear side windows ...............................P.201
Warning messages ..............................................................P.477
Back door ...........................................................................P.150
Locking/unlocking ................................................................P.151
Opening from inside the cabin
*
............................................P.154
Opening from outside...................................................P.152, 153
Warning messages ..............................................................P.477
A
B
C