Toyota RAV4 (2020 year). Manual in english - part 7
398
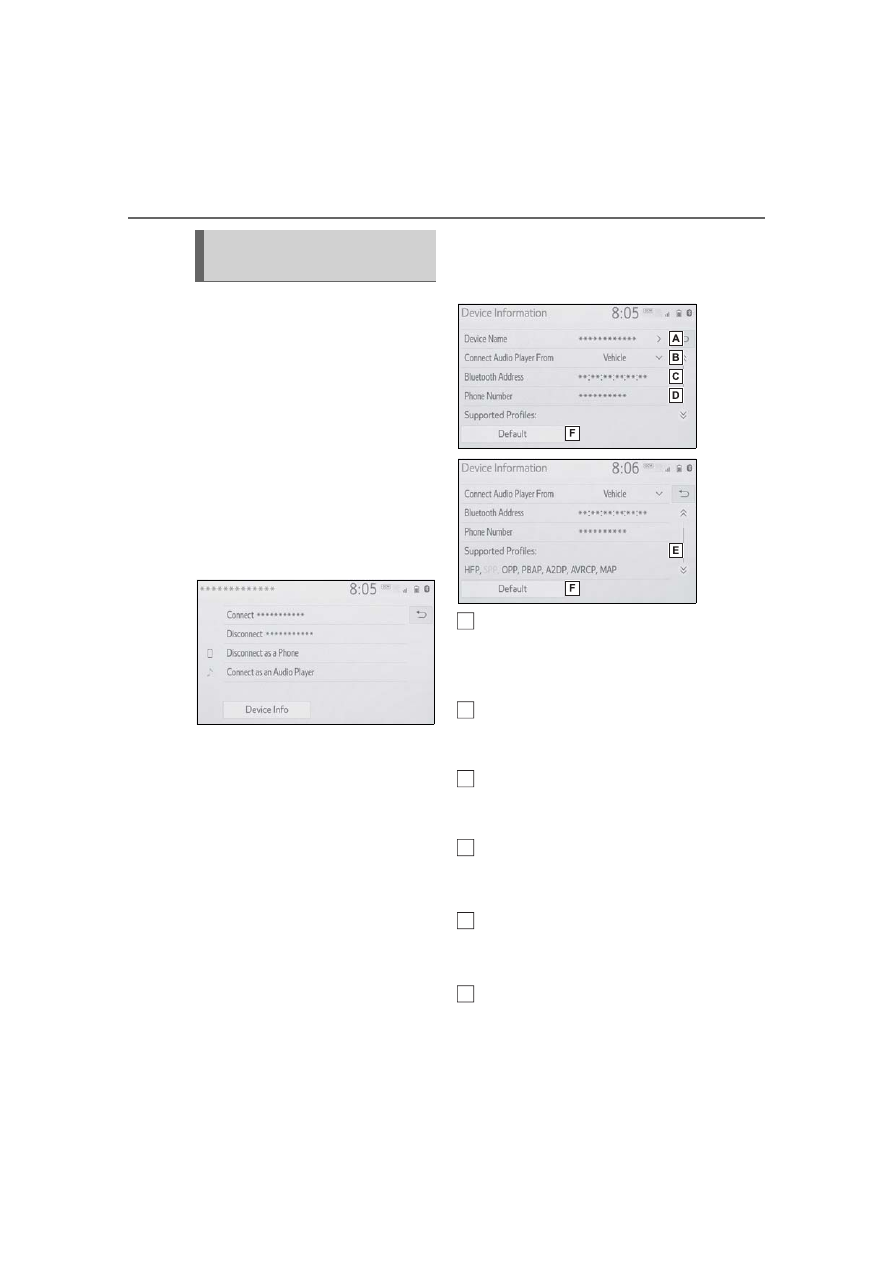
5-3. Connectivity settings
The Bluetooth
®
device’s infor-
mation can be displayed on the
screen. The displayed informa-
tion can be edited.
This operation cannot be per-
formed while driving.
1
Display the Bluetooth
®
set-
tings screen. (
2
Select “Registered Device”.
3
Select the desired device to
be edited.
4
Select “Device Info”.
5
Confirm and change the
Bluetooth
®
device informa-
tion.
The name of the Bluetooth
®
device is displayed. It can be
changed to a desired name.
(
Select to set the Bluetooth
®
audio player connection
method. (
Device address is unique to
the device and cannot be
changed.
Phone number is unique to
the Bluetooth
®
phone and
cannot be changed.
Compatibility profile is unique
to the Bluetooth
®
device and
cannot be changed.
Select to reset all setup
items.
Editing the Bluetooth
®
device information
A
B
C
D
E
F