Toyota Matrix (2014 year). Instruction - part 24
374
4-3. Do-it-yourself maintenance
MATRIX_U
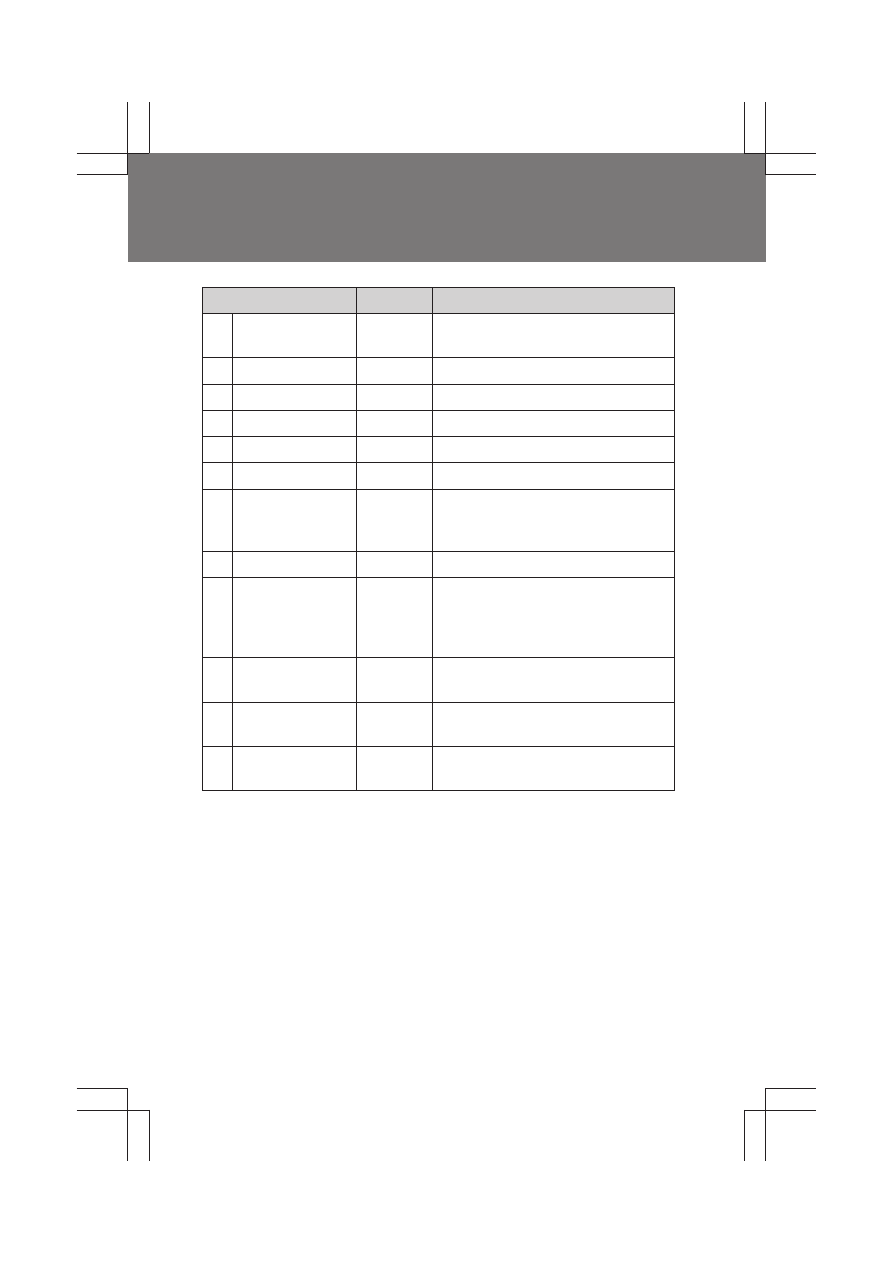
26
DOME
10 A
Interior lights, personal light, clock,
wireless remote control
27
SPARE
10 A
Spare fuse
28
SPARE
30 A
Spare fuse
29
SPARE
20 A
Spare fuse
30
AMP
30 A
No circuit
31
MAYDAY
10 A
No circuit
32
EFI MAIN
20 A
Multiport fuel injection system/
sequential multiport fuel injection
system, EFI NO. 1, EFI NO. 2
33
HORN
10 A
Horn
34
IG2
15 A
Multiport fuel injection system/
sequential multiport fuel injection
system, starting system, IGN,
METER
35
HTR SUB
NO. 1
30 A
PTC heater
36
HTR SUB
NO. 3
30 A
PTC heater
37
PWR OUTLET/
INVERTER
15 A
Power outlet
Fuse
Ampere
Circuit