Suzuki Grand Vitara JB627. Manual - part 287


  Index      Suzuki     Suzuki Grand Vitara JB627 - service repair manual


Search            


Content   ..  285  286  287  288   ..


Suzuki Grand Vitara JB627. Manual - part 287


7B-64 Air Conditioning System: 

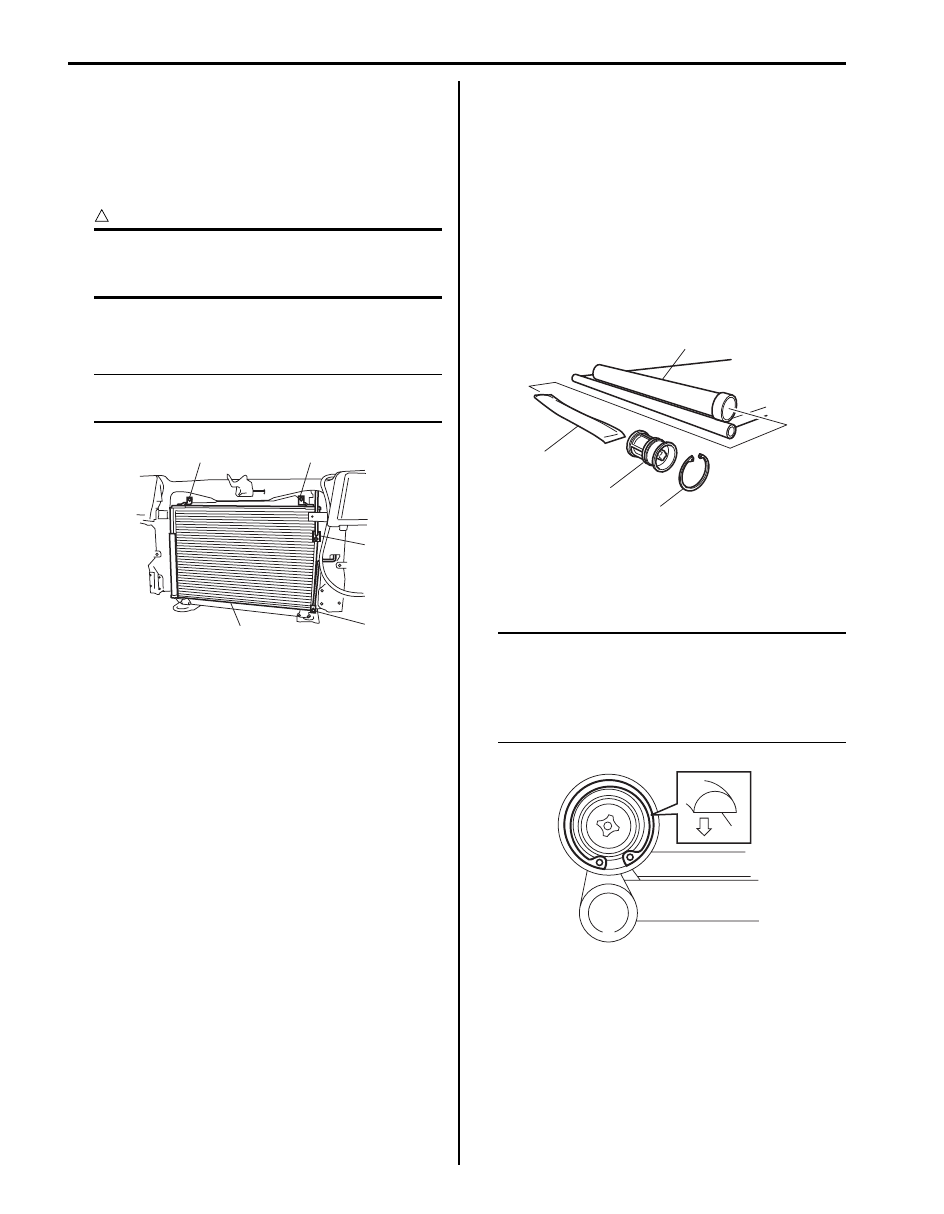
3) Remove front bumper assembly referring to “Front 

Bumper Components in Section 9K”.

4) Remove front bumper upper member referring to 

“Front Bumper Components in Section 9K”.

5) Disconnect compressor discharge hose (1) and 

liquid pipe (2) from condenser assembly (4).

CAUTION

!


As soon as above hose and pipe are 
disconnected, cap opened fittings so that 
moisture and dust do not enter condenser.


6) Remove condenser assembly mounting bolts (3), 

and then remove condenser assembly.

NOTE
Be careful not to damage fins of condenser 
and radiator.


Installation
Reverse removal sequence to install condenser, noting 
the following point.
• Replenish specified amount of compressor oil to 

compressor suction side referring to “Precautions on 
Replenishing Compressor Oil”.

• Evacuate and charge the A/C system referring to 

“Evacuation” and “Charge” in “Operation Procedure 
for Charging A/C with Refrigerant”.

Desiccant Removal and Installation

S6JB0B7206004

Removal

1) Remove condenser assembly from vehicle referring 

to “A/C Condenser Assembly Removal and 
Installation”.

2) Remove circlip (4) using special tool.

Special tool
:  09900–06107 

3) Remove the filter (1) from the receiver / dryer tank 

(2).

4) Remove desiccant (3).

Installation
Reverse removal sequence to install desiccant, 
according to instruction manual with supply parts.

NOTE

• Replenish specified amount of compressor 

oil to compressor suction side referring to 
“Precautions on Replenishing Compressor 
Oil”
.

• Install circlip (1) as shown in figure.


3

3

1

2

4

I5JB0A720036-02

3

2

1

4

I5JB0A720037-02

1

I5JB0A720038-01

Air Conditioning System:  7B-65

HVAC Air Filter Removal and Installation

S6JB0B7206005

Removal

1) Disconnect negative (–) cable at battery.
2) Remove glove box.
3) Remove filter cover (1).

4) Pull out filter element (1).

Installation
Reverse removal procedure for installation noting the 
followings:
• Install filter (1) into blower unit by paying attention to 

direction of arrow on filter.

• Enable air bag system after installation of filter.

Refer to “Enabling Air Bag System in Section 8B”.

HVAC Air Filter Inspection

S6JB0B7206006

Check that filter is not excessively dirty, damage or oily, 
clean filter with compressed air from air outlet side of 
filter. If abnormality is found, replace filter with new one.

1

I5JB0A720039-01

1

I5JB0A720040-03

1

I5JB0A720041-03

I5JB0A720092-02

7B-66 Air Conditioning System: 

HVAC Unit Components

S6JB0B7206007

20

19

21

25

16

17

22

22

18

3

2

1

5

23

24

16

15

26

26

26

27

26

4

6

14

1

7

9

13

12

10

8

11

[A]

I6JB0B720001-01

Air Conditioning System:  7B-67

26

27

26

1

3

3

2

4

5

6

[B]

24

23

22

22

20

19

1

10

11

12

13

15

9

8

21

25

14

16

16

18

17

7

I6JB0B720002-01

[A]: LHD model

9. Evaporator temperature sensor

19. Temperature control links

[B]: RHD model

10. Blower lower case

20. Temperature control actuator


Content   ..  285  286  287  288   ..