Subaru WRX STI (2019 year). Instruction - part 2
(20,1)
北米Model "A1720BE-A" EDITED: 2018/ 3/ 9
&
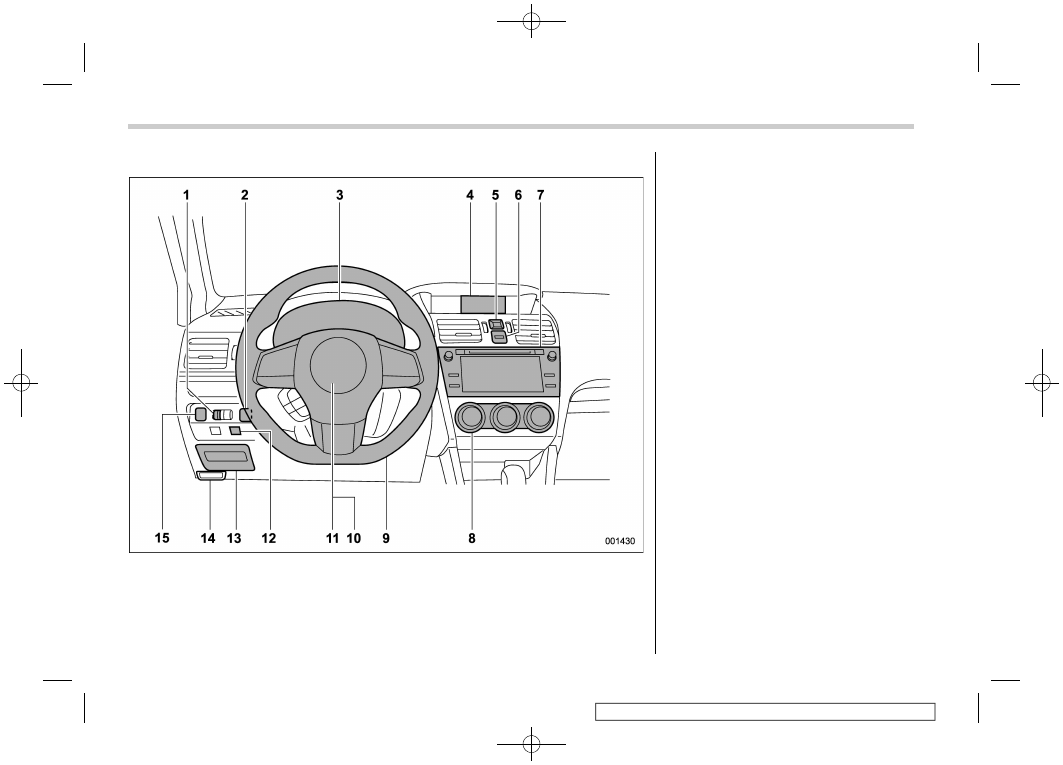
Instrument panel
1)
Illumination brightness control dial
(page 3-72)
2)
Trunk opener switch (page 2-36)
3)
Combination meter (page 3-8)
4)
Multi-function display (color LCD)
(page 3-44)
5)
Hazard warning flasher switch (page 3-8)
6)
Multi-function display (color LCD) control
switches (page 3-44)
7)
Audio*
8)
Climate control (page 4-1)
9)
Tilt/telescopic steering (page 3-87)
10) Horn (page 3-88)
11) SRS airbag (page 1-33)
12) Vehicle Dynamics Control OFF switch
(page 7-39)
13) Fuse box (page 11-43)
14) Hood lock release knob (page 11-9)
15) BSD/RCTA OFF switch (if equipped)
(page 7-57)
*: For details about how to use the audio
and navigation system (if equipped), refer
to the separate navigation/audio Owner’s
Manual.
NOTE
For models with the EyeSight system:
Refer to the Owner’s Manual supple-
ment for the EyeSight system.
18