Subaru Baja (2006 year). Instruction - part 12
5-14
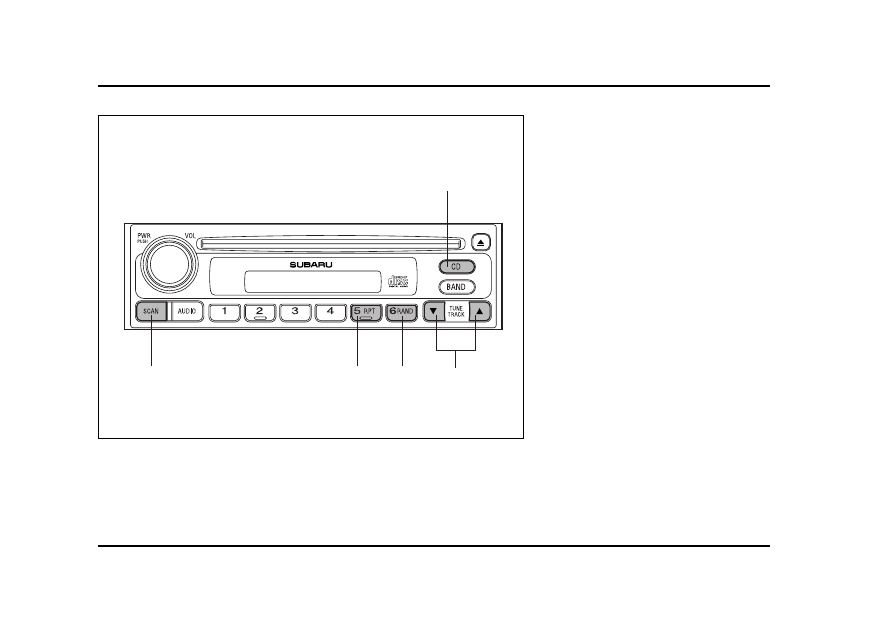
Audio
(16)
(20)
(19)
(18)
(17)
UB5067DB
(16) CD button
(17) Track selection buttons
(18) RAND (Random) button
(19) RPT (Repeat) button
(20) SCAN button
|
|
|
5-14 Audio (16) (20) (19) (18) (17) UB5067DB (16) CD button |