Subaru Legacy IV (2008 year). Manual - part 282
EX(H4DOTC)-3
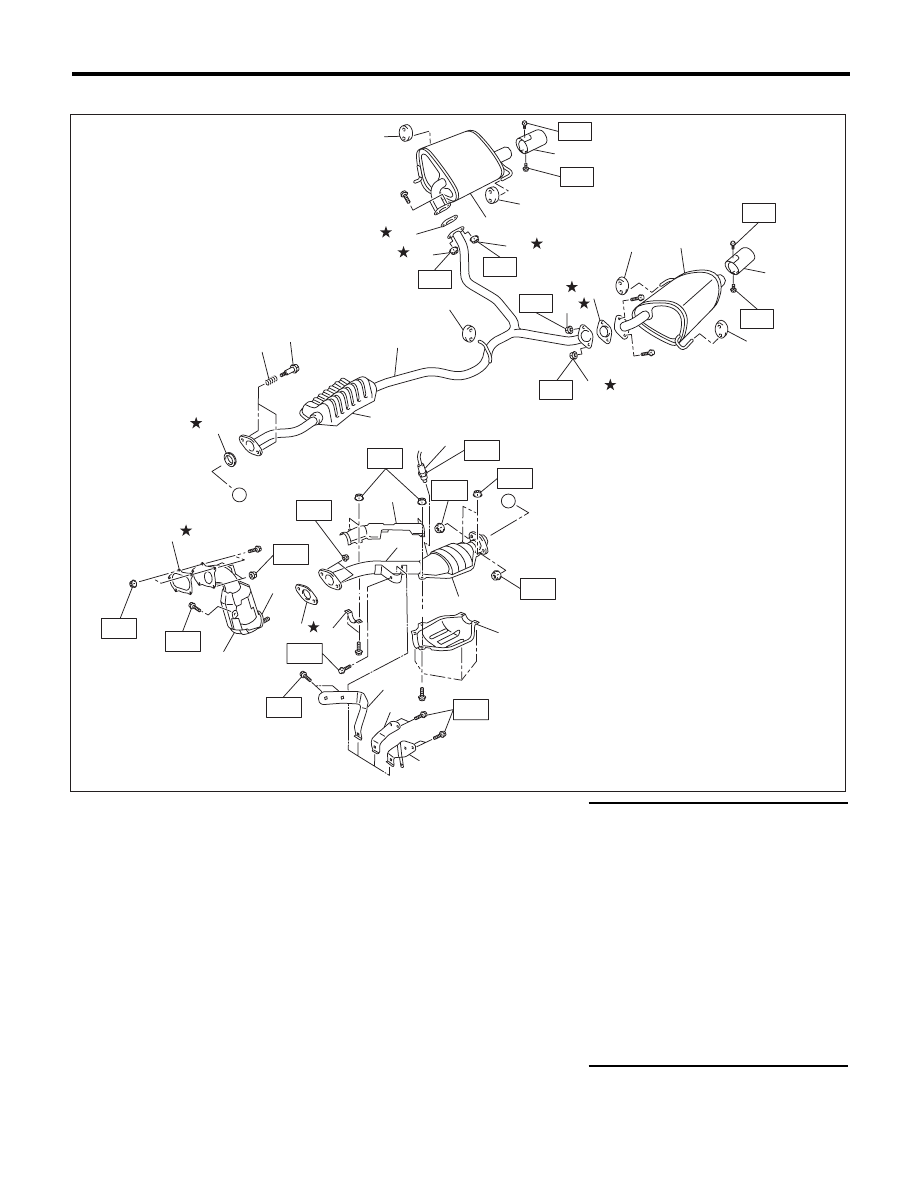
General Description
EXHAUST
2. CENTER AND REAR EXHAUST PIPE, AND MUFFLER
(1)
Gasket
(13)
Chamber
Tightening torque:N·m (kgf-m, ft-lb)
(2)
Front catalytic converter
(14)
Cushion rubber
T1: 7.5 (0.8, 5.5)
(3)
Center exhaust pipe (Front)
(15)
Spring
T2: 13 (1.3, 9.6)
(4)
Center exhaust pipe (Rear)
(16)
Bolt
T3: 18 (1.8, 13.3)
(5)
Gasket
(17)
Gasket
T4: 23 (2.3, 17.0)
(6)
Center pipe upper cover (Rear)
(18)
Self-locking nut
T5: 30 (3.1, 22.1)
(7)
Clamp
(19)
Muffler LH
T6: 35 (3.6, 25.8)
(8)
Rear catalytic converter lower
cover
(20)
Muffler RH
T7: 40 (4.1, 29.5)
(21)
Hanger bracket (AT model)
T8: 42.5 (4.3, 31.3)
(9)
Rear oxygen sensor
(22)
Hanger bracket (5MT model)
T9: 48 (4.9, 35.4)
(10)
Rear catalytic converter
(23)
Hanger bracket (6MT model)
T10: <Ref. to FU(H4DOTC)-48,
INSTALLATION, Rear Oxygen
Sensor.>
(11)
Gasket
(24)
Muffler cutter
(12)
Rear exhaust pipe
EX-02369
(11)
A
(12)
(13)
(16)
(15)
(14)
(14)
(17)
(14)
(17)
(19)
(20)
(14)
(14)
(18)
T9
(18)
T9
(18)
T9
(18)
T9
A
(10)
T8
T3
T10
(6)
(4)
(9)
(8)
(5)
(7)
T5
T8
T8
(1)
(2)
(3)
T3
T2
T2
T6
T1
T1
T1
T1
(24)
(24)
(21)
(22)
T4
(23)
T7