Chrysler Cirrus, Dodge Stratus, Plymouth Breeze Haynes. Manual - part 2
0-12
Maintenance techniques, tools and working facilities
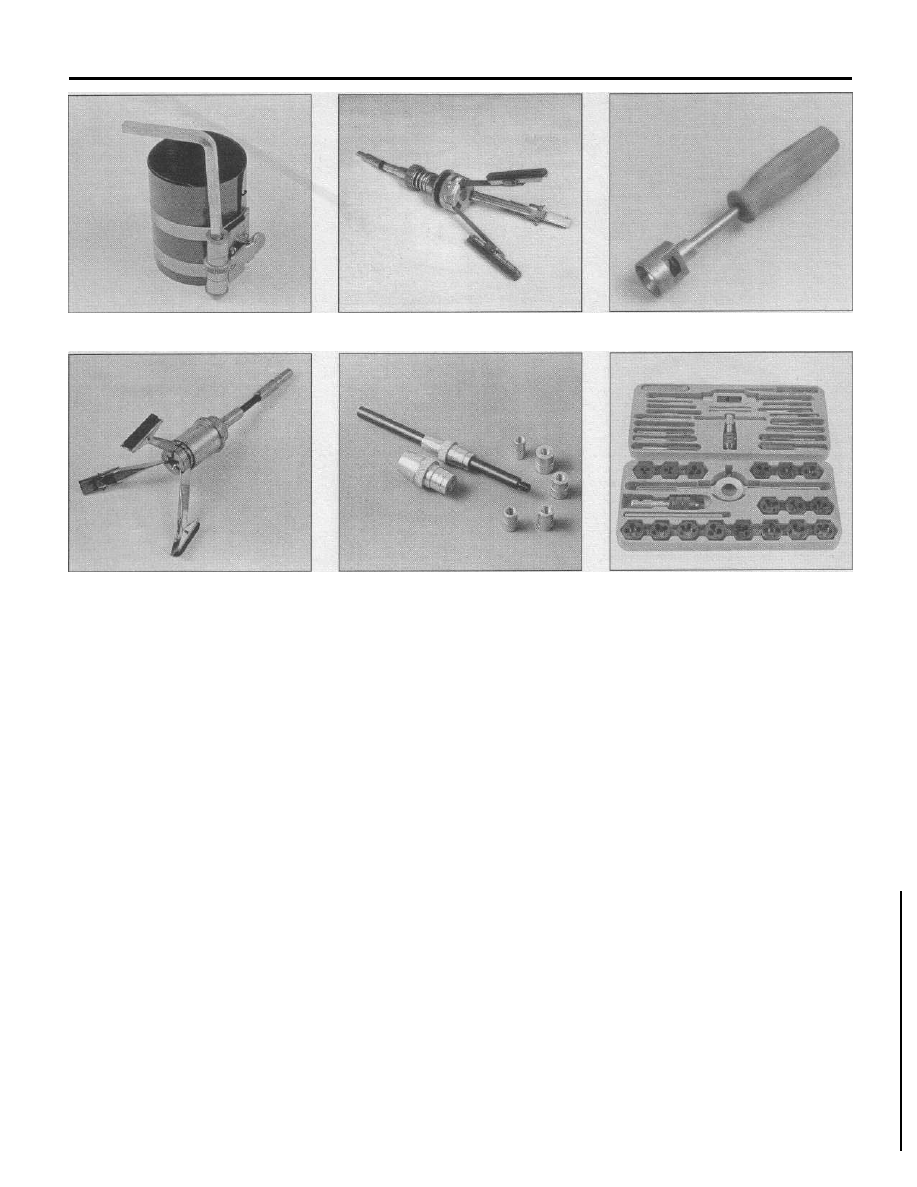
Ring compressor
Cylinder hone
Brake hold-down spring tool
Brake cylinder hone
should start off with the maintenance and
minor repair tool kit, which is adequate for
the simpler jobs performed on a vehicle.
Then, as confidence and experience grow,
the owner can tackle more difficult tasks,
buying additional tools as they are needed.
Eventually the basic kit will be expanded into
the repair and overhaul tool set. Over a period
of time, the experienced do-it-yourselfer will
assemble a tool set complete enough for
most repair and overhaul procedures and will
add tools from the special category when it is
felt that the expense is justified by the fre-
quency of use.
Maintenance and minor repair
tool kit
The tools in this list should be consid-
ered the minimum required for performance
of routine maintenance, servicing and minor
repair work. We recommend the purchase of
combination wrenches (box-end and open-
end combined in one wrench). While more
expensive than open end wrenches, they
offer the advantages of both types of wrench.
Combination wrench set (1/4-inch to
1 inch or 6 mm to 19 mm)
Adjustable wrench, 8 inch
Spark plug wrench with rubber insert
Spark plug gap adjusting tool
Feeler gauge set
Brake bleeder wrench
Standard screwdriver (5/16-inch x
6 inch)
Clutch plate alignment tool
Phillips screwdriver (No. 2 x 6 inch)
Combination pliers - 6 inch
Hacksaw and assortment of blades
Tire pressure gauge
Grease gun
Oil can
Fine emery cloth
Wire brush
Battery post and cable cleaning tool
Oil filter wrench
Funnel (medium size)
Safety goggles
Jackstands (2)
Drain pan
Note: If basic tune-ups are going to be part of
routine maintenance, it will be necessary to
purchase a good quality stroboscopic timing
light and combination tachometer/dwell
meter. Although they are included in the list
of special tools, it is mentioned here because
they are absolutely necessary for tuning most
vehicles properly.
Repair and overhaul tool set
These tools are essential for anyone
who plans to perform major repairs and are in
addition to those in the maintenance and
minor repair tool kit. Included is a compre-
hensive set of sockets which, though expen-
sive, are invaluable because of their versatil-
ity, especially when various extensions and
drives are available. We recommend the 1/2-
inch drive over the 3/8-inch drive. Although
the larger drive is bulky and more expensive,
Tap and die set
it has the capacity of accepting a very wide
range of large sockets. Ideally, however, the
mechanic should have a 3/8-inch drive set
and a 1/2-inch drive set.
Socket set(s)
Reversible ratchet
Extension - 10 inch
Universal joint
Torque wrench (same size drive as
sockets)
Ball peen hammer - 8 ounce
Soft-face hammer (plastic/rubber)
Standard screwdriver (1/4-inch x 6 inch)
Standard screwdriver (stubby -
5/16-inch)
Phillips screwdriver (No. 3 x 8 inch)
Phillips screwdriver (stubby - No. 2)
Pliers - vise grip
Pliers - lineman's
Pliers - needle nose
Pliers - snap-ring (internal and external)
Cold chisel - 1/2-inch
Scribe
Scraper (made from flattened copper
tubing)
Centerpunch
Pin punches (1/16, 1/8, 3/16-inch)
Steel rule/straightedge - 12 inch
Allen wrench set (1/8 to 3/8-inch or
4mmto10mm)
A selection of files
Wire brush (large)
Jackstands (second set)
Jack (scissor or hydraulic type)