Opel Frontera UBS. Manual - part 582


  Index      Opel     Opel Frontera UBS - service repair manual 1998-2002 year


Search            


Content   ..  580  581  582  583   ..


Opel Frontera UBS. Manual - part 582


MANUAL TRANSMISSION

7B–33

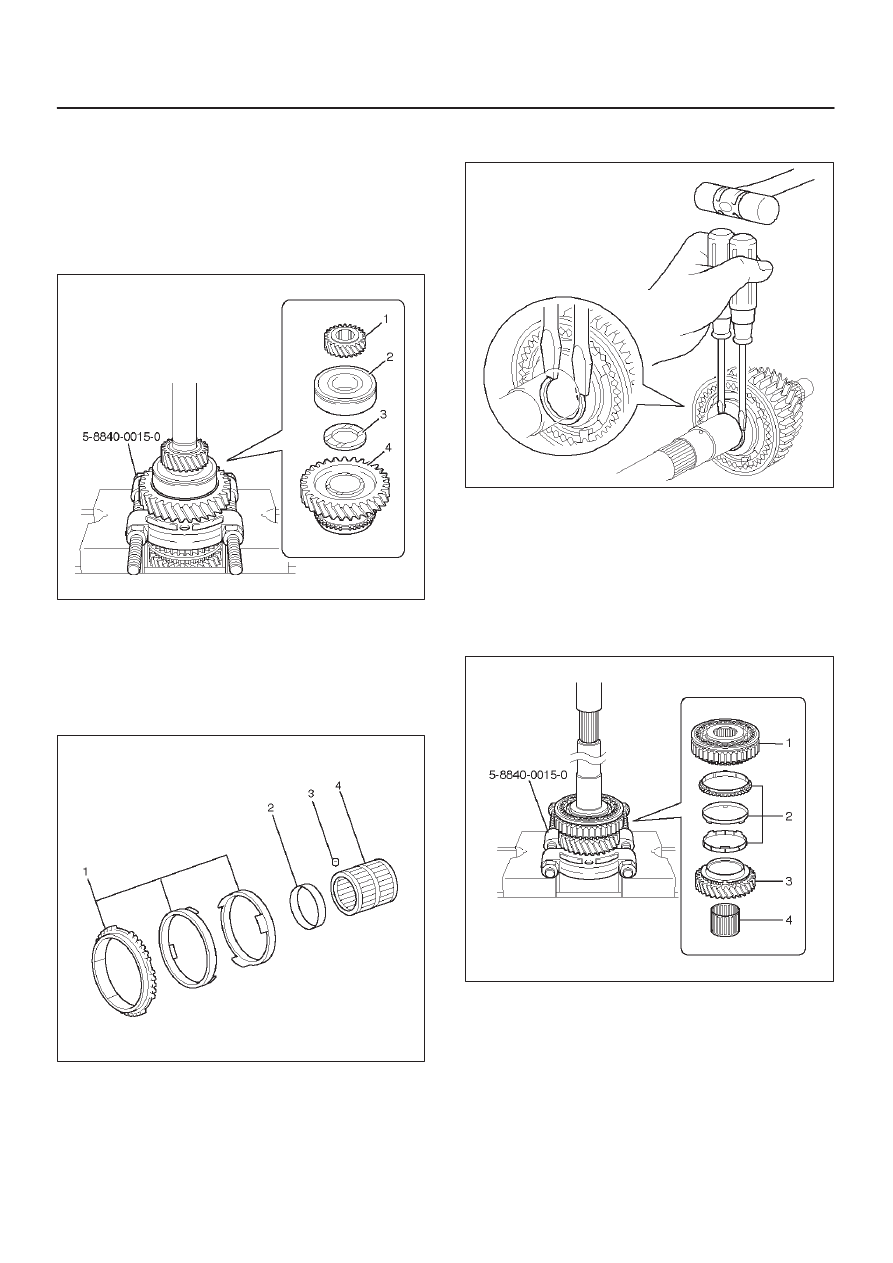
4. Using bearing separator 5–8840–0015–0

(J–22912–01) and a press, remove the following
parts.

1. 5th gear (1).

2. Mainshaft bearing (2).

3. 1st gear thrust washer (3).

4. 1st gear (4).

226RW197

5. Remove following parts from mainshaft.

1. Synchronizer assembly (1).

2. 1st gear thrust washer pin (3).

3. 1st gear needle roller bearing (4).

4. 1st gear bearing spacer (2).

226RW146

6. Using 2 screwdrivers and hammer, tap out snap

ring.

226RW073

7. Using bearing separator 5–8840–0015–0

(J–22912–01) and a press, remove the following
parts.

1. Clutch hub No.1 assembly (1).

2. Synchronizer assembly (2).

3. 2nd gear (3).

4. 2nd gear needle roller bearing (4).

226RW198

7B–34 MANUAL TRANSMISSION

8. Remove the reverse gear from clutch hub No.1.

9. Remove the 3 inserts and 3 compression springs.

D

When removing the inserts, push the insert
spring with a screwdriver.

226RW075

10. Remove the snap ring.

NOTE: Don’t damage the bearing surface.

226RW076

11. Using a press, remove following parts.

1. Clutch hub No.2 assembly (1).

2. 3rd block ring (2).

3. 3rd gear (3).

4. 3rd gear needle roller bearing (4).

226RW091

12. Using screwdriver, remove the 2 insert springs,

hub sleeve No.2, clutch hub No.2 and 3 inserts.

226RW090

MANUAL TRANSMISSION

7B–35

24. Remove the shift parts and interlock parts.

1. Mount the intermediate plate through the

aluminum plate in a vise.

2. Using a plastic hammer, tap the 5th shift rod on

the neutral.

226RW052

3. Using a torx socket wrench(T40), remove the 4

plugs.

226RW050

4. Using a magnetic finger, remove 3 springs and

balls.

226RW049

5. Using 2 screwdrivers and a hammer, remove 2

snap rings from each shift fork rod.

226RW048

7B–36 MANUAL TRANSMISSION

6. Pull out the 3rd–4th shift rod at the rear.

226RW047

7. Using a magnetic finger, remove the interlock pin

and straight pin.

226RW043

8. Pull out the 1st–2nd shift rod at the rear.

226RW045

9. Using a magnetic finger, remove the interlock pin.

226RW042


Content   ..  580  581  582  583   ..