Index Opel Opel Frontera UBS - service repair manual 1998-2002 year
Search
Content .. 533 534 535 536 ..
Opel Frontera UBS. Manual - part 535
7A–9
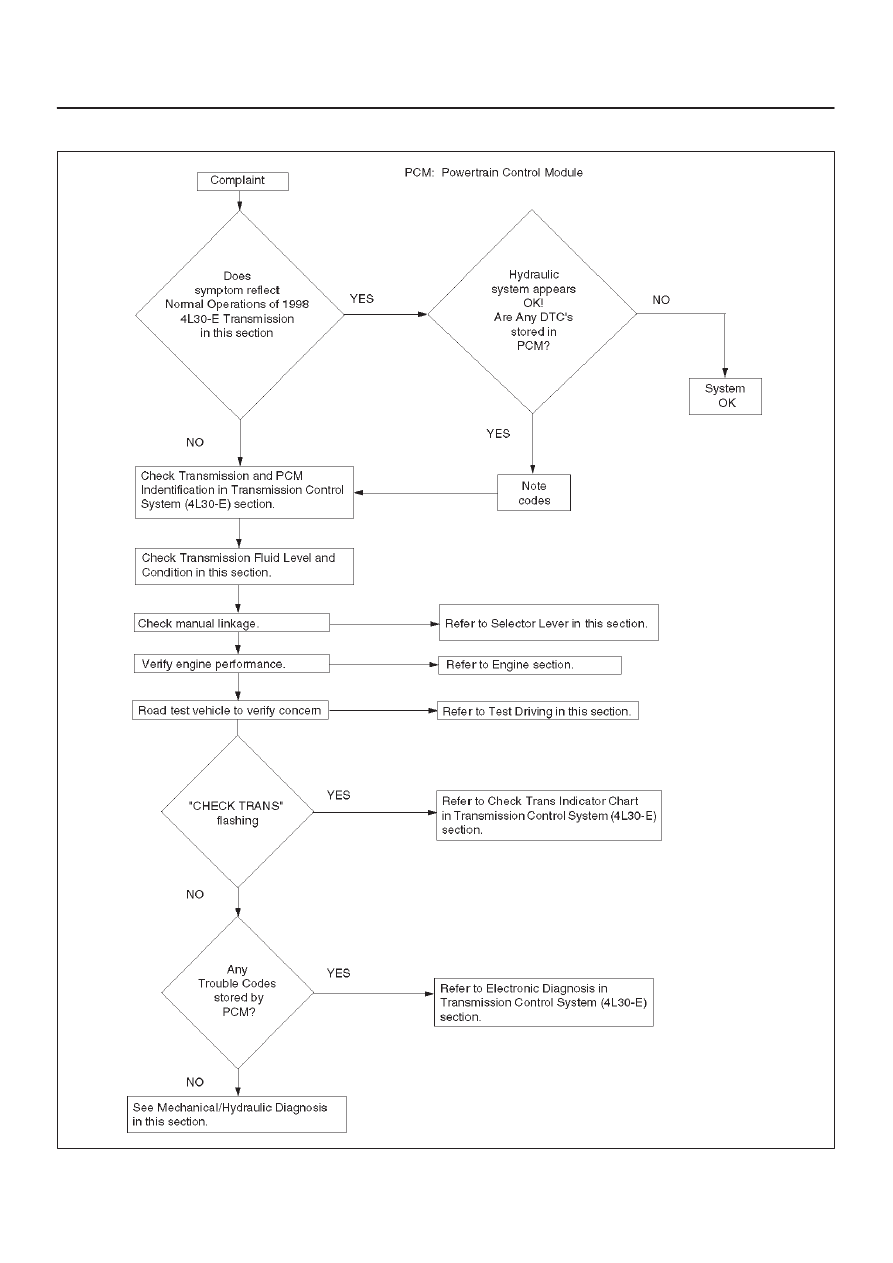
AUTOMATIC TRANSMISSION (4L30–E)
Preliminary Inspection Chart
F07RT039