Opel Frontera UBS. Manual - part 426


  Index      Opel     Opel Frontera UBS - service repair manual 1998-2002 year


Search            


Content   ..  424  425  426  427   ..


Opel Frontera UBS. Manual - part 426


 ENGINE EXHAUST 6F – 3

ON-VEHICLE SERVICE

Rattles and noise vibrations in the exhaust system
are usually caused by misalignment of parts.  When
aligning the system, leave all bolts or nuts loose
until all parts are properly aligned; then tighten,
working from front to rear.

1. Check connections for looseness or damage,

especially for exhaust gas leakage.

2. Check clamps and rubbers for weakness, cracks

or damage.

3. If any part of the converter heat shield is

damaged or dented to the extent that it contacts
the catalyst, repair or replace.

4. Check for dents or damage and for any holes or

cracks caused by corrosion.
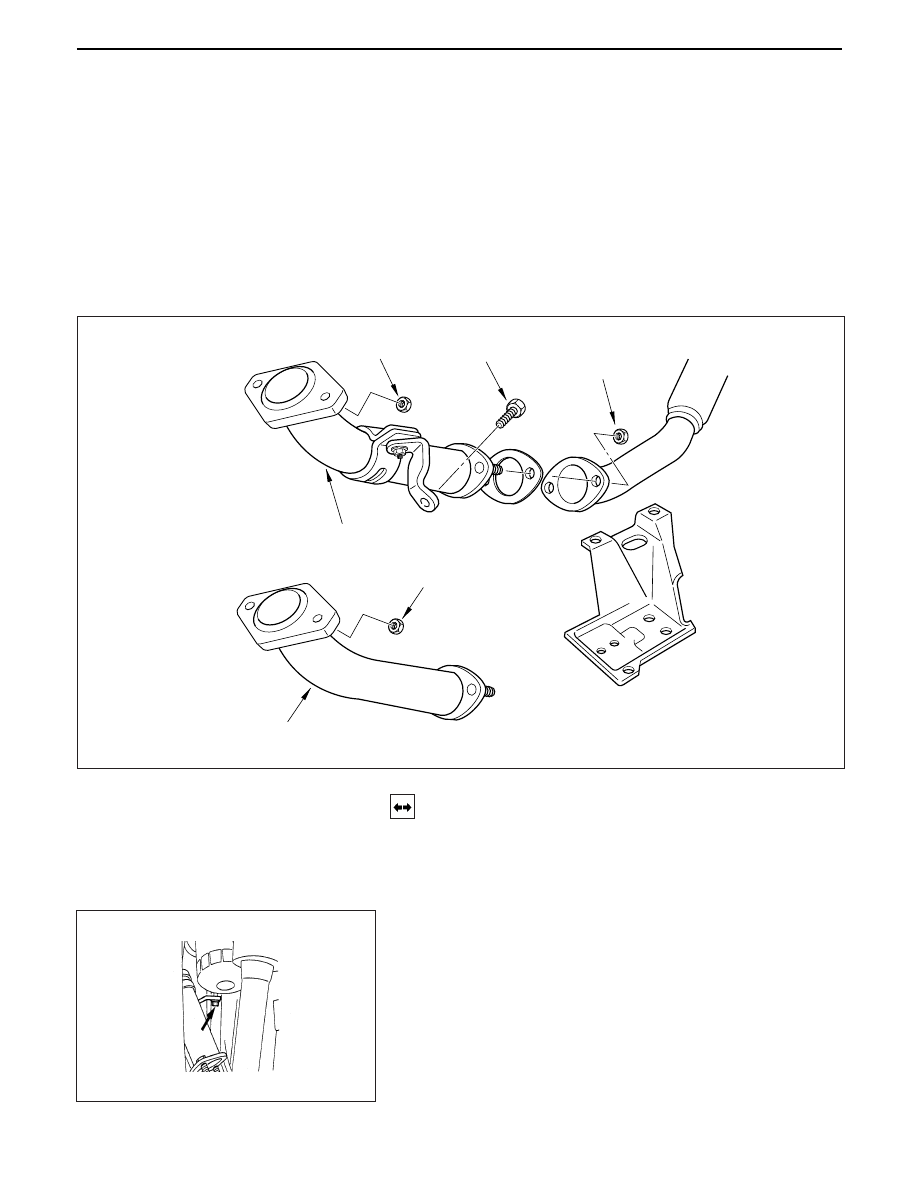
REMOVAL

Preparation:

Disconnect battery negative cable.

Raise the vehicle and support with suitable safety
stands.

1. Front exhaust pipe mounting bracket fixing

bolt

150RV009

FRONT EXHAUST PIPE

4JG2-NA

4JG2-T

3

3

1

4

4

2

6F – 4 ENGINE EXHAUST

2. Front exhaust pipe fixing nuts

• Remove two bolts fixed from front pipe and center

pipe A.

3. Exhaust manifold fixing nuts

Remove two fixing nuts from exhaust manifold and
front pipe.

4. Front exhaust pipe

INSTALLATION

4. Front exhaust pipe

3. Exhaust manifold fixing nuts

Tighten the fixing nuts to the specified torque.

67 (6.8/49)

N·m (Kg·m/lb·ft)

2. Front exhaust pipe fixing nuts

Tighten the fixing nuts to the specified torque

43 (4.4/32)

N·m (Kg·m/lb·ft)

1. Front exhaust pipe mounting bracket fixing

bolt

Tighten the fixing nuts to the specified torque

40 (4.1/30)

N·m (Kg·m/lb·ft)

 ENGINE EXHAUST 6F – 5

CENTER EXHAUST PIPE

REMOVAL

Preparation:

Disconnect battery negative cable.

Raise the vehicle and support with suitable safety
stands.

1. Exhaust pipe protector

2. Exhaust silencer fixing nuts

3. Center exhaust pipe fixing nuts

Remove two fixing nuts from center pipe A and B.

4. Mounting rubber

Pull out a mounting rod clamped to the center
pipe from mounting rubber.

5. Center exhaust pipe B

6. Front exhaust pipe fixing nuts

Remove two fixing nuts from front pipe and
center pipe A.

7. Center exhaust pipe A

150RV011

4JG2-NA

Exhaust Throttle
(Optional Equipment)

7

1

6

4

5

3

2

4JG2-T

6F – 6 ENGINE EXHAUST

INSTALLATION

7. Center exhaust pipe A

6. Front exhaust pipe fixing nuts

Tighten the fixing nuts to the specified torque

43 (4.4/32)

N·m (Kg·m/lb·ft)

5. Center exhaust pipe B

4. Mounting rubber

43 (4.4/32)

N·m (Kg·m/lb·ft)

2.   Exhaust silencer fixing nuts

 •


 Tighten the fixing bolts to the specified torque.

40 (4.1/30)

N·m (Kg·m/lb·ft)

1.   Exhaust pipe protector

 •


 Tighten the fixing bolts to the specified torque.

37 (3.8/27)

N·m (Kg·m/lb·ft)

3. Center exhaust pipe fixing nuts

Tighten the fixing nuts to the specified torque.


Content   ..  424  425  426  427   ..