Opel Frontera UBS. Manual - part 366
 

  Index      Opel     Opel Frontera UBS - service repair manual 1998-2002 year


Search            


Content   ..  364  365  366  367   ..


Opel Frontera UBS. Manual - part 366


6G–8

ENGINE LUBRICATION

3. Install crankcase, tighten crankcase fixing bolts

to the specified torque.

Torque : 10 N·m (1.0 Kg·m/89 lb in)

013RW004

2. Install oil pan

1. Remove residual sealant, lubricant and moisture

from mounting surface, then dry thoroughly.

2. Properly apply a 4.5 mm (07 in) wide bead of

sealant (TB-1207C or equivalent) to mounting
surface of oil pan.
Sealant beat must be continuous.

D

The crankcase must be installed within 5
minutes after sealant application befor the
sealant hardens.

013RW003

3. Install oil pan, tighten oil pan fixing bolts to the

specified torque.

Torque : 25 N·m (2.5 Kg·m/18 lb ft)

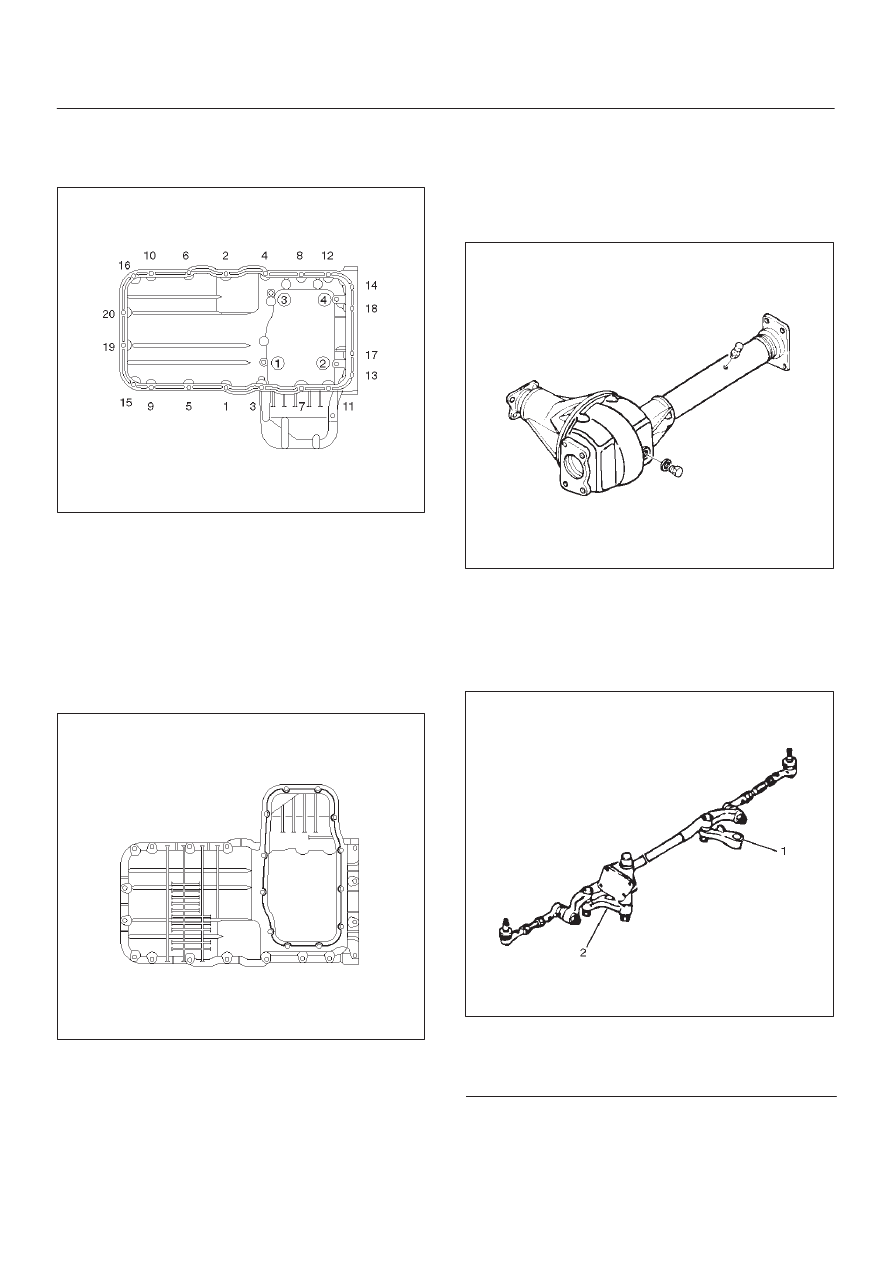
3. Install axle housing assembly and tighten fixing bolts

to the specified torque.

Axle case bolts
Torque : 82 N·m (8.4 Kg·m/60 lb ft)
Mounting bolts
Torque : 152 N·m (15.5 Kg·m/112 lb ft)

013RW005

4. Install relay lever assembly and tighten fixing bolts.

Torque: 44 N·m (4.5 Kg·m/32 lb ft)

5. Engage teeth of pitman arm and steering unit, and

tighten nut to the specified torque.

Torque : 216 N·m (22.0 Kg·m/159 lb ft)

013RW006

Legend

(1) Pitman Arm
(2) Relay Lever

6G–9

ENGINE LUBRICATION

6. Install suspension cross member and tighten fixing

bolts to the specified torque.

Torque : 78 N·m (8.0 Kg·m/58 lb ft)

013RW007

7. Install radiator under fan shroud.
8. Install stone guard.
9. Install engine oil level dipstick.

10. Fill engine oil until full level on engine oil gauge

dipstick.

6G–10

ENGINE LUBRICATION

Oil Pump

Removal

1. Disconnect battery ground cable.
2. Drain engine oil.
3. Remove crankcase assembly.

D

 Refer to removal procedure for Oil Pan and
Crankcase in this manual.

4. Remove crankshaft pulley.

D

Refer to removal procedure for Crankshaft Pulley in
this manual.

5. Remove timing belt.

D

Refer to removal procedure for Timing Belt in this
manual.

6. Remove timing pulley from crankshaft.
7. Remove four fixing bolts from oil filter assembly.
8.  Remove oil strainer fixing bolts, remove oil strainer

assembly with O-ring.

9. Remove three bolts from oil pipe and O-ring.

10. Remove eight oil pump fixing bolts, then oil pump

assembly.

11. Remove sealant from mounting surface of oil pump

assembly, cylinder block and take care not to damage
mounting surfaces of oil pump and cylinder block.

Installation

1. Install oil pump assembly 

D

Apply sealant (TB-1207B or equivalent) to the oil
pump mounting surfaces as shown in the
illustration.

D

The oil pump assembly must be installed within 5
minutes after sealant application before the sealant
hardens.

NOTE: Do not apply sealant to the oil ports.

051RW002

D

Use 5–8840–2287–0 installer when installing new
oil seal.

D

Apply engine oil to oil seal lip.

D

Install oil pump assembly to the cylinder block.

NOTE: Do not damage oil seal during installation of oil
pump assembly.

015RS001

D

Tighten fixing bolts to the specified torque.

Torque : 25 N·m (2.5 Kg·m/18 lb ft)

051RW001

2. Install oil pipe with O-ring, tighten fixing bolt to the

specified torque.

Torque : 10 N·m (1.0 Kg·m/89 lb in)

3. Install oil strainer with O-ring, tighten fixing bolt to the

specified torque.

Torque : 25 N·m (2.5 Kg·m/18 lb ft)

6G–11

ENGINE LUBRICATION

4. Install oil filter assembly and tighten bolts to the

specified torque.

Torque : 25 N·m (2.5 Kg·m/18 lb ft)

050RW001

Legend

(1) Oil Pump
(2) Oil Filter
(3) Oil Gallery
(4) From Oil Filter
(5) To Oil Filter

5. Install timing pulley on crankshaft.

Install timing belt.

D

Refer to installation procedure for Timing Belt in this
manual.

6. Install crankshaft pulley.

D

Refer to install procedure for Crankshaft Pulley in
this manual.

7. Install crankcase assembly.

D

Refer to installation procedure for Oil Pan and
Crankcase in this manual.

8. Refill engine oil until full level on engine oil dipstick.


Content   ..  364  365  366  367   ..