Content .. 2225 2226 2227 2228 ..
Opel Frontera UBS. Manual - part 2227
6B–4
ENGINE COOLING
B06RW002
D
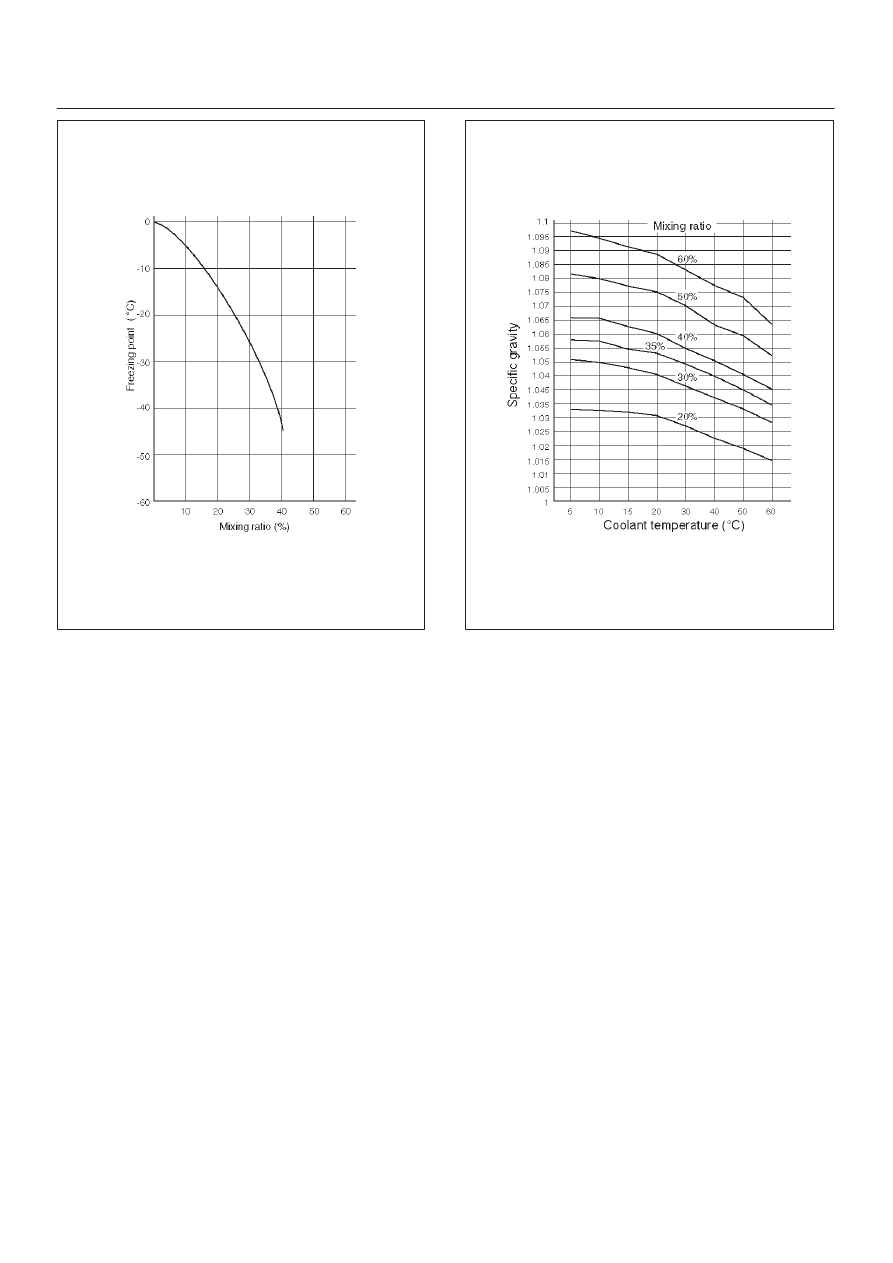
Mixing ratio
Check the specific gravity of engine coolant in the
cooling system temperature ranges from 0
°
C to 50
°
C
using a suction type hydrometer, then determine the
density of the engine coolant by referring to the table.
NOTE:
1. Even in the areas where the atmospheric
temperature is higher than 0
°
C, be sure not to use
antifreeze solution at a mixing ratio lower than 20% so
that the inside of the engine may not be corroded.
2. If antifreeze solution is used at a mixing ratio higher
than 60%, the specific heat of the coolant falls and the
engine may be overheated. Moreover, antifreeze
performance drop and the coolant may be frozen.
The density of the solution must be adjusted as
occasion calls.
Antifreeze solution lower than 20% may not have
sufficient anticorrosive performance, and therefore,
please never fail to adjust as occasion demands within
the range of 20% to 60%.
B06RW003