Content .. 1563 1564 1565 1566 ..
Opel Frontera UBS. Manual - part 1565
7C–22
CLUTCH
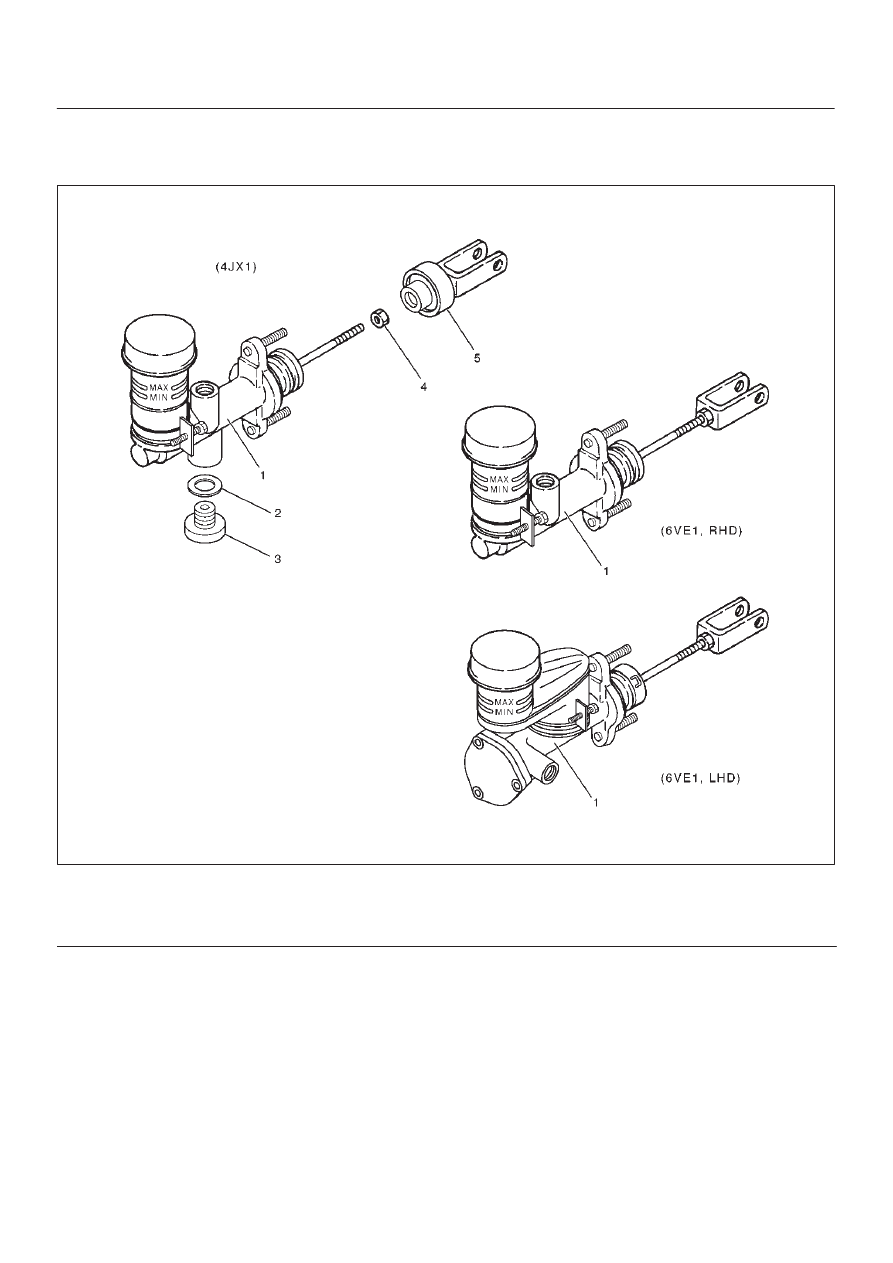
Master Cylinder
Disassembled View
208RW016
Legend
(1) Master Cylinder Assembly
(2) Gasket
(3) Damper Cylinder Assembly
(4) Nut
(5) Push Rod Damper
|
|
|
Content .. 1563 1564 1565 1566 ..
7C–22 CLUTCH Master Cylinder Disassembled View 208RW016 Legend (1) Master Cylinder Assembly (3) Damper Cylinder Assembly |