Opel Frontera UE. Manual - part 925
6E2–86
6VD1 3.2L ENGINE DRIVEABILITY AND EMISSIONS
Knock Sensor (KS) System Check
(Engine Knock, Poor Performance, or Poor Economy)
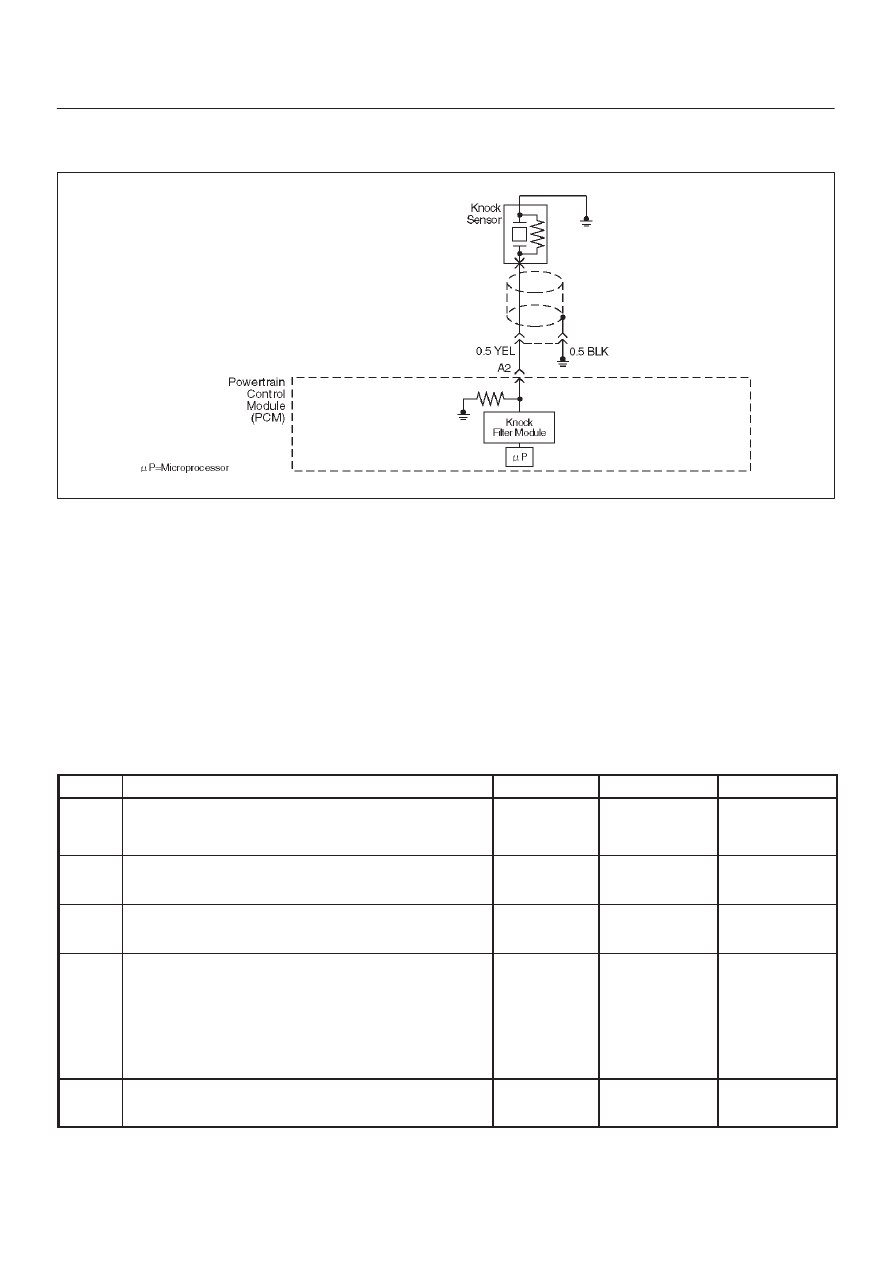
D06RW035
Circuit Description
The knock sensor (KS) sends an AC voltage signal to the
powertrain control module (PCM). As the KS detects
engine knock, the signal to the PCM changes in amplitude
and frequency. The PCM retards timing if the engine
speed is over 900 RPM.
Diagnostic Aids
If the KS system checks OK, but detonation is the
complaint, refer to
Diagnosis, Detonation/Spark Knock.
Test Description
The numbers below refer to the step numbers on the
Diagnostic Chart.
9. The change in signal speed depends on how hard
the tapping is done. Normally there is about 1.5 to
10 mV at PCM pin A2 with the engine off. Loud
tapping should be able to make the reading jump to
20-25 mV AC.
Knock Sensor (KS) System Check
(Engine Knock, Poor Performance, or Poor Economy)
Step
Action
Value(s)
Yes
No
1
Is DTC P0325 or P0327 set?
—
Go to
DTC
P0325 or
DTC P0327
Go to
Step 2
2
Run the engine at 1500 RPM.
Is there an internal engine knock?
—
Go to
Step 3
Go to
Step 4
3
Repair the mechanical problem.
Is the action complete?
—
Verify repair
—
4
1. Install the Tech 2.
2. Turn the ignition “ON.”
3. On the Tech 2 select F0: Data List.
4. Cycle through the list until “Knock Noise Channel” is
displayed.
Is knock retard at the specified value?
more than
0.1V
Go to
Step 5
Go to
Step 6
5
Replace the PCM.
Is the action complete?
—
Verify repair
—