Opel Frontera UE. Manual - part 452
CLUTCH
7C–27
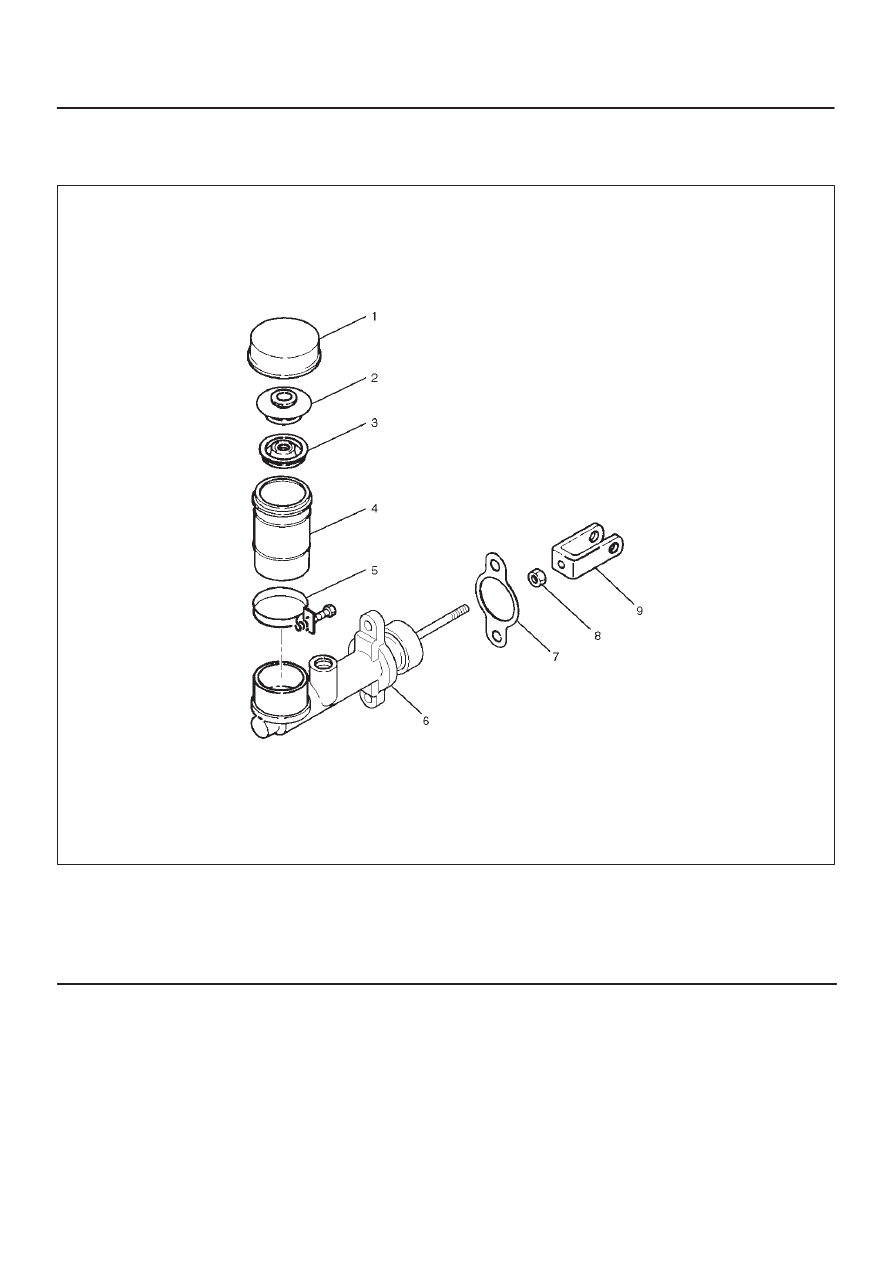
Master Cylinder
208RX003
Legend
(1) Reservoir Cap
(2) Inner Cap
(3) Seal
(4) Reservoir
(5) Clip
(6) Body Sub Assembly
(7) Gasket
(8) Nut
(9) Yoke
Disassembly
1. Disassemble reservoir cap (1), inner cap (2), seal (3),
clip (5), and reservoir (4).
2. Disassembly gasket (7), yoke (9), nut (8) and body
sub assembly.
Inspection and Repair
Make the necessary adjustments, repair, and part
replacements if excessive wear or damage is discovered
during inspection.
Reassembly
To reassemble, follow the disassembly steps in the
reverse order.